Using Postman to Explore the OneLogin API
Today’s IT landscape is defined by the concept of leveraging a multitude of available services. These services are usually exposed in the form of a web API. While some of the APIs already follow the RESTful design principles, all of them are accessible with the standard HTTP vocabulary using a set of headers and a body with some payload.
The obvious benefit of this design is that the services can be used in any client, at least theoretically. In practice, network restrictions and browser security settings may impose certain limitations. Regardless of how we want to use these services, testing the required API calls is necessary in any scenario.
An easy way to explore a new API is to use existing tools such as Postman. Postman has been designed to make working with APIs easy, configurable, and shareable.
Installing Postman
Postman is distributed as an Electron application, so it is available for all desktop platforms.
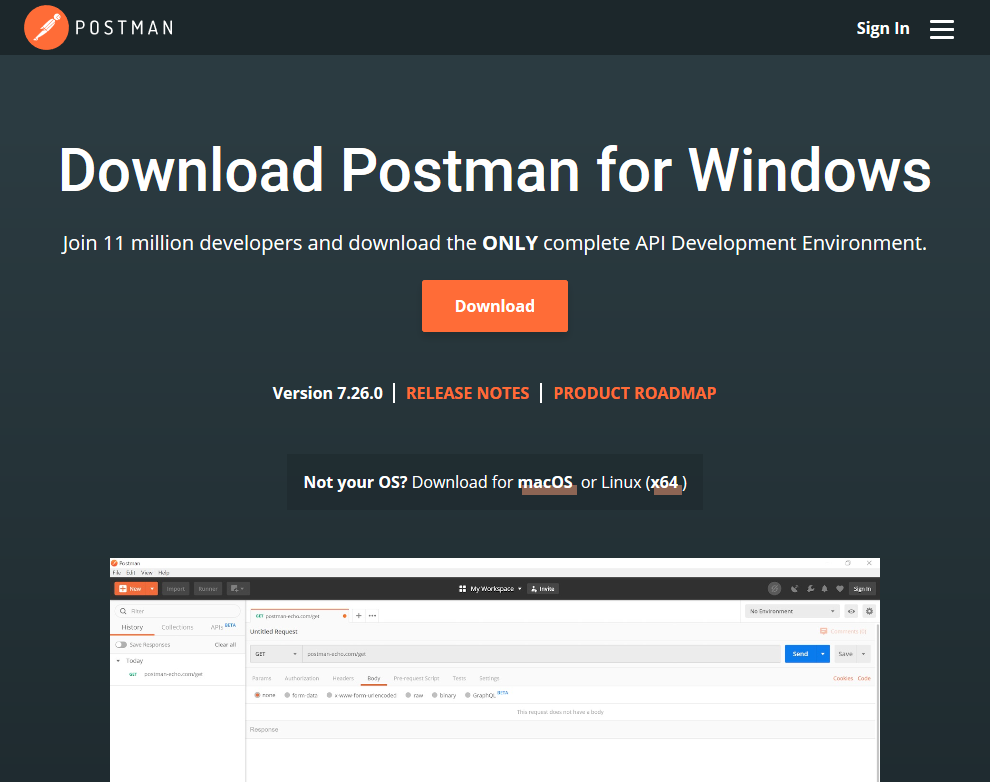
Go to the Postman download page. This automatically selects the right distributable for your platform.
Click Download gets the binary.
Once Postman is installed, you can launch it.
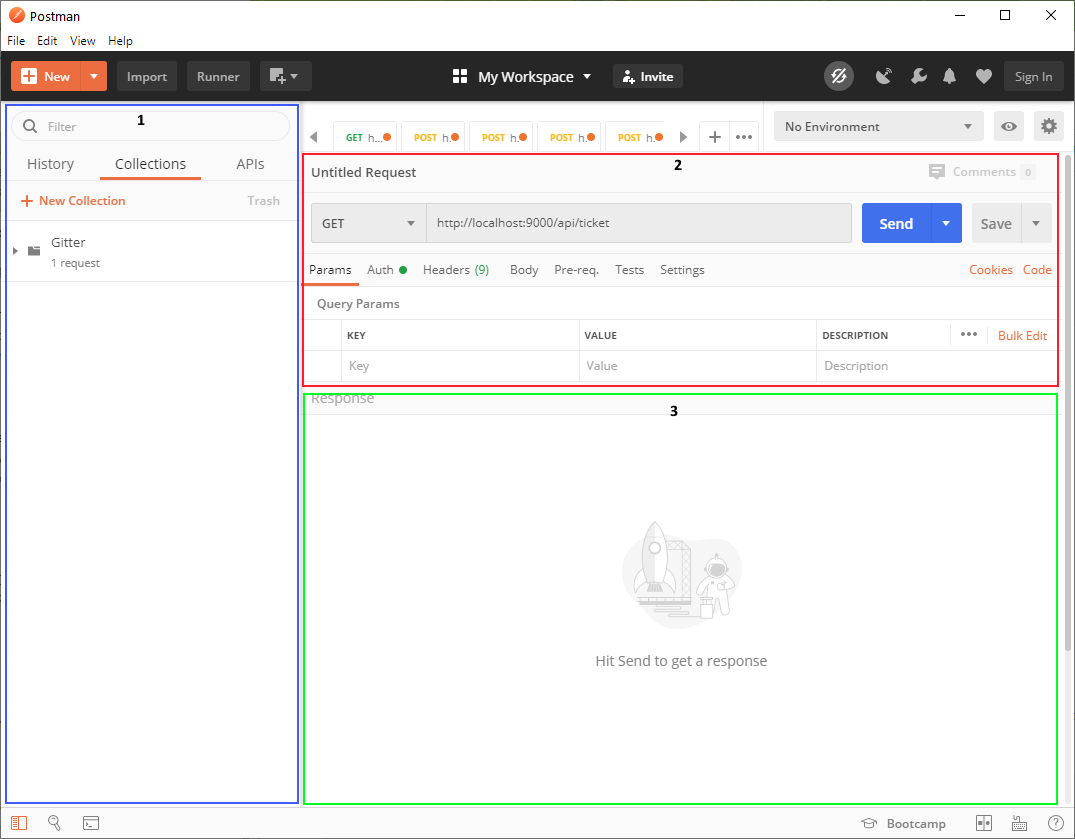 As you can see in the screenshot above, the Postman interface is separated into three main parts:
Saved requests / responses (Postman Collections, which we’ll talk about later)
The request editor
The response viewer
With Postman installed, let’s get our hands dirty.
API Requests with Postman
Send a simple request to, for example:
https://jsonplaceholder.typicode.com/todos/1
In Postman, the process looks like this:
Click the address bar (between the GET and Send drop-downs).
Enter
https://jsonplaceholder.typicode.com/todos/1in the address bar.Submit the request by clicking Send.
When the request is successfully submitted, you should see the response below the request details.
The response body in Postman UI should look like this:

In addition to the response body, you should also see the headers of the response. In this case, you can see the typical response headers. Note that content-type is set to application/json and thus triggers the special viewer for JSON data.
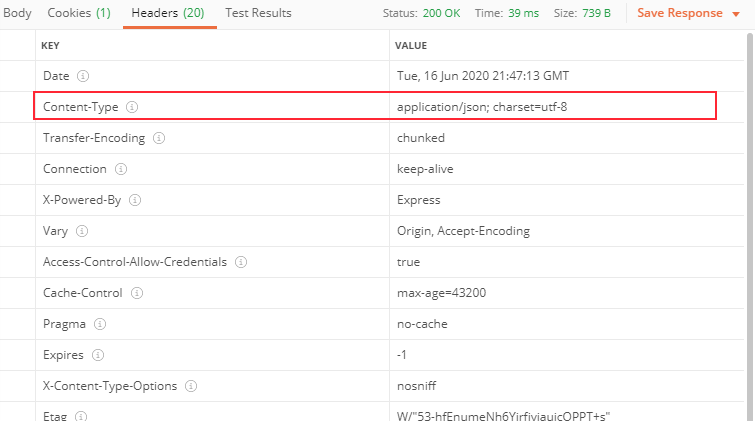
Most APIs return the response serialized as JSON by default. Some APIs, however, need to receive the right content-type header for doing so (they may default to XML, for example). In rare cases, the services don’t use JSON at all. For OneLogin, everything follows the RESTful principles, which includes using JSON as a standard serialization format.
Postman adds some nice and helpful formatting to the response. Even large responses are easy to digest and explore.
Authentication with OneLogin
Let’s go one step further and explore the OneLogin API. In the developer portal, you can find the API reference, which gives you all the necessary information for working with this API. Even better, the OneLogin API documentation contains the Postman Collection that can be used right away.
Note that OneLogin has a prebuilt Postman Collection for generating access tokens, and we’ll take a closer look at that later. First, however, we’ll make some requests against the OneLogin API created directly in Postman to illustrate the process. We’ll start with the most elementary call: generating a token.
An access token is necessary to perform any call against the OneLogin API. Since all resources are bound to a user context, we need a way to supply that context. The access token is a convenient, stateless, yet secure way of doing this.
The OneLogin authentication mechanism follows the broadly adapted OAuth 2.0 specification. The API documentation on this one is quite explicit.
Assuming that a client has been generated already, let’s generate a token.
Switch the request’s body mode to “raw.”
Insert the following content:
{
  "grant_type":"client_credentials"
}
In the request’s headers, add a new header for content-type and set it to
application/json.Make sure that the address is set to (Note: Change <subdomain> to your OneLogin subdomain):
https://<subdomain>.onelogin.com/auth/oauth2/v2/tokenMake sure POST is used (previously, we used GET).
Before you send the request, use the Auth tab to simplify sending the authorization header. Postman comes with some known flows built in. Therefore, it already knows that a Basic Auth flow consists of a username password combination, which requires a colon separator and a base64 transformation. There is no need for any code!
Hit SEND, you should see a result much like this one:

We don’t display the access (and especially the refresh) token for security purposes. If you suspect that a token has been exposed, you should revoke it immediately. Let’s try to do that right away!
Leave most of the settings as they were, with the exception of two things:
You need a new address. The new URL is
https://<subdomain>.onelogin.com/auth/oauth2/revoke.You need to change the request body. The new body contains the access token acquired beforehand.
{
  "access_token":"..."
}
SEND it! The response should look similar to:
{
    "status": {
        "error": false,
        "code": 200,
        "type": "success",
        "message": "Success"
    }
}
Most importantly, the error field reads “false.”
Managing Applications
Let’s look at another example. In the developer documentation, you can find all the details necessary for managing applications via the API.
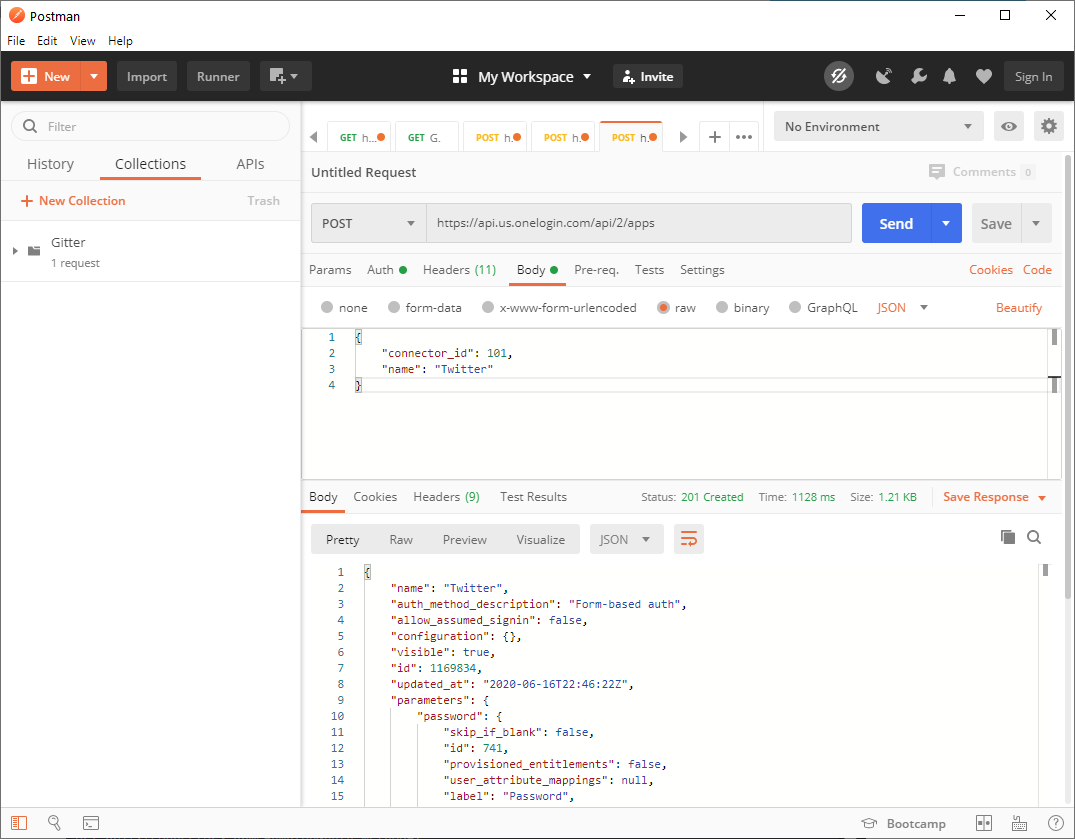
For creating an app, the minimum requirement is to supply a connector_id and a name. One other thing to keep in mind for these kinds of API calls is that the authentication mechanism needs to be switched from Basic to Bearer, supplying a valid access_token obtained earlier.
As a rule of thumb, paths starting with /api require Bearer authentication, while paths starting with /auth require Basic. In this case, the resource URL is:
https://<subdomain>.onelogin.com/api/2/apps
The body of the new request looks like:
{
  "connector_id": 101,
  "name": "Twitter"
}
The connector_id could be retrieved from another API call, or from the website (just look at the last segment of the https://<subdomain>.onelogin.com/apps/new/101 URL). The name is arbitrary, but should be selected carefully to help you identify the application later.
You can use the same resource to remove an app. You will need to:
Change the request’s type from POST to DELETE.
Append the ID of the app to delete to the URL.
As an example, for deleting the previously created app, you only would need to append 1169834 to the URL. In this case, the URL to be used for deletion would have been:
https://<subdomain>.onelogin.com/api/2/apps/1169834
Managing Users
The developer portal also lists all the API resources available for managing users.
The resource URL for users is:
https://<subdomain>.onelogin.com/api/2/users
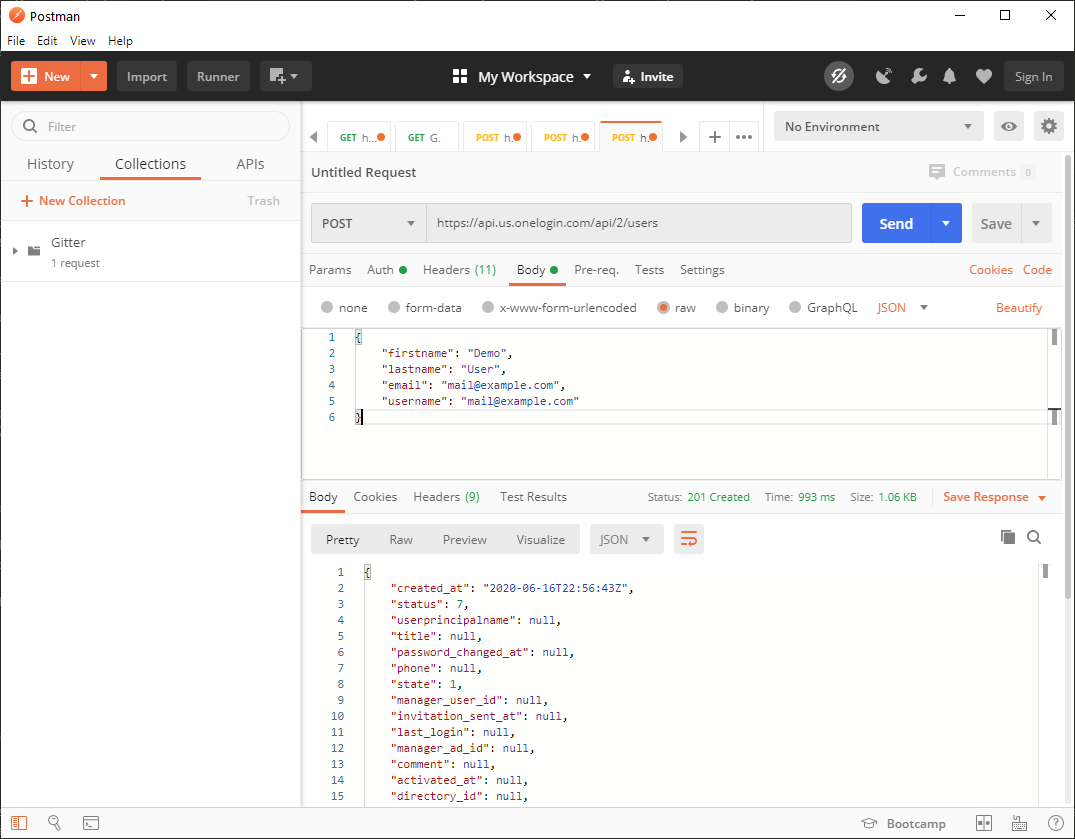
Like before, we start with a POST call. However, in the case of a new user, you’ll need a different set of required parameters in the body.
The following four string parameters are required:
- firstname
- lastname
- username
Submitting the request should yield the expected success response with the status code 201:
As a follow-up, you can assign a role to the new user. To do this, note the ID of the created user. In the previous example, you received 82455979. As a result, assigning roles to this user works with the URL:
https://<subdomain>.onelogin.com/api/1/users/82455979/add_roles
Assigning roles is an update to the existing user resource. Thus, use a PUT request rather than POST. The only required parameter in the body is role_id_array. The available IDs can be read out via an API. If you use a wrong ID, the response will tell you what role IDs are available.
Since you did not create any roles so far, you can only assign the default resource owner role (the specific ID may be different in your case):
{
  "role_id_array": [342113]
}
The request should return a non-error response:
{
    "status": {
        "message": "Success",
        "error": false,
        "type": "success",
        "code": 200
    }
}
Finally, use a DELETE request to remove the user. We can use the URL:
https://<subdomain>.onelogin.com/api/1/users/82455979
Postman Collections
Having entered all these requests, you may be wondering: isn’t there a way to reuse requests? Can these requests be put in a kind of catalogue? How can I share requests? In my application code, I structure reusability in functions, classes, and libraries. Do these concepts exist in Postman, too?
Yes they do!
The mechanism is called Postman Collections.
Using Postman Collections, you can group related API requests or share sets of API requests. As already mentioned, the OneLogin developer portal offers a Postman Collection to help you get started quickly.
Let’s have a look at some core principles of the Postman Collection. Take the first request demonstrated in this article, the one against the JSON Placeholder API. You could put it in the Samples collection.
Here is how you do this:
Click New Collection on the left-hand side.
Enter a name for the collection.
Click Create.
In the request viewer, click SAVE (right next to SEND).
Enter a descriptive name for the request.
Choose the intended collection at the bottom.
Click SAVE TO.
You’ve just created your first Postman Collection.
Now, let’s use an existing collection. Start by downloading one of the Postman Collections from the OneLogin developer portal. It’s referenced at the end of the page as shown in the screenshot below.
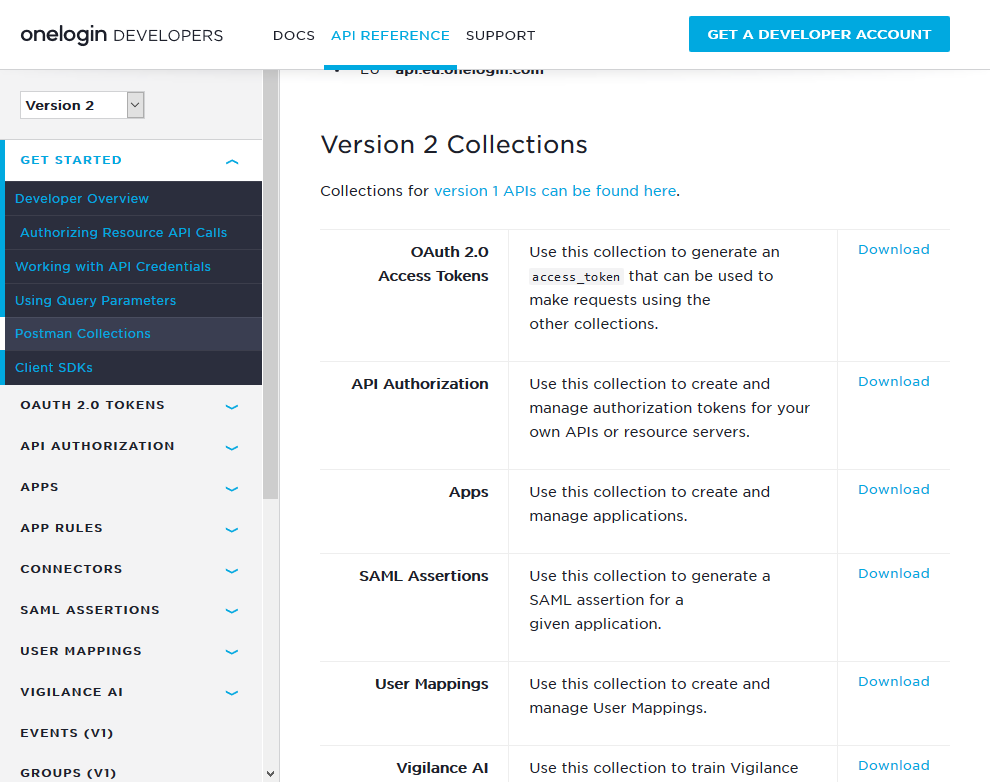
This provides a postman_collection file, and you can import this file directly in Postman using the following steps:
From the File menu, select Import.
Select the file you’ve just downloaded.
Verify in the Confirm your input dialog that this is the expected collection.
Click IMPORT.
The new collection is now visible in the Postman Collection pane. It should look similar to the screenshot below.
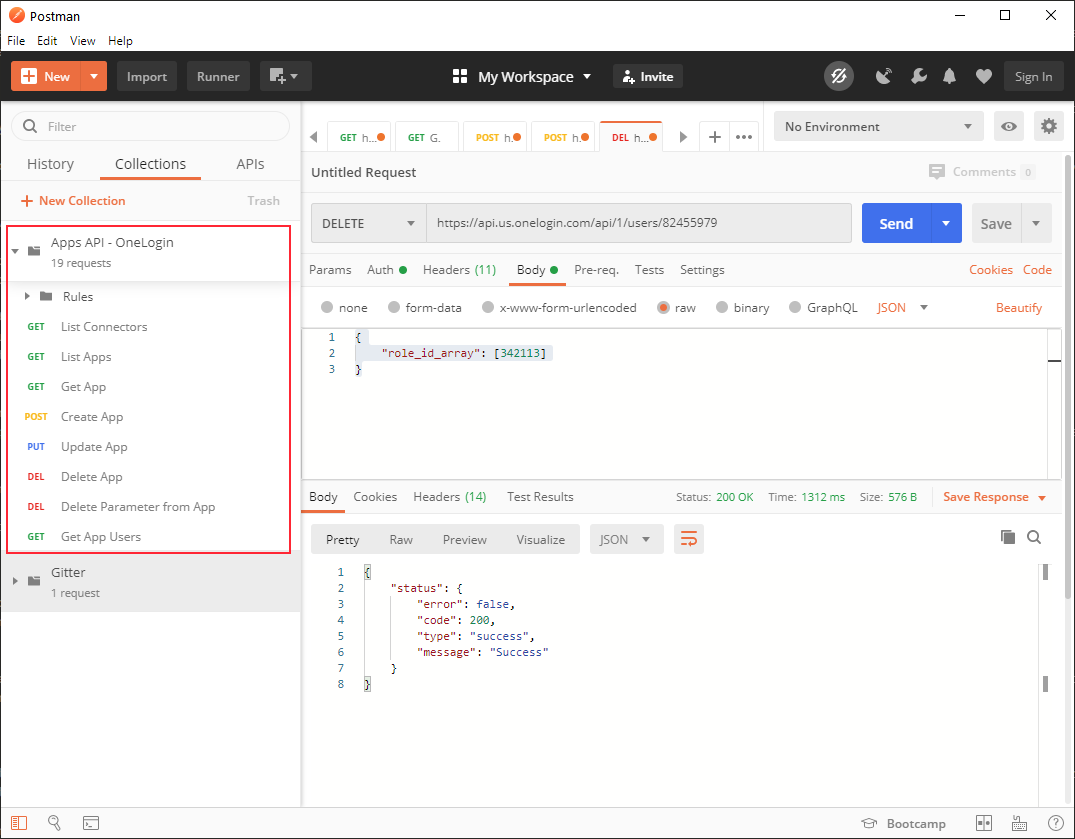
You can now use the individual requests. As an example — following the ones demonstrated earlier — you can run the request for listing your registered OneLogin apps.
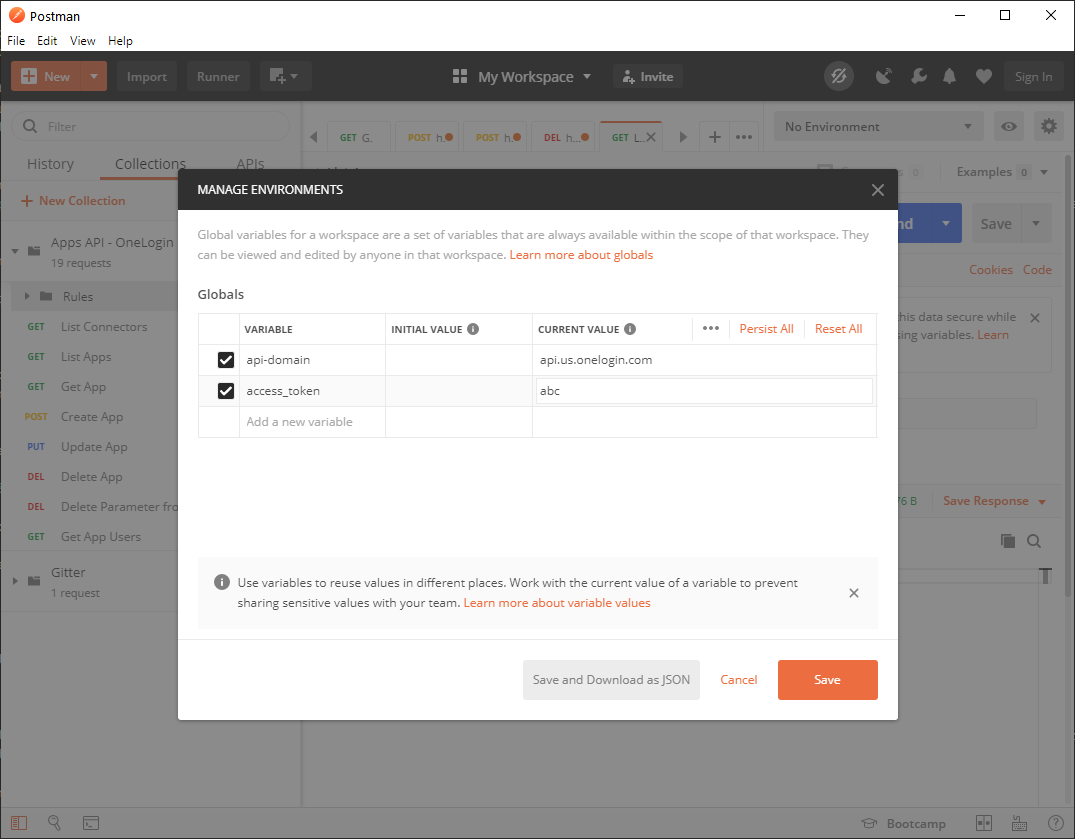
Before using the entries from the collection, however, make sure to supply the used variables. For most requests, two variables are sufficient:
1. access_token
2. api-domain
These variables can be seen in the double-braces notation: . In the simplest case, go into the environment settings (the “eye” icon next to the No Environment drop-down) and click Edit in the Globals section.
Supply the current values for the required variables as shown in the screenshot below.
Wrapping Up
In this article, we got you started using Postman with the OneLogin API as an example. Postman is a tool that makes working with backend services not only feasible, but rather enjoyable. We went over the basic concepts, as well as explored the OneLogin API with Postman’s help.
For more information, visit Postman Learning Centre.
Have a Question?

Found a problem or a bug? Submit a support ticket.

Looking for walkthroughs or how-to guides on OneLogin's user and admin features? Check out the documentation in our Knowledge Base.

Have a product idea or request? Share it with us in our Ideas Portal.