Using the AppAuth PKCE to Authenticate to your Electron Application
Using the AppAuth PKCE to Authenticate to your Electron Application The Proof Key for Code Exchange (PKCE) is an OAuth specified flow for authenticating users to your application. It was originally designed for use in mobile applications to prevent malicious background apps from tampering with or using the auth code passed between the application and the Authz server to make requests on the user’s behalf. It is currently being encouraged as a best practice for authenticating users to Single Page Apps (SPAs) and electron based desktop applications such as Slack or Spotify.
This is a gentle introduction to using the AppAuth PKCE client libraries to integrate the PKCE authentication flow into your electron application with minimal setup. This will require you to have a OneLogin account with some light configuration. For your convenience we’ve included a terraform plan file that should spin up most of the resources for you.
Enter PKCE or “Pixy”
PKCE was originally developed for mobile apps to prevent malicious background code from intercepting the returned code in the Auth Code flow.
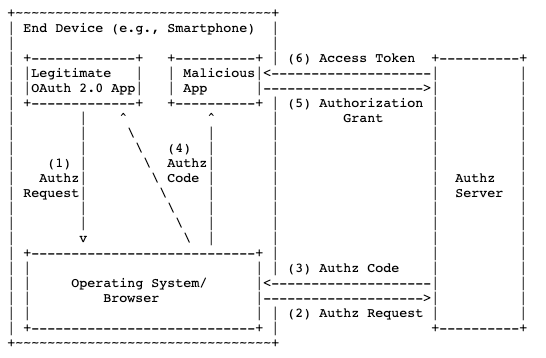
In order to close the Code Interception Attack loophole, the idea here is to make a temporary “client_secret” called a code_challenge use that so subsequent requests from the Electron App can be validated by the AuthZ server to ensure they come from your Electron App and not from some other app that intercepted the auth code.
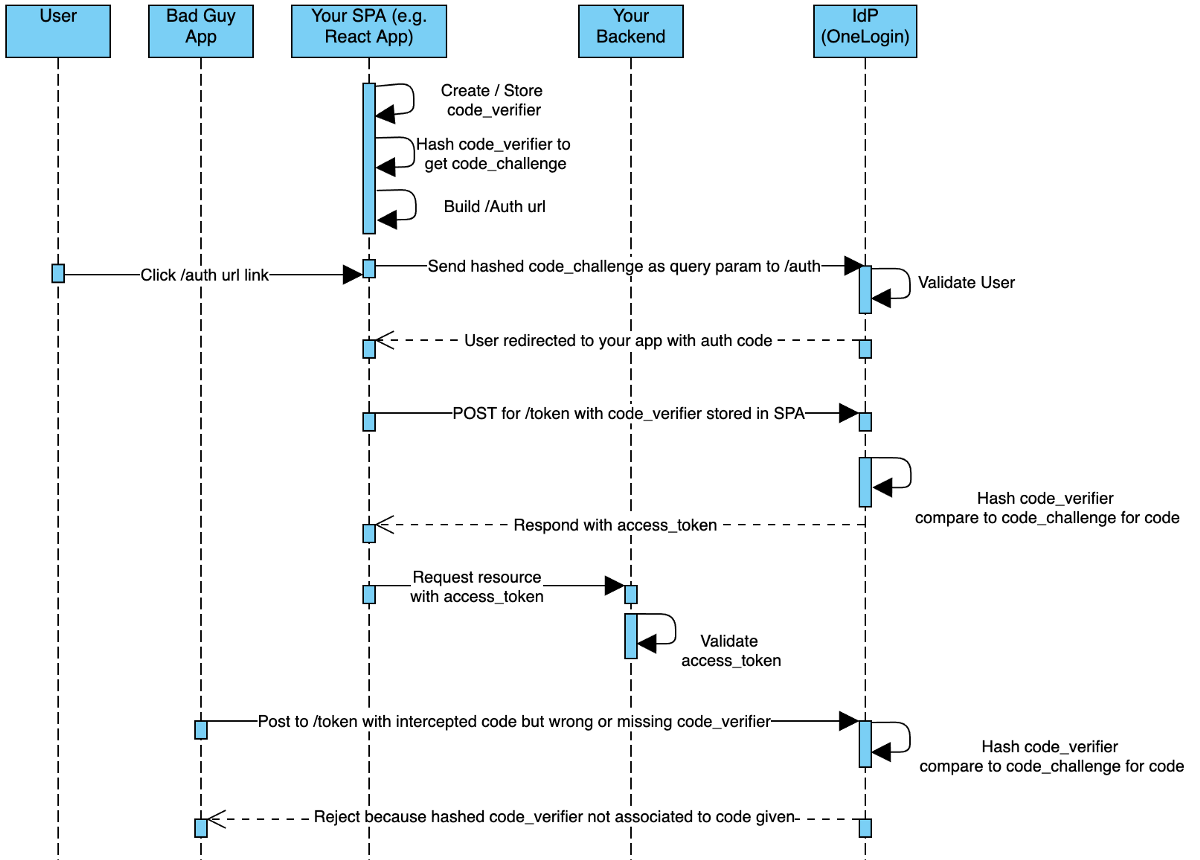
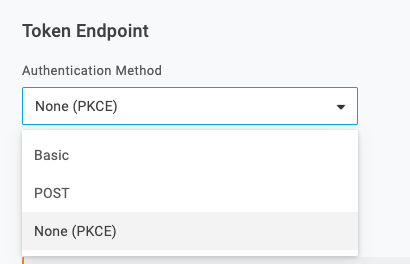
First when your Electron App loads up, it will need to generate a URL for your user to hit to log in. This url contains all the goodies indicated in the chart above (like code, scope, and redirect_uri). A user will click a button that just href-s out to the IdP (sends users to the IdP’s login page) where they will be asked to identify themselves. Once that succeeds, the IdP will respond with a code, and the Electron App will use that code and send a POST request to the /token endpoint.
Subsequent /token requests will require the un-hashed code_verifier we compute at the outset so the IdP will re-hash it and confirm that token requests are all coming from the same app that initiated the flow.
The chart above looks complicated, but luckily there is a library that handles the auth_code hashing and the handshakes for you. The second half of this writeup is a working example you can step through to see what this would look like in your Electron App.
Hands-On Demo
You should get a developer account with all the features for this unlocked, including multi-factor auth, which is now possible if you authenticate your users with this flow.
One-Liner Setup
If you don’t feel like going through a UI-driven setup process, the sample repository contains a main.tf file for your convenience. If you’re a Terraform user, you can simply run terraform apply and you’ll have the user, app, and role configured. After that, all you need to do is set a password for your test user and you’re good to go and proceed to the Code Setup section.
Create an OIDC App
From there, add a new OIDC App
Then tell your OIDC app about your Electron App redirect URIs. Doing this, tells your IdP to allow cross origin traffic and redirects to only these URLs so you don’t run into any CORS issues.
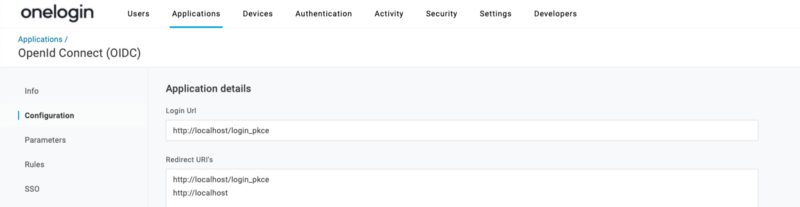 Enter http://localhost in the Redirect URLs box (the 2nd box)
Next, under the SSO tab, grab your client_id and save it to a .env file in your Electron App project. If you’re following these code samples, you should save it like OIDC_CLIENT_ID=123 . While you’re in your .env file, you should also drop in your OIDC_IDP_URL like so OIDC_IDP_URL=
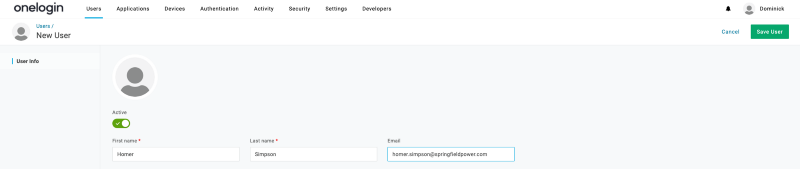
Create a Test User
Next we’ll create a user and assign a username and password in OneLogin. Note, you’ll still want to do the Change Password part here if you set up with Terraform.
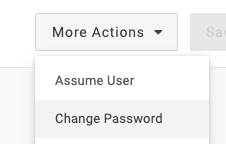 This option is available to you after you save the user
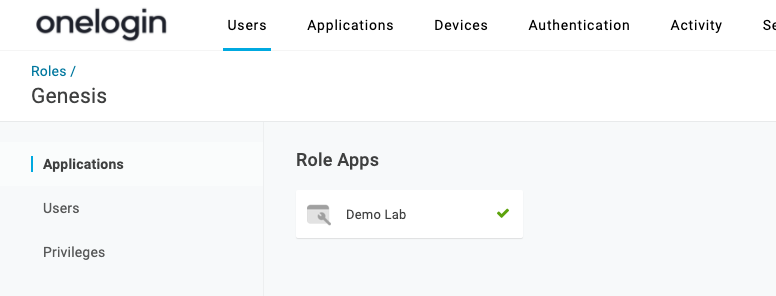
Create a Role
Finally, we create a role to bind the app and the user so we can actually log in.
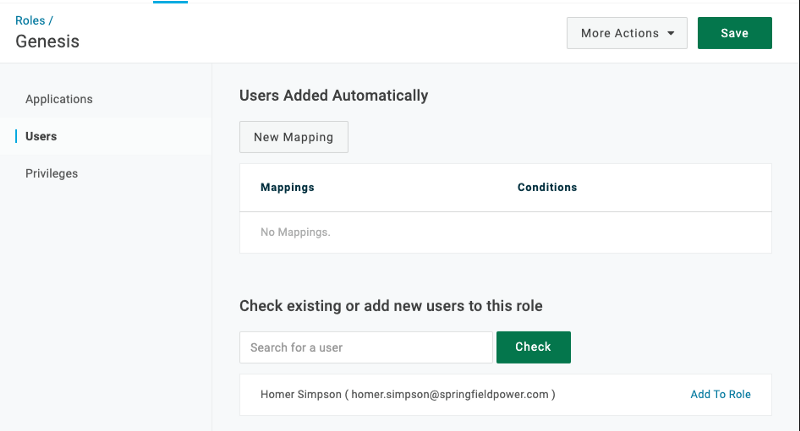 Click Add To Role and Save the role
Add your OIDC app to the role (I named mine Demo Lab and added it already).
Code Setup
Get the sample electron app and clone it using git: git clone https://github.com/googlesamples/appauth-js-electron-sample.git onelogin-electron-example Then we need to update some packages in our package.json file. The U indicates an update is needed, and the A indicates a new line to add
Update package.json
"scripts": {
U    "start": "npm run compile && npx electron .",
U    "dev": "npm run compile && npm run watch & npx electron .",
A    "postinstall": "electron-builder install-app-deps"
   }

   "dependencies": {
U    "@openid/appauth": "^1.3.0",
U    "@types/react": "^16.14.2",
U    "@types/react-dom": "^16.9.10",
U    "electron": "^11.1.1",
A    "@types/crypto-js": "^4.0.1",
A    "@types/node": "^14.14.20",
A    "crypto-js": "^4.0.0",
   }

   "devDependencies": {
U    "typescript": "^4.1.3"
A    "electron-builder": "^22.9.1",
   }
Update index.ts
Next update index.ts. This is the starting point of our electron app that kicks off all the UI processes. You can set the dimensions and icons of your window here. What is required is adding the webPreferences node to the BrowserWindow instantiation. This will enable index.html to run this line and handle the authentication scripts
`<script type="text/javascript"> require('./built/app'); </script>`
-      {width: 1280, height: 720, icon: 'assets/app_icon.png'});
+      {width: 1280, height: 720, icon: 'assets/app_icon.png', webPreferences: { nodeIntegration: true }});
Update flow.ts
Next we’ll update flow.ts. This is where all the magic happens to make PKCE work with the PKCE library. First, if you’re using TypeScript, I found that I had to explicitly refer to the EventEmitter out of the EventEmitter module in order to extend it.
-export class AuthStateEmitter extends EventEmitter {
+export class AuthStateEmitter extends EventEmitter.EventEmitter {
Then you’ll add your OIDC URL and client ID so your app can contact OneLogin for the exchange.
-const openIdConnectUrl = "https://accounts.google.com";
+const openIdConnectUrl = "https://your-domain.onelogin.com/oidc/2";

-const clientId ="<some-id>.apps.googleusercontent.com";
+const clientId ="<the client-id from your onelogin oidc app configuration>";
Finally, there’s a bit about consent here that you can comment out. As of this writing, OneLogin doesn’t handle consent for this flow.
Comment out the extras as they’re not needed by OneLogin
+    // const extras: StringMap = { prompt: "consent", access_type: "offline" };
+    // if (username) {
+    //   extras["login_hint"] = username;
+    // }

    const request = new AuthorizationRequest({
      client_id: clientId,
      redirect_uri: redirectUri,
      scope: scope,
      response_type: AuthorizationRequest.RESPONSE_TYPE_CODE,
      state: undefined,
+    // extras: extras // Not required for OneLogin with this example
    }, new NodeCrypto());
Update app.ts
Finally we’ll set up the app.ts to handle a logged in user. You’ll just need to drop in the user information endpoint (our /me endpoint) and optionally, add a fallback logic to gravatar if you find that our /me endpoint does not return a profilePicture.
         let request =
-            new Request('https://www.googleapis.com/oauth2/v3/userinfo', {
+            new Request('https://.onelogin.com/oidc/2/me', {
Optional if you want to use gravatar
-      this.userProfileImage.src = `${this.userInfo.picture}?sz=96`;
+      if (this.userInfo.profilePicture){
+        this.userProfileImage.src = `${this.userInfo.profilePicture}?sz=96`;
+      } else {
+        // fallback to gravatar
+        let hash = MD5(this.userInfo.email.toLocaleLowerCase()).toString();
+        this.userProfileImage.src = `https://www.gravatar.com/avatar/${hash}?sz=96`;
+      }
Have a Question?

Found a problem or a bug? Submit a support ticket.

Looking for walkthroughs or how-to guides on OneLogin's user and admin features? Check out the documentation in our Knowledge Base.

Have a product idea or request? Share it with us in our Ideas Portal.