Authenticating iOS Apps With the OneLogin iOS Library
Adding authentication support to an iOS app can be painful. Traditionally, you have to set up a complete server-side authentication system first – and only then can you think about calling that system from your iOS app.
That seems like a lot of work before writing a single line of Swift code, but it doesn’t have to be. You can easily add authentication support to an iOS app using the OneLogin OpenID Connect Library for iOS.
Although the library is built on top of OpenID Connect (OIDC), you don’t need to be an OIDC expert to use the library because it takes care of the mundane details. If you don’t know anything about OIDC, read OneLogin’s Dev Overview of OpenID Connect before you start.
Prerequisites
The steps demonstrated here assume that you:
- Are an experienced iOS developer
- Have Xcode installed
- Know how to create an iOS app in Xcode
Know how to clone a Git repository from GitHub
Although we’ll demonstrate how to use the OneLogin iOS library in a sample application, we won’t cover the steps needed to create to create an iOS app from scratch. But you will be able to download the sample app’s code to see how it works.
Creating a OneLogin application
Configure an OIDC App Connector in OneLogin
Before you can use OneLogin in your iOS app, first create an application in the OneLogin portal.
Sign into the OneLogin portal
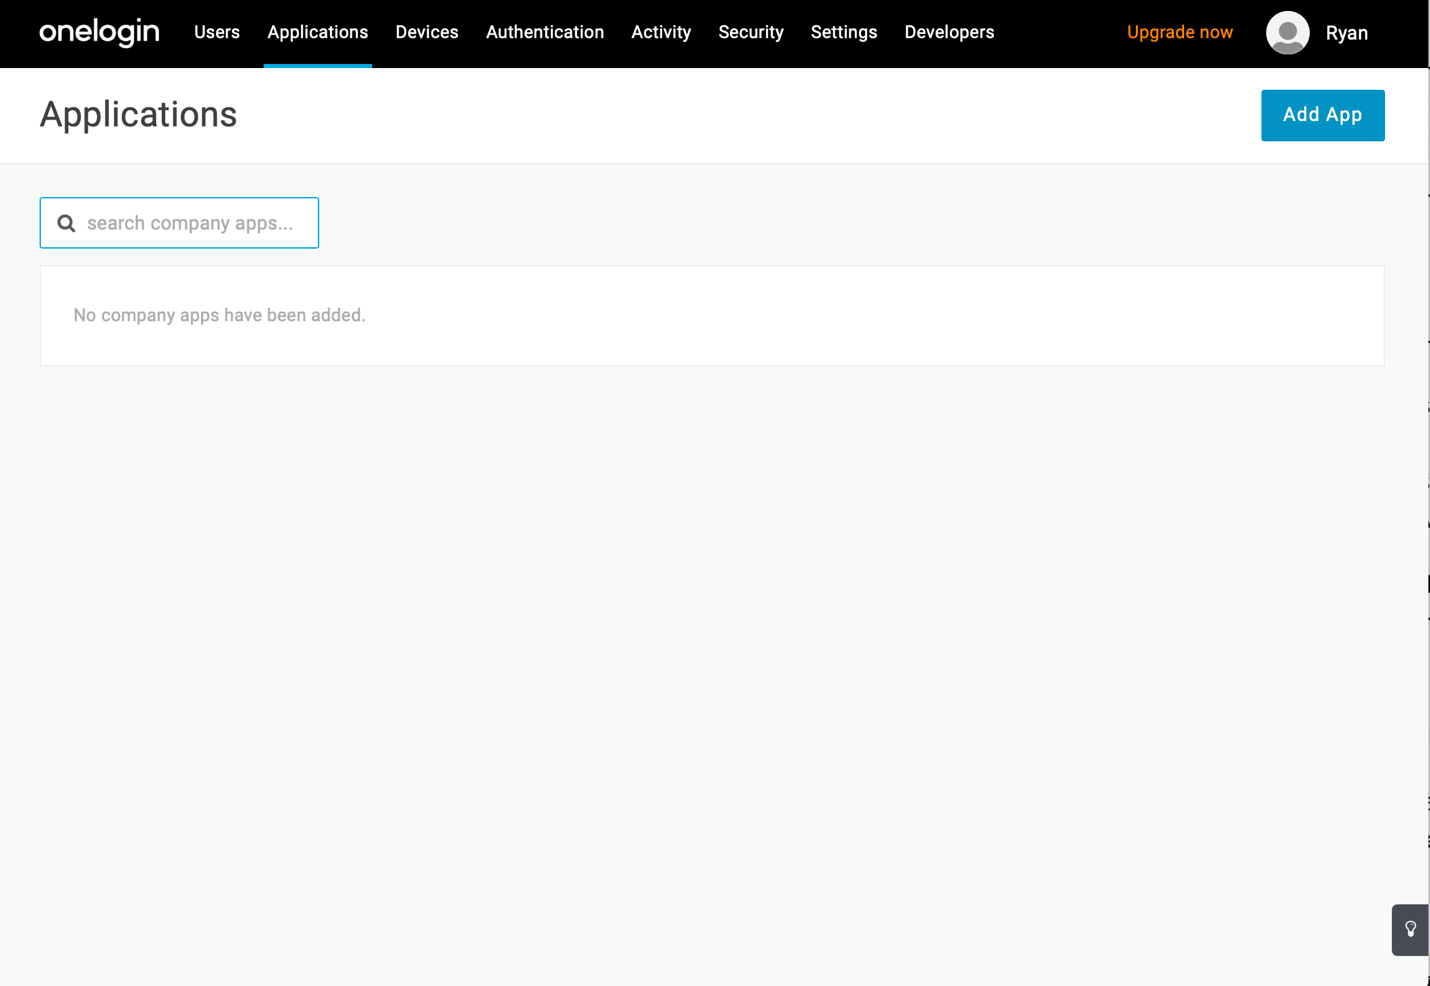
Click on the Applications link at the top of the screen.
If you’ve just signed up for OneLogin, this screen will be empty. Click on the Add App button at the top-right of the screen.
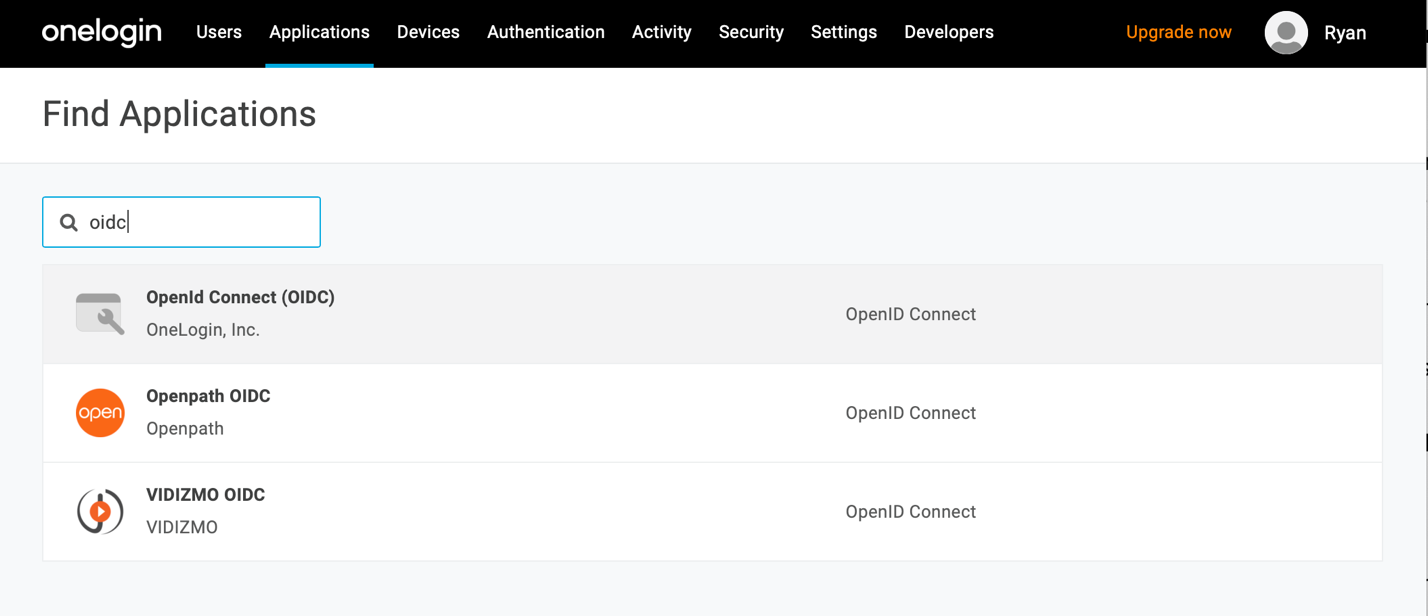
In the Find Applications screen, search for “oidc”.
Click OpenId Connect (OIDC) by OneLogin, Inc.
Enter a display name and description for your app. (Enter something that makes sense for your application.)
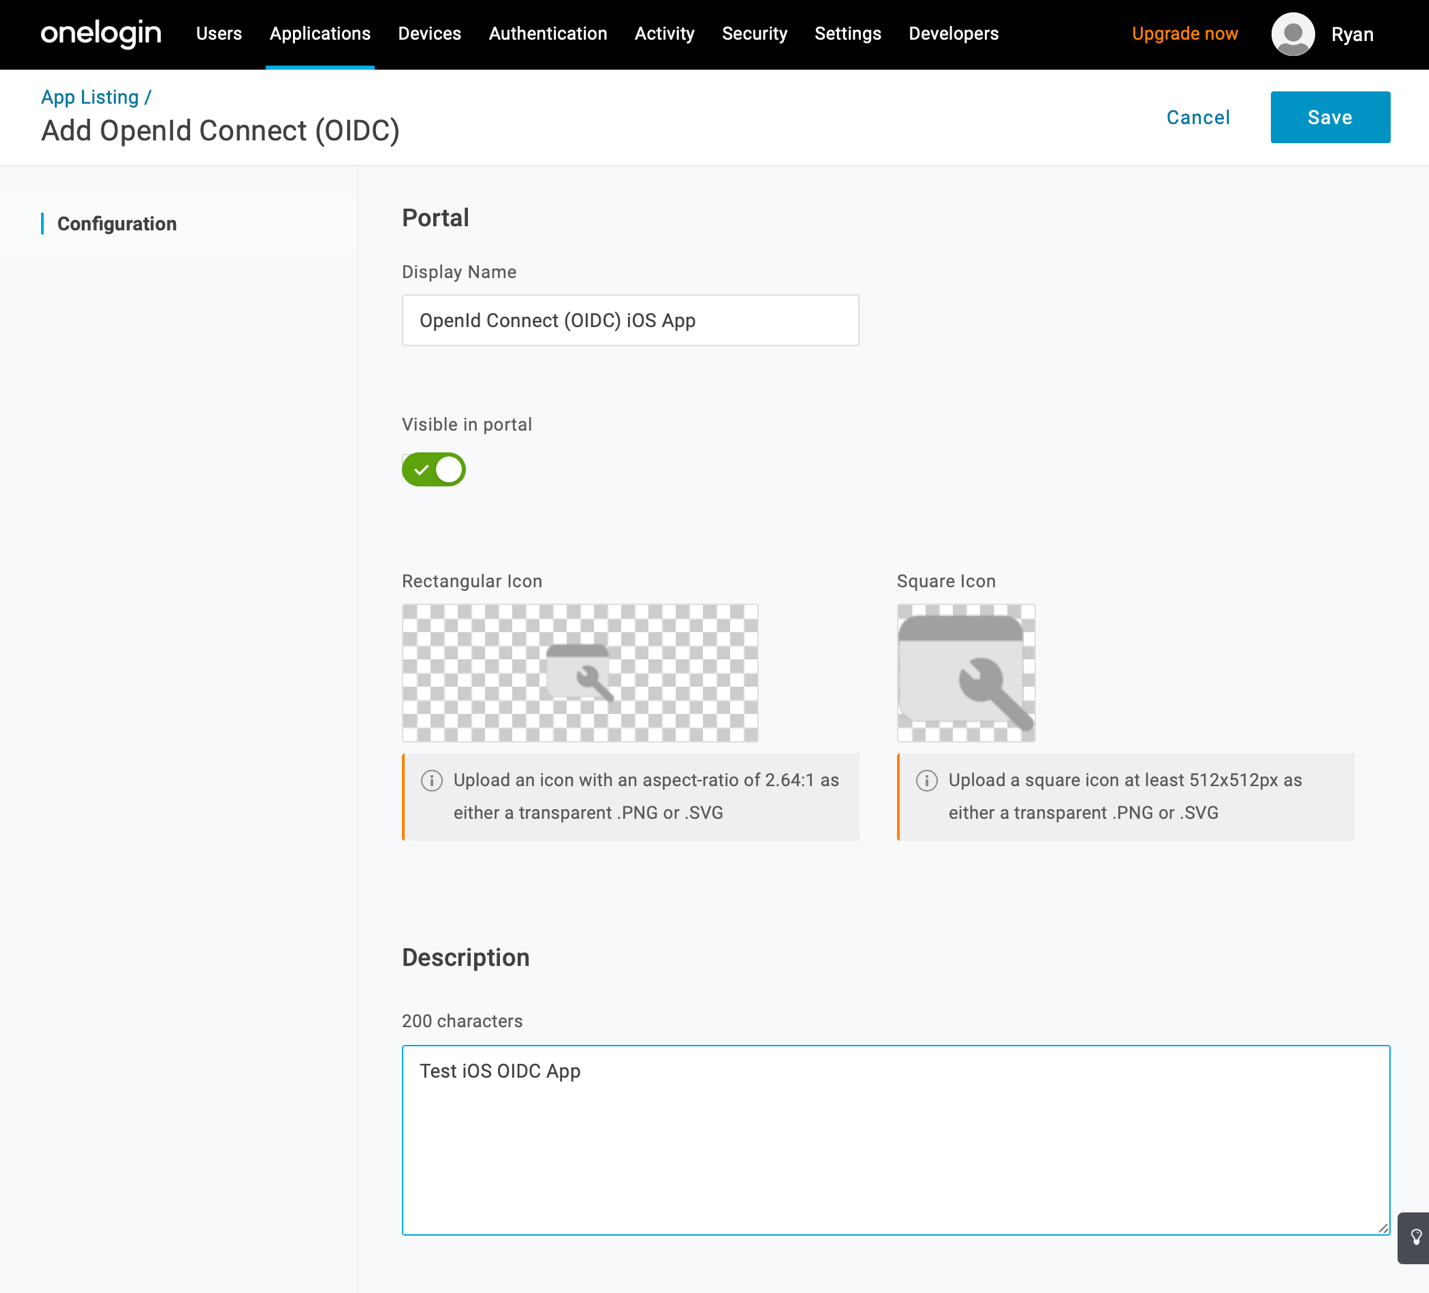
Click Save.
Configure your New OIDC App in OneLogin
Now you’ve created a OneLogin application for your iOS app. Now you need to make some configuration changes to your new app.
Click SSO in the menu on the left.
Change Application Type to Native.
Change Authentication Method to None (PKCE).
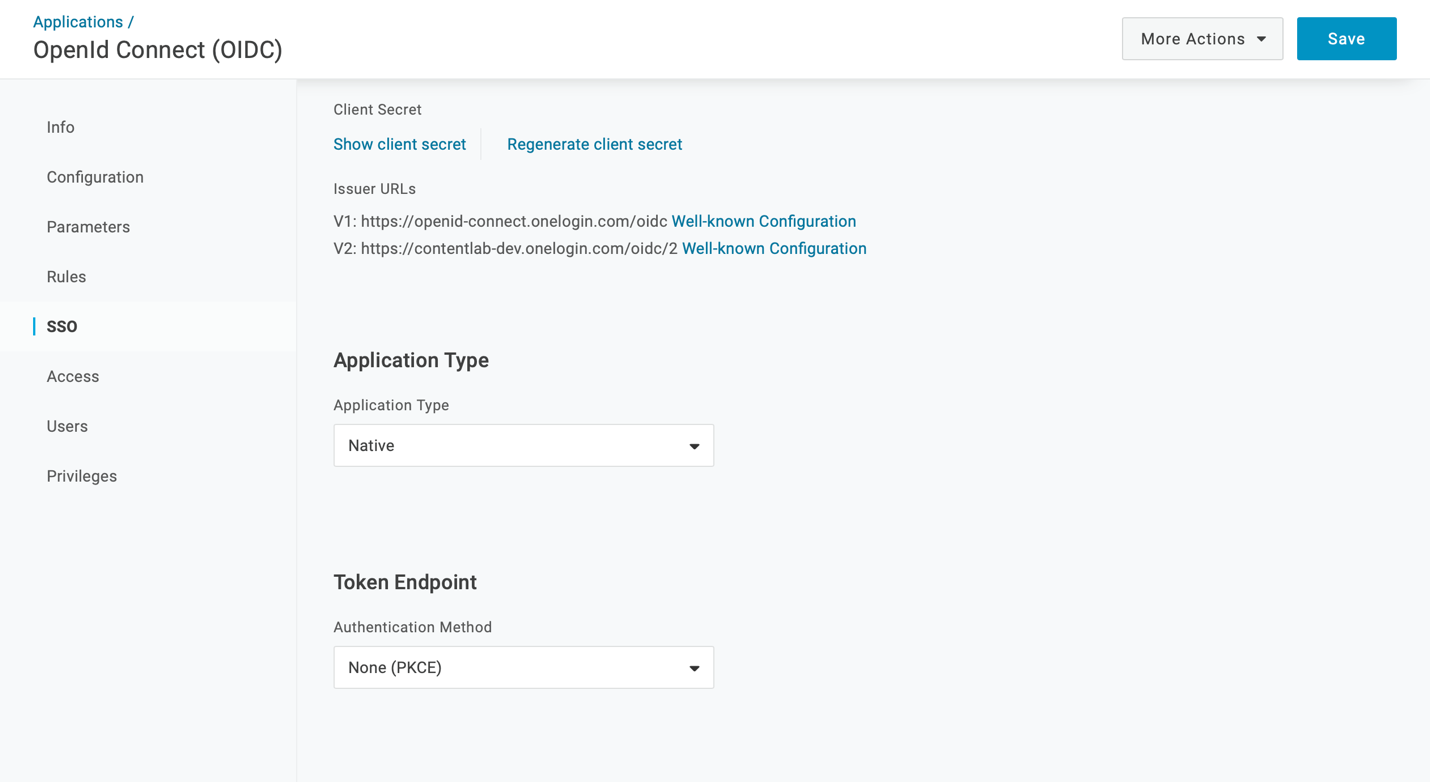
Click Save when you’re done.
These changes let you use OpenID Connect in your iOS app without requiring you to route your login through a web server or embed an OIDC client secret in your iOS app. This is important because it is easy to extract a client secret that’s embedded in an iOS app — even if it’s compiled into the app’s main executable. If an attacker gets access to your client secret, it’s relatively easy for them to breach your application’s security.
There’s just one more change needed for your OIDC application.
Click Configuration in the menu on the left.
Add a redirect URI for your app. (In a web app, you’d need to enter an HTTPS callback URI here. But since you’re using PKCE, you can enter any URI you’d like.)
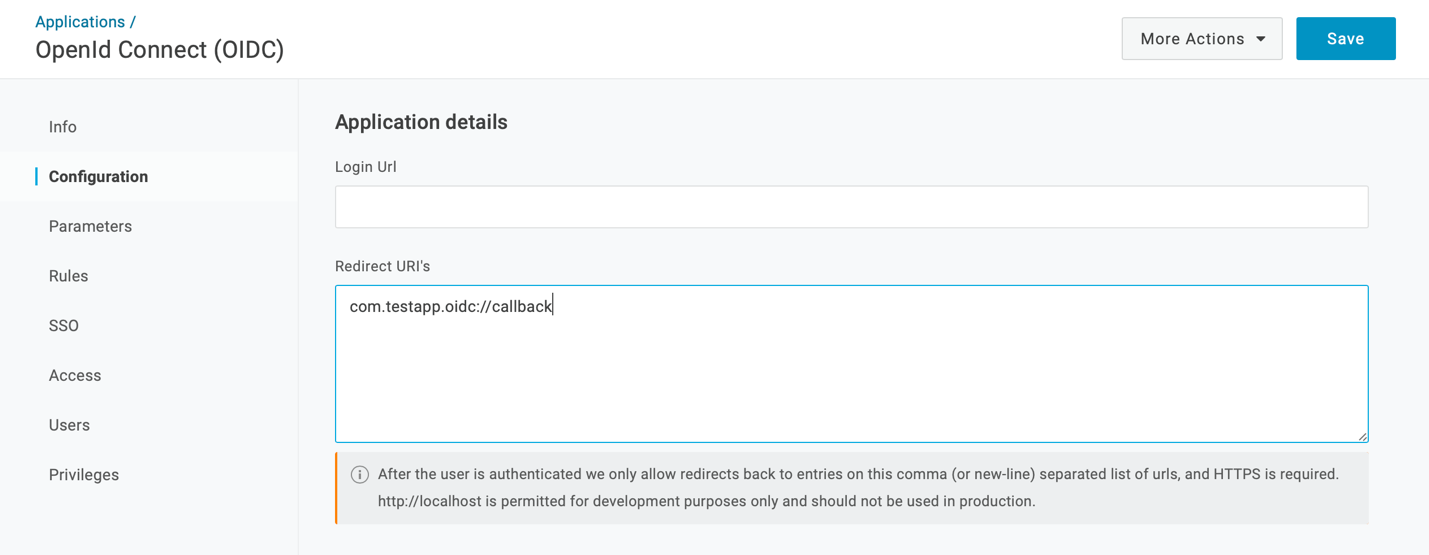
It’s important to choose a URI with a unique scheme – which is the part of the URI that comes before :// – because you’ll be adding an interceptor to your iOS app to ensure that all requests to that URI are routed to your app.
I used com.testapp.oidc://callback. In a production iOS app, consider using your app’s bundle identifier with .oidc://callback appended at the end.
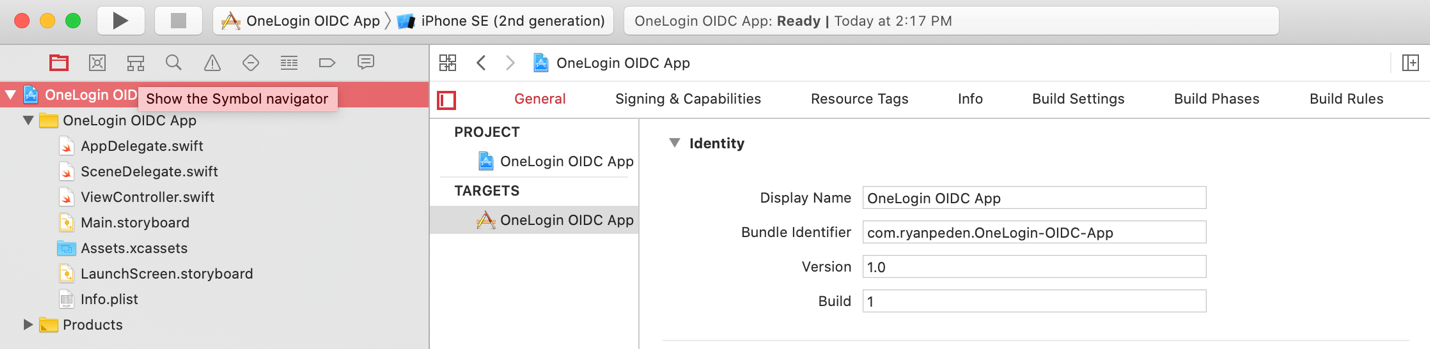
To find your bundle identifier, click your app’s top level project in Xcode to load its properties screen. The bundle identifier is the second item from the top.
When you are done entering your Redirect URi, click Save.
Add Users to the OIDC App in OneLogin
The last step is to add users to the OneLogin application you’ve just created.
In the OneLogin admin panel, click Users.
Choose the user you’d like to add to your new application by clicking on their name. (If you don’t have a user to work with see Adding Users Manually.)
In the User configuration page, click on Applications in the menu at left.
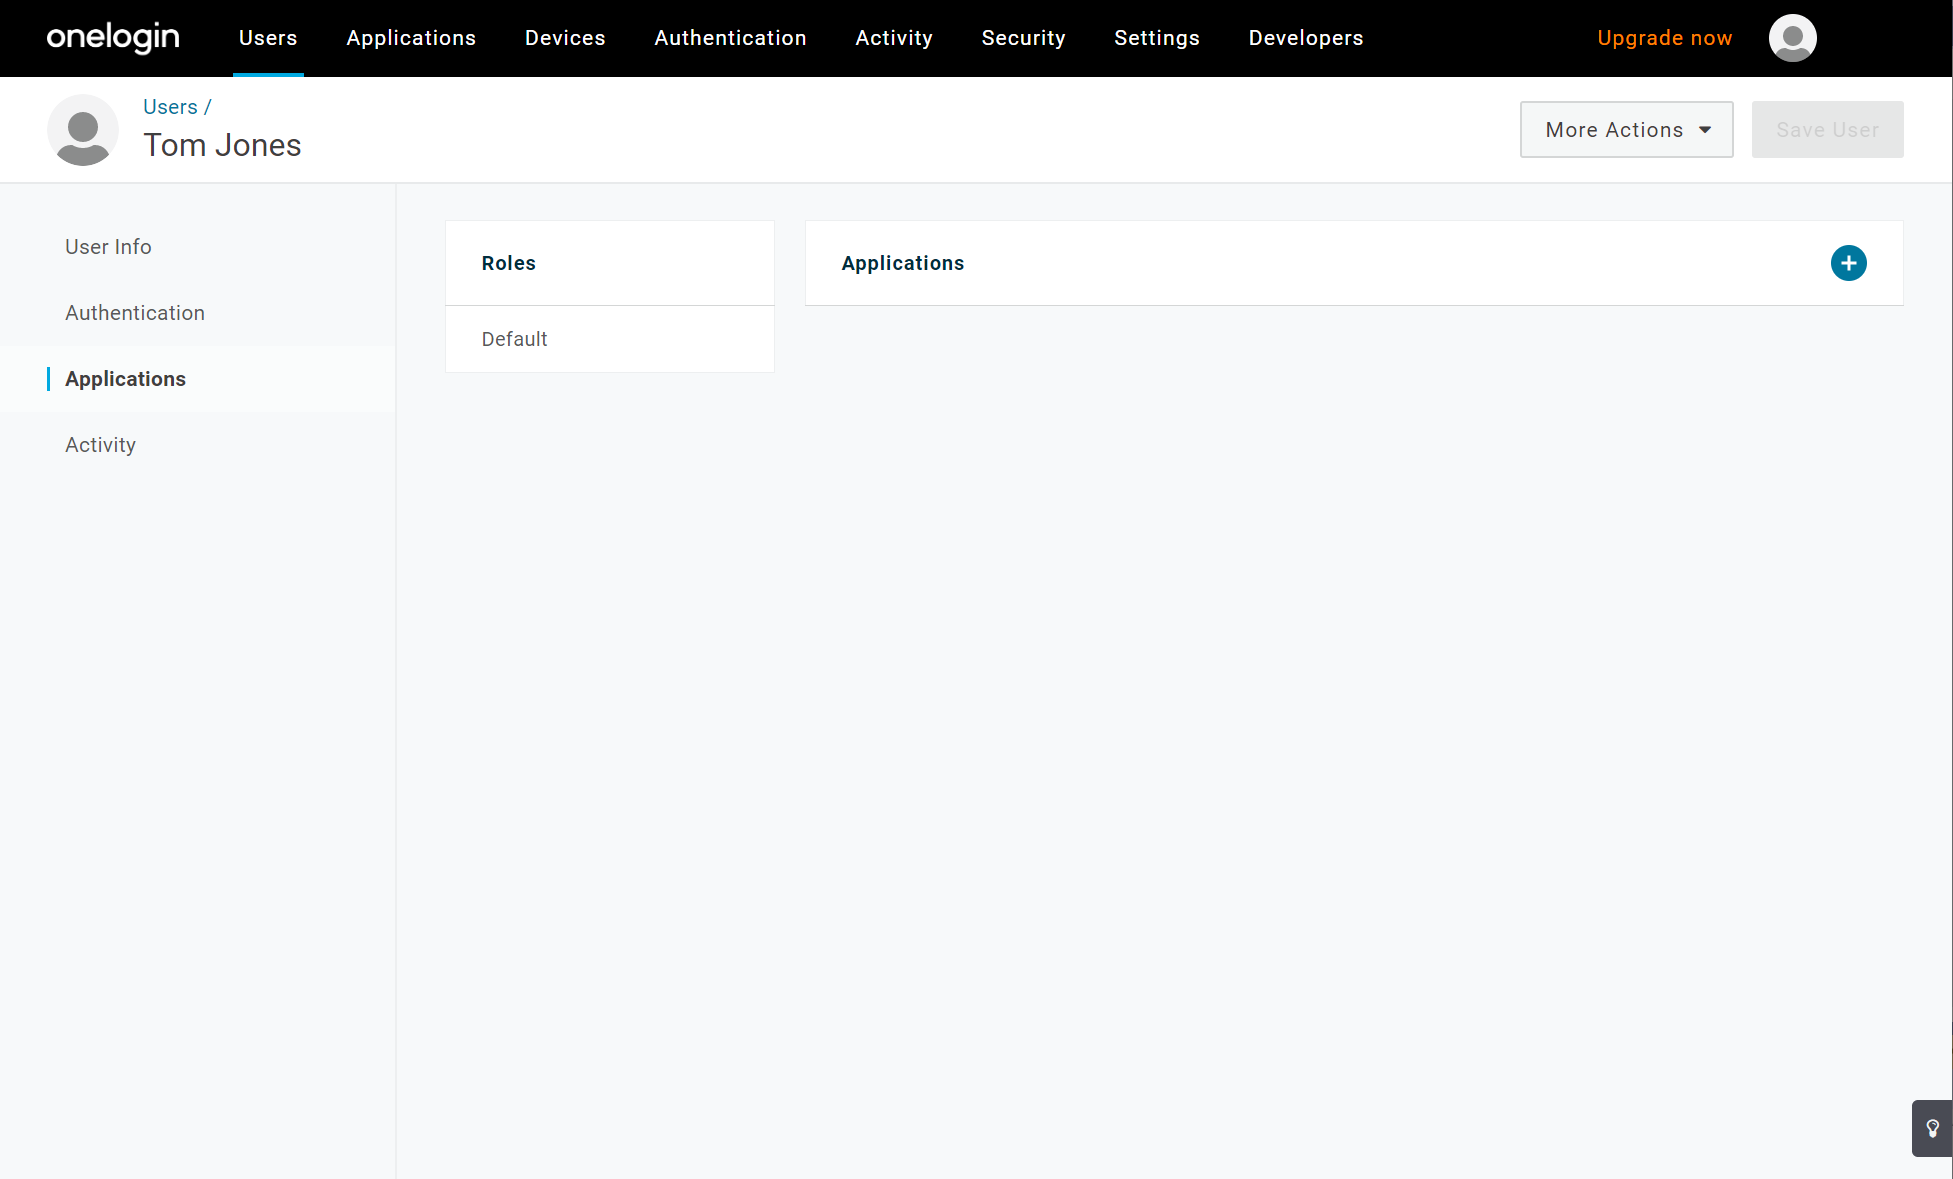
Click the + icon to add an application to this user’s profile.
In the dialog box pop up, select your OpenID Connect application in the dropdown.
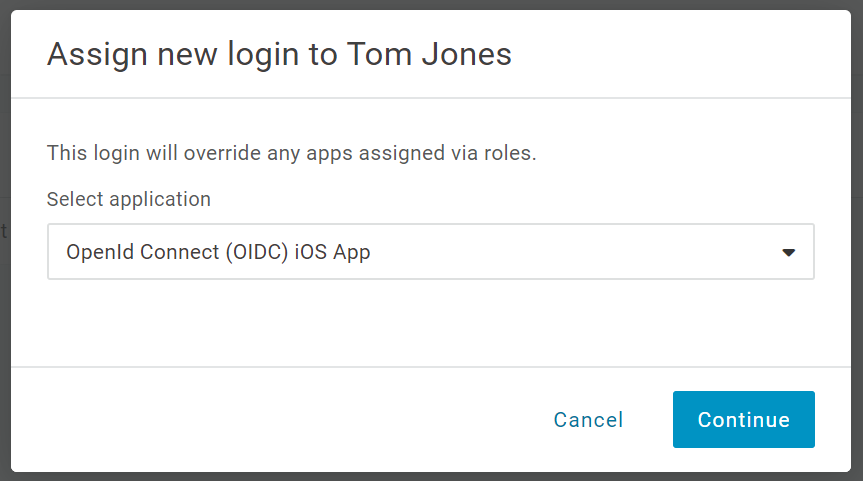
Click the Continue button.
Your OneLogin OpenID Connect app is now ready to use.
Adding OneLogin OpenID Connect to your app
Clone the OIDC Library from GitHub
Clone OneLogin’s OpenID Connect library from the GitHub repository at https://github.com/onelogin/onelogin-oidc-ios.
Once you’ve cloned the library code, add it to your iOS app’s workspace.
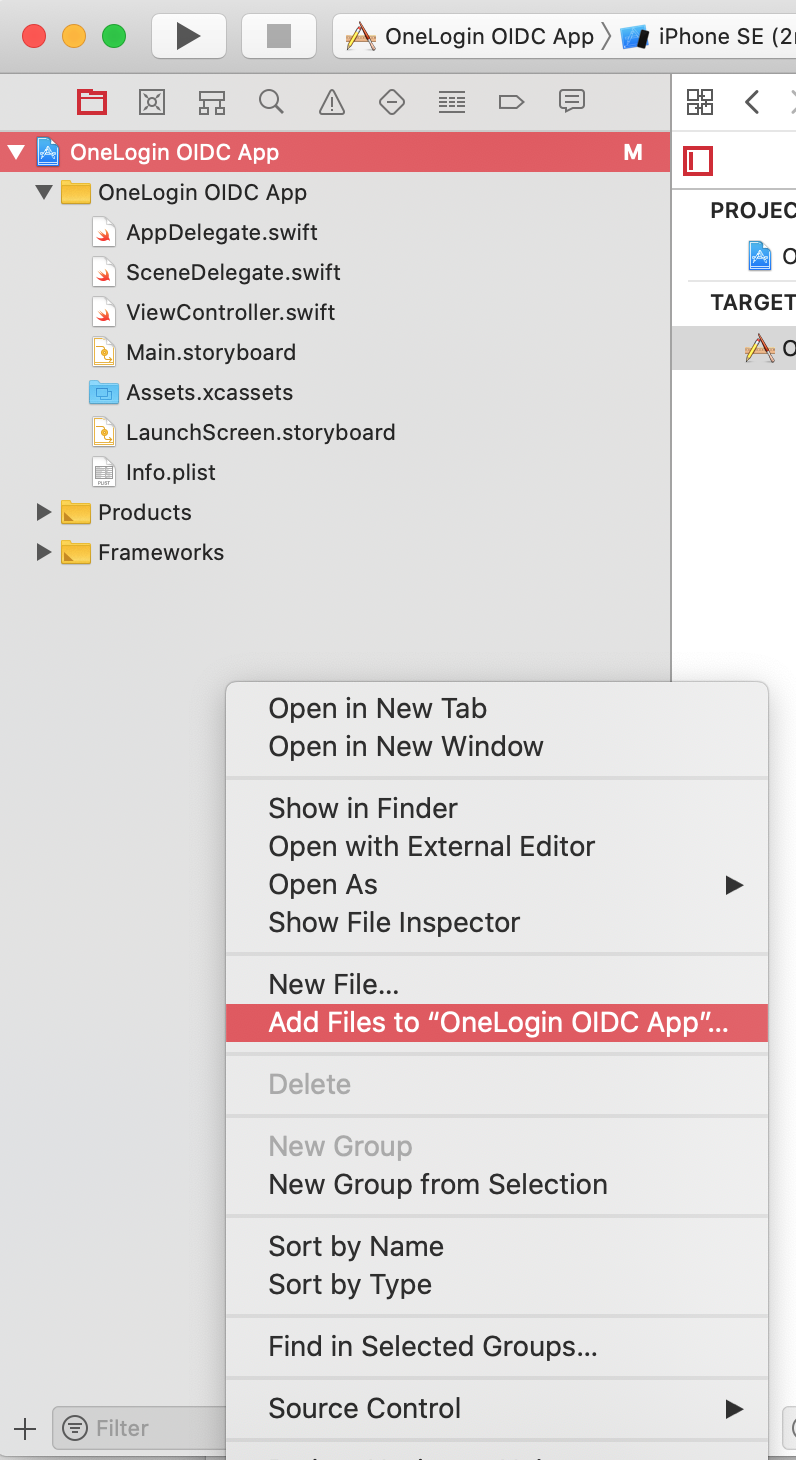
Right-click the Project Navigator
Choose Add Files to “<your app name>”.
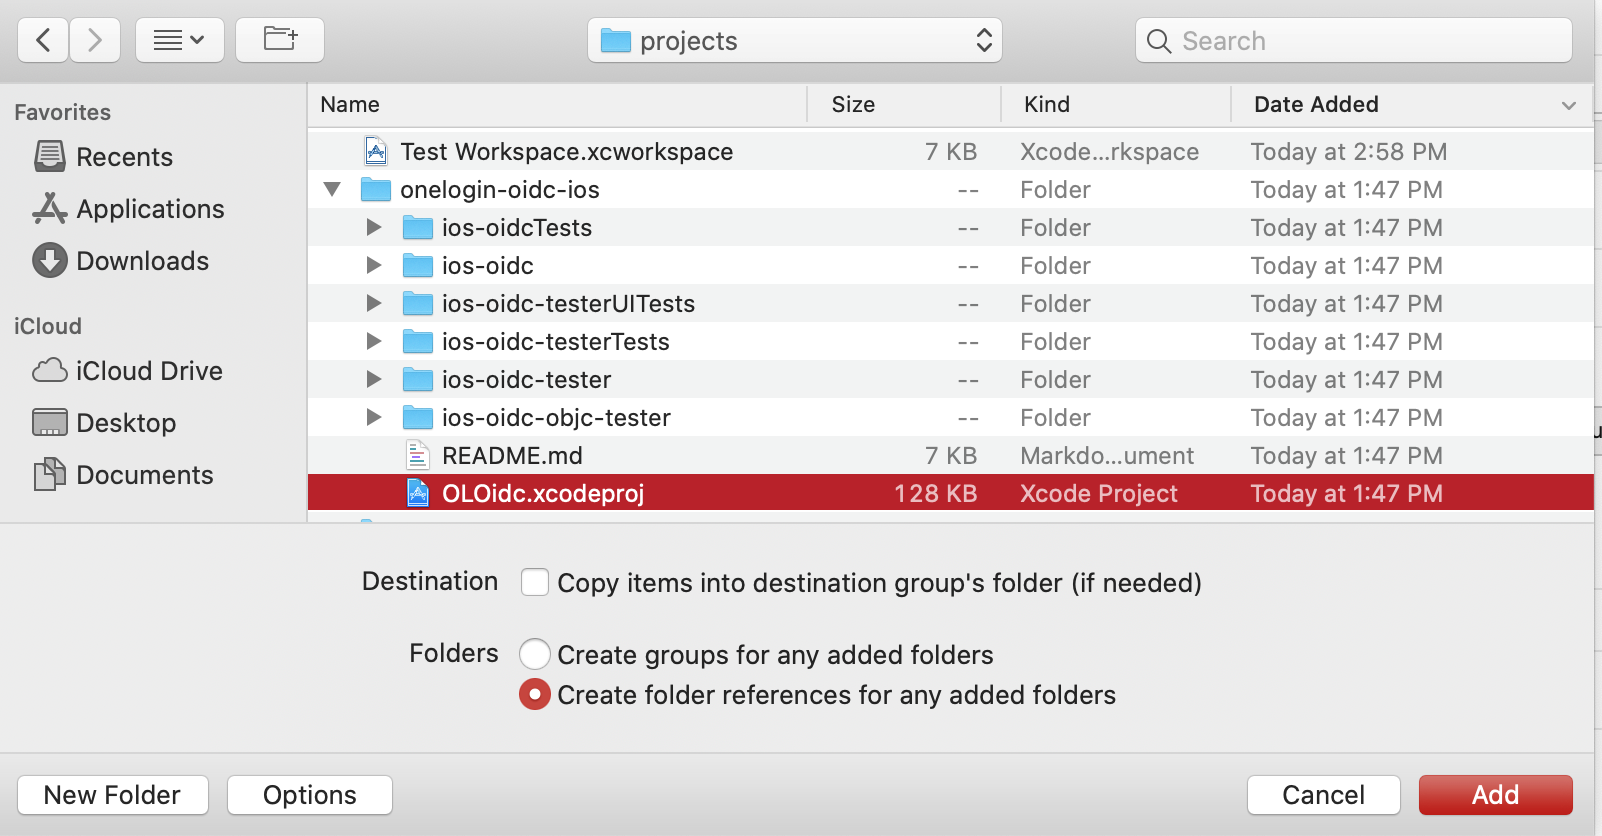
In the folder where you cloned the onelogin-oidc-ios repository, click OLOidc.xcodeproj.
Click Add.
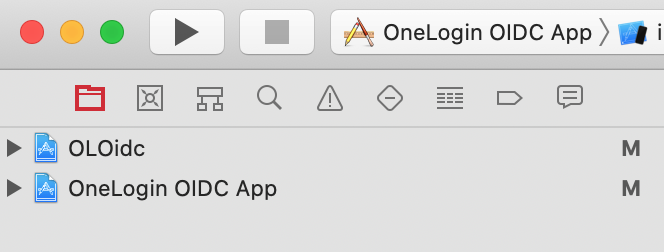
Notice that the OLOidc project has been added to your workspace alongside your iOS app.
Change the Build Settings in you Project
Before you can use the OLOidc library, change its build settings to use your development team and build certificate.
Click the OLOidc project.
Click the Signing and Capabilities tab at the top of the project settings screen.
Click OLOidc under Targets on the left.
Set your team and signing certificate using the drop-down boxes on the right.
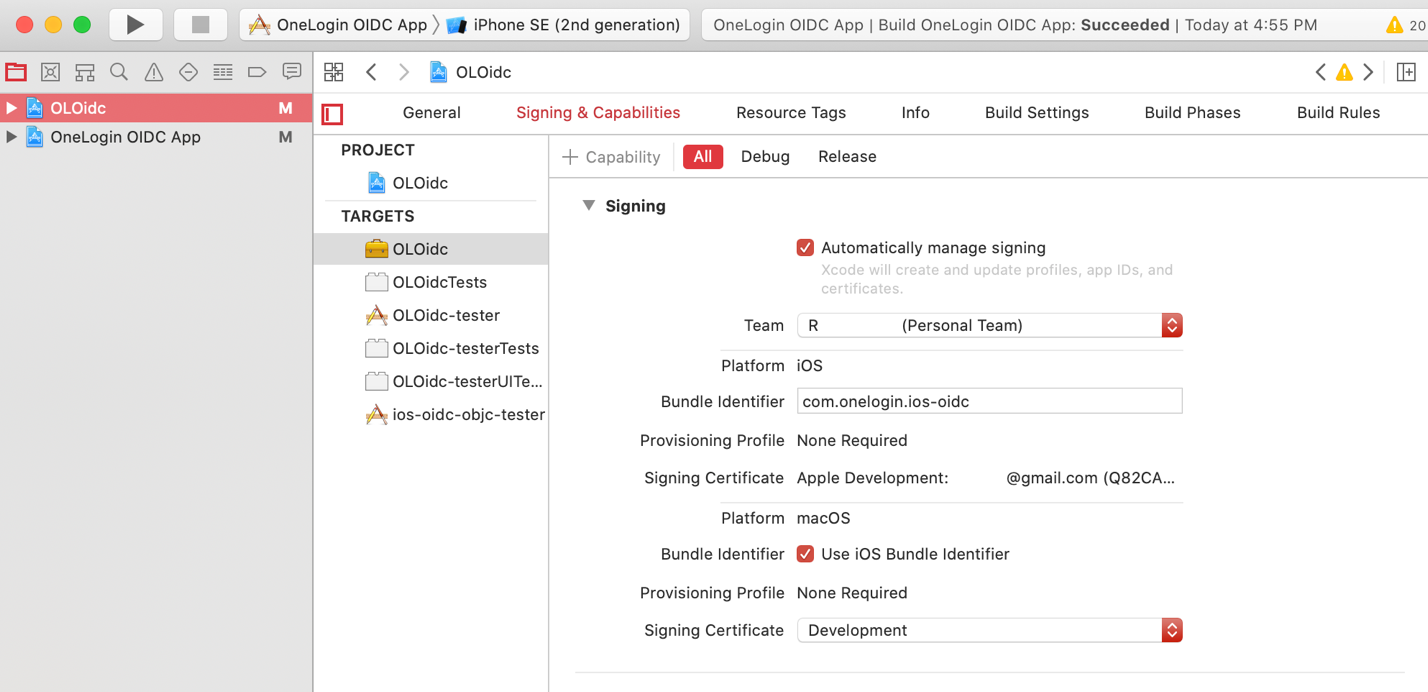 Choosing your team should automatically populate the rest of the fields. If you have more than one signing certificate, you can choose the one you want using the Signing Certificate select box.
Add a Reference to the OneLogin iOS Library
Now all you have to do to start using the OneLogin iOS library is to add a reference to it in your iOS app.
Select your iOS app project.
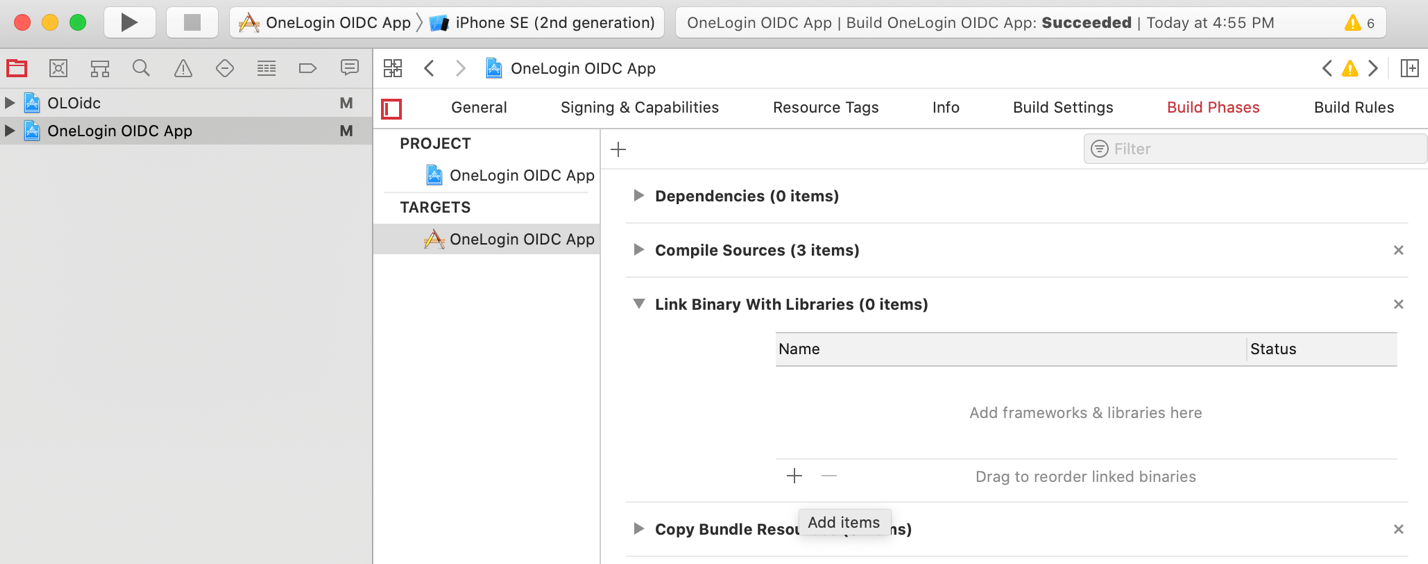
In the project properties window that opens, click the Build Phases tab.
Open the Link Binary with Libraries section.
Click the + button to add a library reference.
In the window that opens, open the Workspace section and select the OLOidc.framework library.
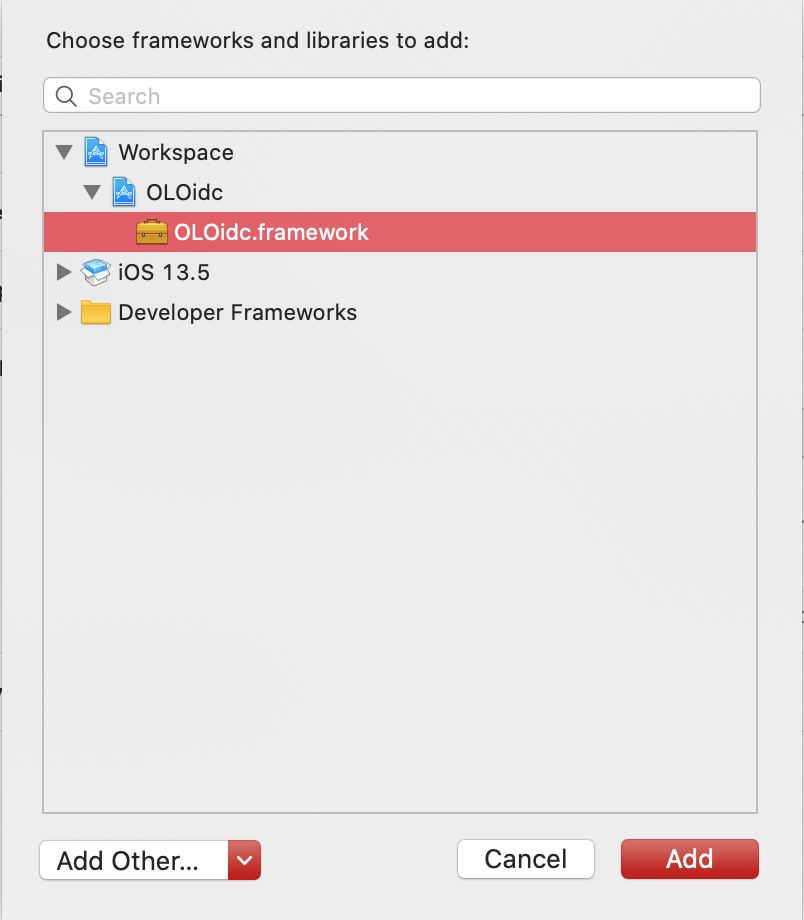
Click Add.
And with that, you’re ready to use the OneLogin OpenID library in your app.
Using the OneLogin OpenID Connect iOS library
If you’d like to see a complete copy of the demo app’s source code before you start, you can download it from here.
Register your OneLogin URI Scheme
Register your OneLogin URI scheme in your app’s Info.plist file so iOS will correctly send OneLogin’s callback request to your app.
Right-click your app’s Info.plist file.
Choosing Open As > Source Code.
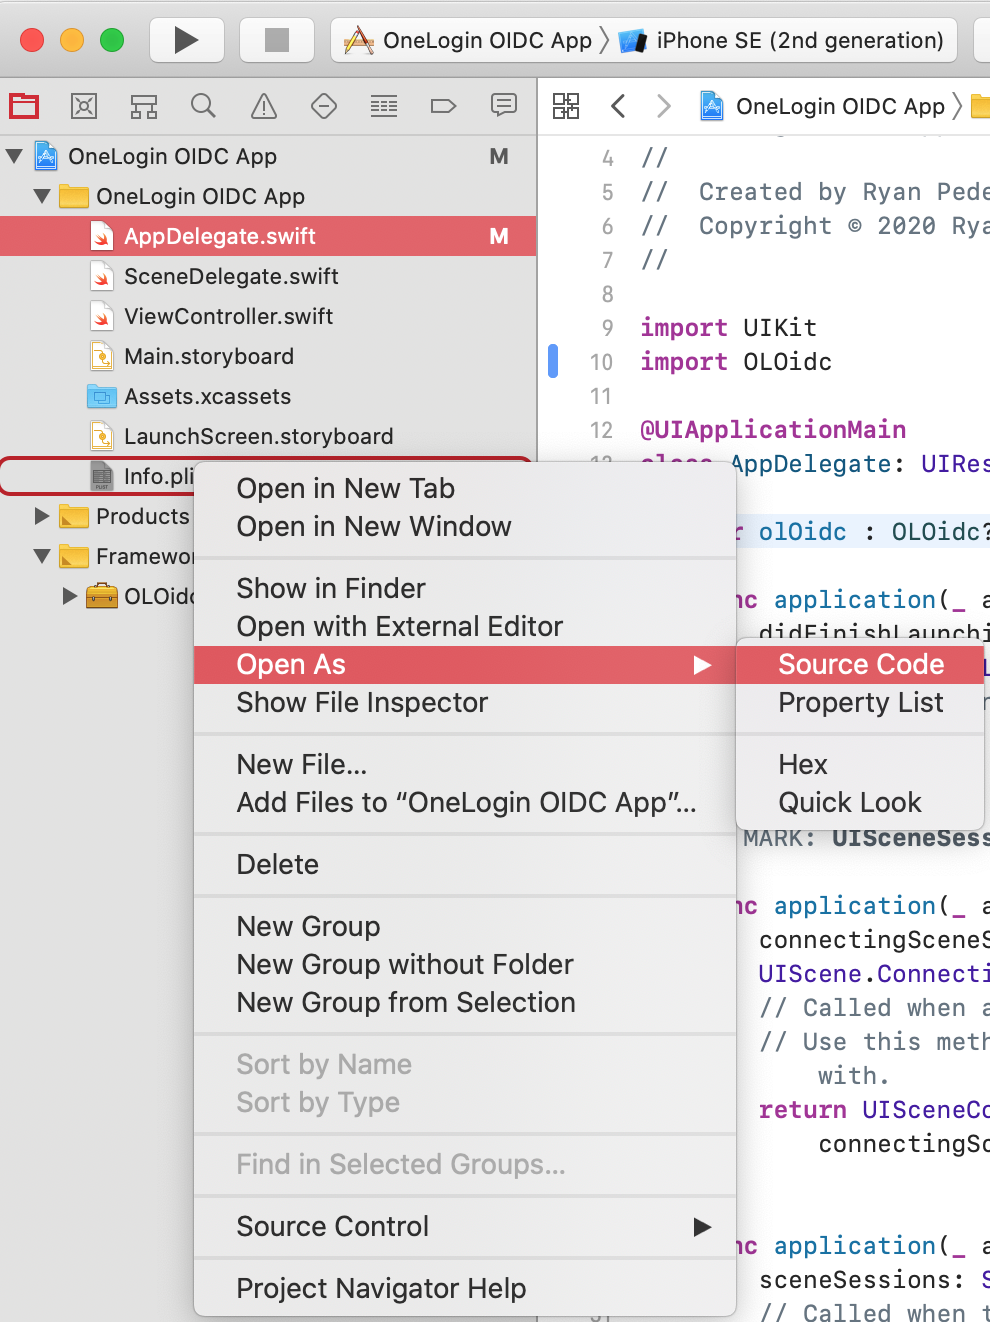
Inside the plist’s main <dict> element, add the following code:
<key>CFBundleURLTypes</key>
<array>
    <dict>
        <key>CFBundleTypeRole</key>
        <string>Editor</string>
        <key>CFBundleURLSchemes</key>
        <array>
            <string>yourRedirectScheme</string>
        </array>
    </dict>
</array>
Change yourRedirectScheme to match the URI scheme you set when creating your OneLogin app’s callback URL.
For example, if you set your callback URL to com.myapp.oidc://callback, your URI scheme would be com.myapp.oidc.
Start using OneLogin in your Code
You’re now ready to dive into your app’s code and start using OneLogin.
Let’s begin by giving your app the ability to handle callbacks from OneLogin.
Open your app’s AppDelegate.swift file and add this line to the bottom of the imports section:
import OLOidcAdd the following code inside the AppDelegate class:
var olOidc : OLOidc?

static var shared: AppDelegate {
    return UIApplication.shared.delegate as! AppDelegate
}

func application(_ app: UIApplication, open url: URL, options: [UIApplication.OpenURLOptionsKey : Any] = [:]) -> Bool {
    guard #available(iOS 11, *) else {
        return olOidc?.currentAuthorizationFlow?.resumeExternalUserAgentFlow(with: url) ?? false
    }
    return false
}
Let’s walk through this code one step at a time.
Adding a variable named olOidc to hold an instance of the OLOidc class.
This class contains everything you need to use OneLogin in your app. It will let you sign a user in, read the user’s access token, read the user’s profile information, and sign the user out.Add a static variable named shared.
This variable lets you easily access AppDelegate from inside your app’s view controllers. You need to do this so you can easily share your OLOidc instance between views once a user has signed in.Add an override for the application function that handles the OneLogin callbacks iOS routes to your app.
When this function is called, you hand things off to the OLOidc library to let it handle the login process for you.
That’s all you have to do in AppDelegate.
Add a View to your App to Enable Sign-On via OneLogin
- Open the code of the view controller you’ll be using to handle login.
In this small demo app, use the default ViewController.swift that Xcode created.
It contains a few buttons that let you perform the basic authentication-related tasks you need in an iOS app: sign in, read user information, check token validity, and sign out.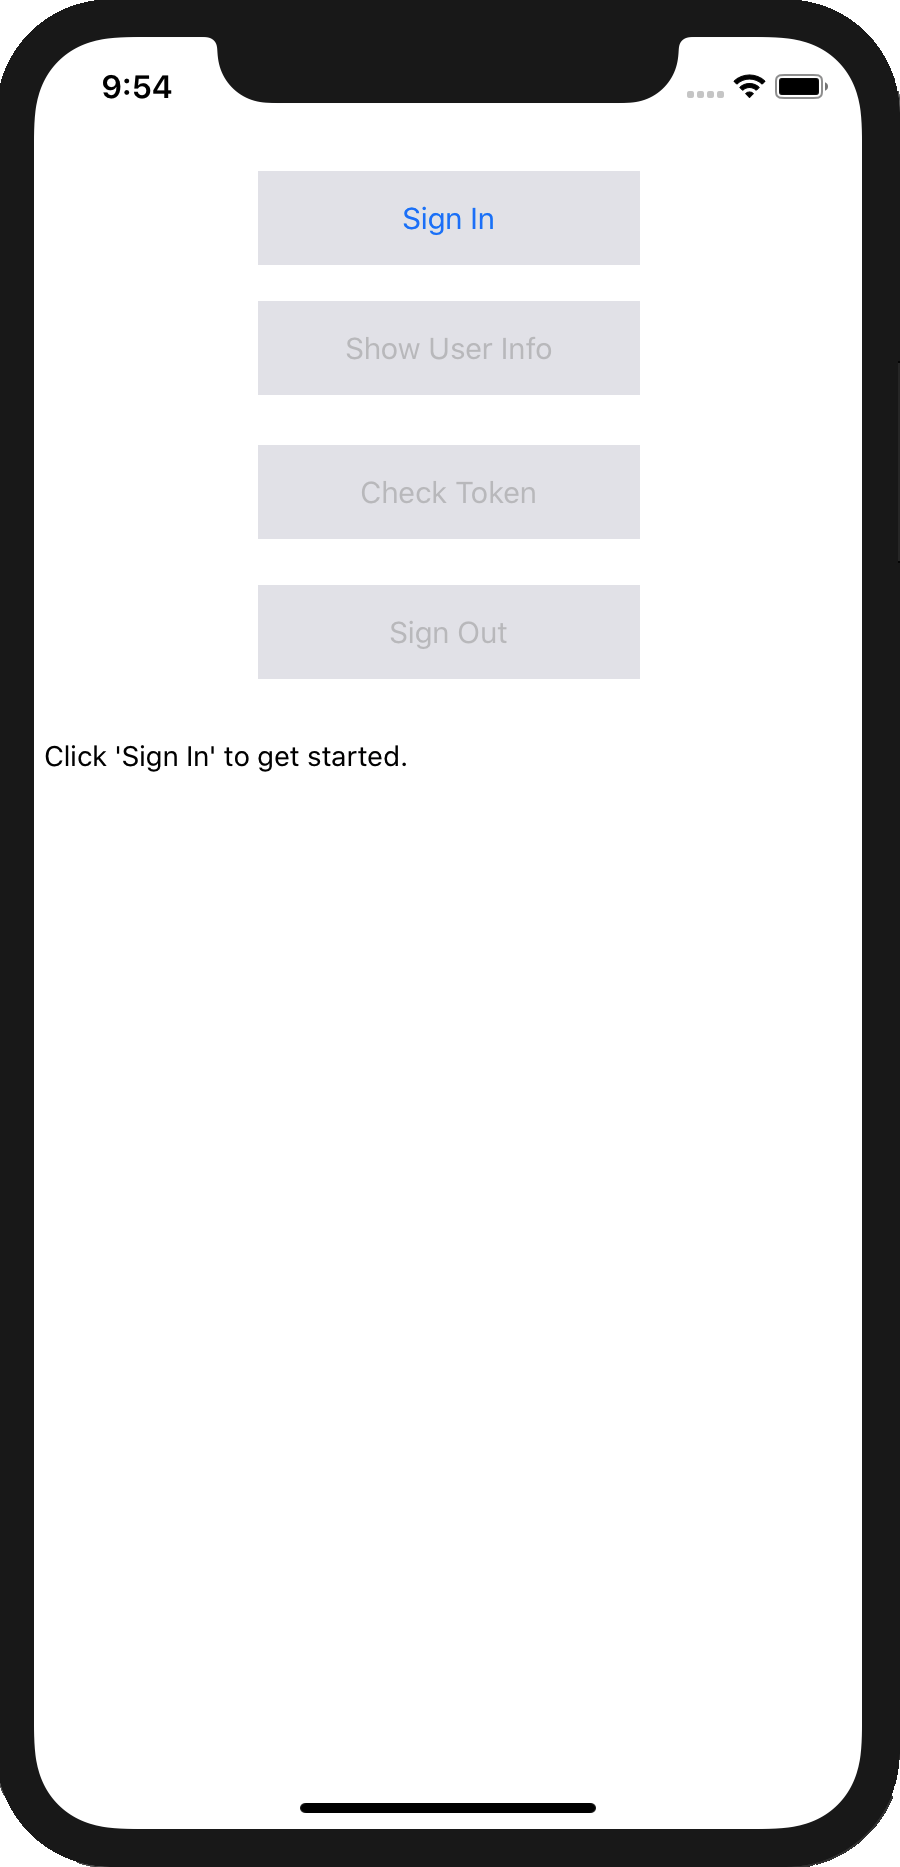
Add Code to Make the App Work
Ignore the UIKit code and focus on the code that helps you interact with OneLogin.
Import the OneLogin library.
import OLOidcAdd a variable named olOidc to hold an instance of the OLOidc class:
private var olOidc: OLOidc?Overload the viewDidLoad function and add some custom code.
override func viewDidLoad() {
    super.viewDidLoad()

    let olOidcConfig = try? OLOidcConfig(dict: [
      "issuer": "yourIssuerUrl",
      "clientId": "yourClientId",
      "redirectUri": "yourRedirectUri",
      "scopes": "openid profile"
    ])

    olOidc = try? OLOidc(configuration: olOidcConfig)
    AppDelegate.shared.olOidc = olOidc
}
Set up a configuration object, olOidcConfig, that contains information about your OneLogin application.
Fill in the first three values in the OLOidcConfig dictionary with values from your own app. Your issuer URL and client ID can both be found on the SSO screen of your application’s page in the OneLogin portal.
Create an instance of OLOidc, save it to your private instance variable, olOidc, and copy it back to your app delegate so it’ll be available there when the redirect handler callback is triggered.
Modify the code that’s called when the Sign In button is tapped as follows.
@IBAction func signInClicked(_ sender: UIButton) {
    olOidc?.signIn(presenter: self) { error
        in
        if let error = error {
            self.setInfoText(text: "Error: \(error)")
            return
        }
        if let accessToken = self.olOidc?.olAuthState.accessToken {
            self.setInfoText(text: "Received access token: \(accessToken)")
            self.showInfoButton.isEnabled = true
            self.checkTokenButton.isEnabled = true
            self.signOutButton.isEnabled = true
            self.signInButton.isEnabled = false
        }
    }
}
The tap handler calls OLOidc’s signIn function, passing self as the first parameter to ensure the login window appears in the current view, and also passing a callback that displays an error message if something went wrong and the user’s access token if the login was successful.
Modify the code that’s called in the tap handlers for the Show User Info and Check Token buttons.
@IBAction func showUserInfoClicked(_ sender: UIButton) {
    olOidc?.getUserInfo(callback: { (userInfo, error) in
        if let error = error {
            self.setInfoText(text: error.localizedDescription)
            return
        }
        self.setInfoText(text: "\(String(describing: userInfo))")
    })
}

@IBAction func checkTokenClicked(_ sender: UIButton) {
    olOidc?.introspect(callback: { (tokenValid, error) in
        if let error = error {
            self.setInfoText(text: error.localizedDescription)
            return
        }
        let status = tokenValid ? "The token is valid" : "The token is not valid"
        self.setInfoText(text: status)
    })
}
To get information about the signed-in user, call the getUserInfo function. To determine whether the current access token is valid, call introspect. In both cases, a message is displayed based on the information returned and an error message is shown if a problem occurred.
Modify the code for the Sign Out button.
This one is a bit more complex because, to sign a user out, you must do three things:
- Revoke the user’s access token.
- Revoke the user’s refresh token.
- Delete the user’s tokens from the iOS Keychain.
a. Add a revokeToken helper function, to avoid repetition inside nested callbacks.
private func revokeToken(tokenType: TokenType, description: String, callback: @escaping () -> Void) {
        olOidc?.revokeToken(tokenType: tokenType, callback: { (error) in
            if let error = error {
                self.appendInfoText(text: "Error revoking token: " +
                                    error.localizedDescription)
                return
            }
            self.appendInfoText(text: description + " token revoked.")
            callback()
        })
}
Note that your code is similar to the first few API calls. In this case, you call revokeToken, tell it what type of token you want to revoke (AccessToken or RefreshToken), and then log a message depending on whether revocation succeeded or failed.
Modify the code for the sign out tap handler.
@IBAction func signOutClicked(_ sender: UIButton) {

    self.setInfoText(text: "Attempting sign out...")

    revokeToken(tokenType: .AccessToken, description: "Access") {
        self.revokeToken(tokenType: .RefreshToken, description: "Refresh") {
            self.olOidc?.deleteTokens()
            self.appendInfoText(text: "Tokens deleted from Keychain.")

            self.signOutButton.isEnabled = false
            self.checkTokenButton.isEnabled = false
            self.showInfoButton.isEnabled = false
            self.signInButton.isEnabled = true
        }
    }
}
This function chains two calls to your revokeToken helper and, if both of them succeed, you call deleteTokens to delete your app’s tokens from the iOS Keychain. Finish up by re-enabling the Sign in button, disabling all of the other buttons.
Wrapping Up
And that’s all there is to it! As an experienced iOS developer, you likely recognize that the OneLogin iOS library is giving you a lot of functionality for very few lines of code. Handling every step of OpenID Connect manually would require hundreds of extra lines of code.
So what’s next? Now that you can sign a user in and get an access token, it would be great to use that access token. To find out how to set up OneLogin support to a server-side API, check out OneLogin’s guides and sample apps.
Have a Question?

Found a problem or a bug? Submit a support ticket.

Looking for walkthroughs or how-to guides on OneLogin's user and admin features? Check out the documentation in our Knowledge Base.

Have a product idea or request? Share it with us in our Ideas Portal.