Using OpenID Connect to Authenticate to an Android App
If you’ve ever attempted to do all the work to implement an identification and authentication system from scratch, then you’re probably very familiar with the many challenges it entails. These challenges often lead to headaches and possibly a system full of security holes. The dream is to have a third party provide an identification and authentication system that is easy to incorporate into your own apps.
That’s where OneLogin comes in. OneLogin provides a complete user identification and authentication solution that gives you the ability to configure your app and create and manage your user accounts, all while being easy to add to your Android apps. Additionally, the user experience of logging in is seamless — your users will never guess that a third party is handling the sign-in functionality.
To help you determine how the OneLogin toolkit could fit your needs, we will walk through the process of adding user authentication to an Android app via the OneLogin OpenId Connect Android SDK. This article assumes that you have working knowledge of Kotlin (or Java), and have some knowledge of authentication principles.
The main steps are:
Create a OneLogin developer account
Set up single sign on (SSO)
Create the Android app
Create a Sign In experience with OneLogin
Revoke the session token
If you want to jump into it yourself, you can check out the OneLogin OpenId documentation.
All of the source code contained in this article is shared on a public GitHub repository.
Take the app for a spin
If you’re interested in seeing an app work with OneLogin, you can simply clone the GitHub repo, build the Android app and run it on your emulator.
Use these credentials to sign into the sample app:
- Username: melmiller
- Password: a1b2c3d4
The master (main) branch represents the final code for the repo which matches the step3 (final) branch of the repo examples.
After you’ve seen it in action, you can step through the code in this article and see how it is all done.
Configure OneLogin
Let’s get started by setting up a OneLogin developer account.You will need one if you want to follow along with the example in this article. You can create your account on the OneLogin developer signup page.
Once you create a Developer Account and log in, you can add a new OneLogin application. This will allow you to manage the settings related to the Android app.
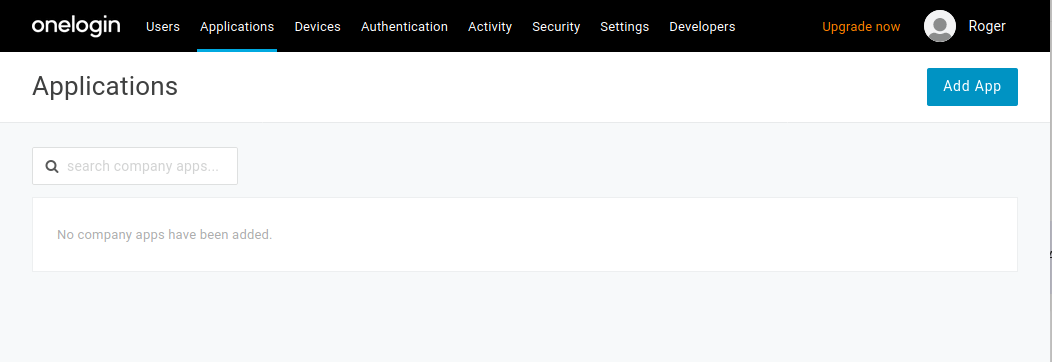
Log in to the OneLogin Admin UI.
Click Applications.
Click Add App.
The list of choices is quite large, but you can narrow it down by doing a search.
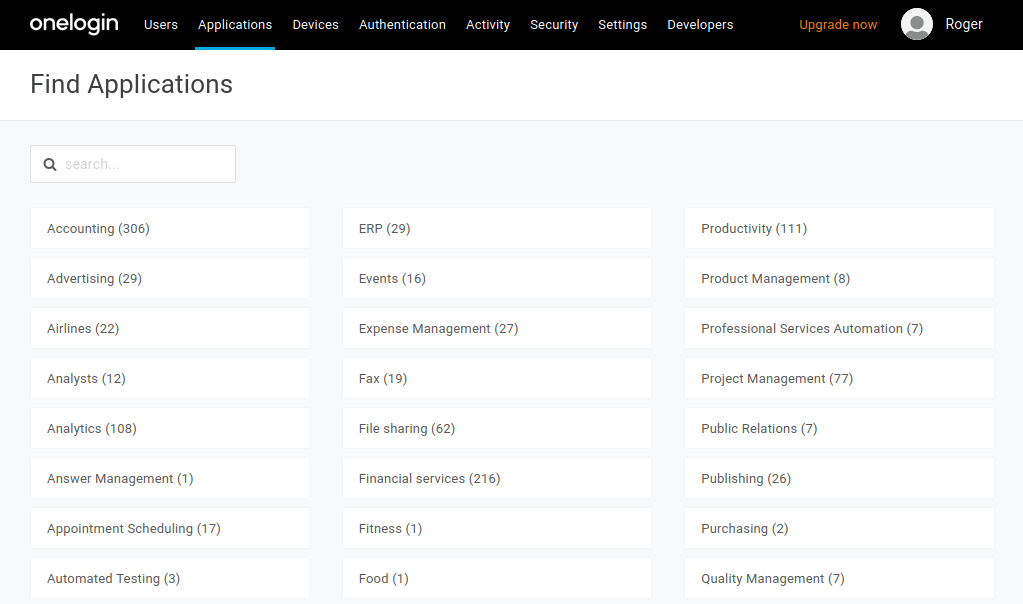
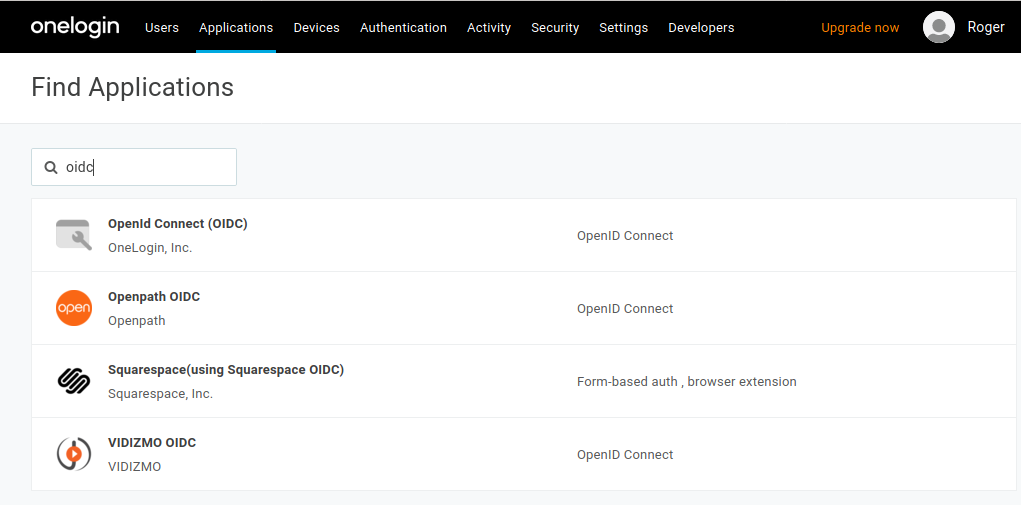
Search for OIDC and select the OpenId Connect (OIDC) app.

Set a display name and description for the app and Save.
The new application is created and saved, and the page refreshes to display some more tabs related to the app.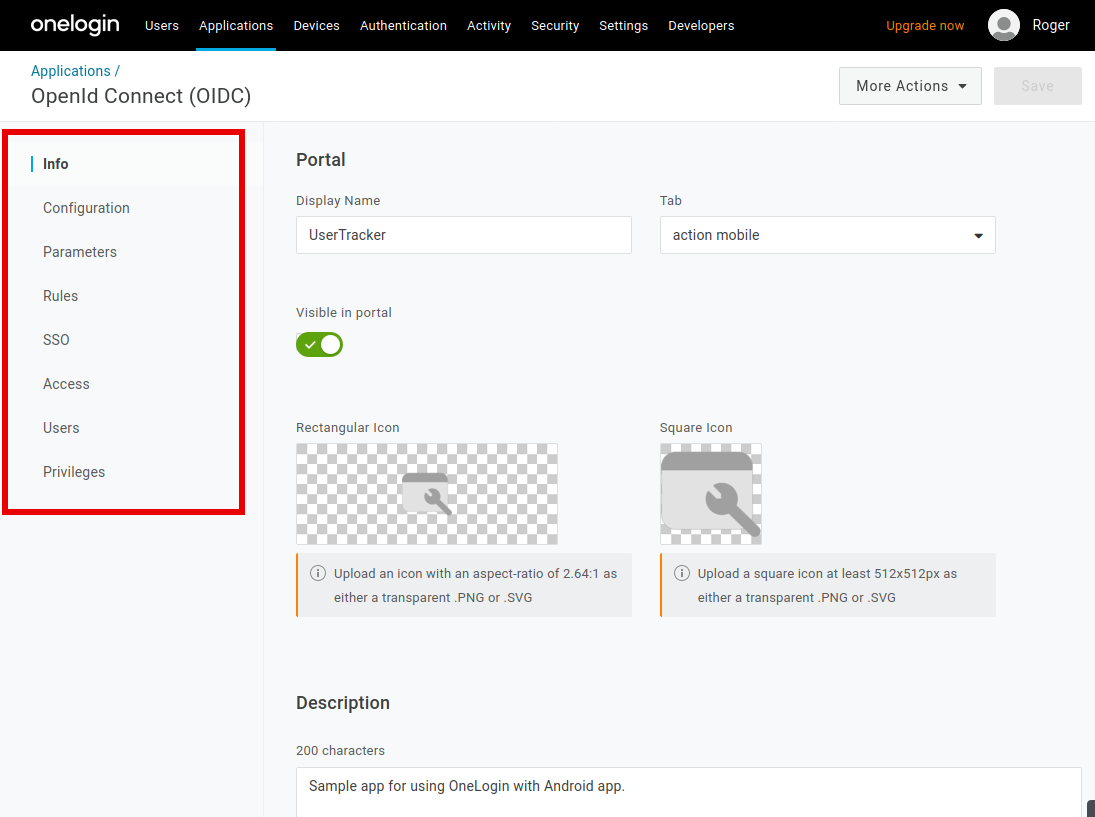
Set up single sign-on (SSO)
The default settings have the app redirect to a URL on your web site when a user wants to sign in. Let’s change the settings to have the app to automatically load the OneLogin dialog instead.
Go to the SSO tab.
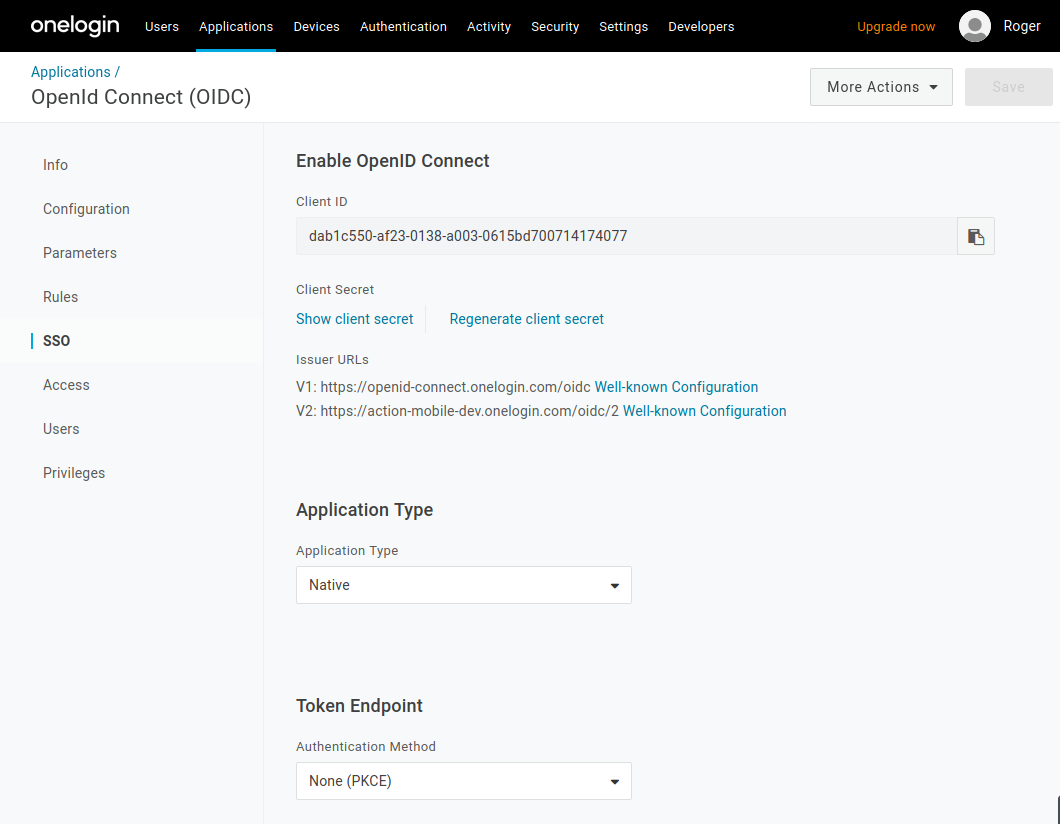
Set ApplicationType is set to Native, since we are going to be writing a Native (Android) app.
Set Token Endpoint is set to None (PKCE).
Click Save.
The final setting to change is on the Configuration tab.
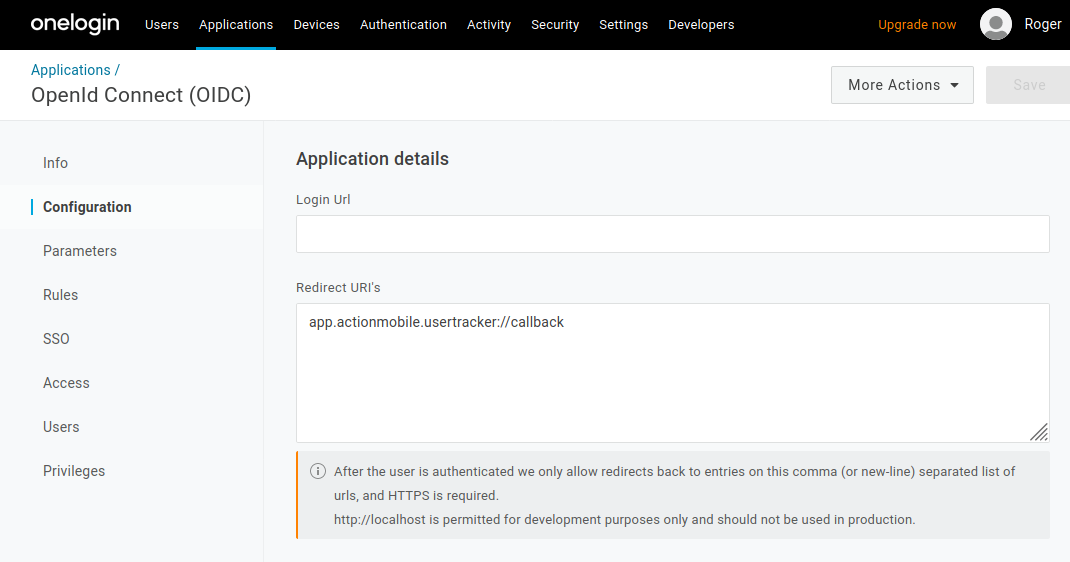
Click on the Configuration tab.
Enter a Redirect URI. For example, “app.actionmobile.usertracker://callback”. The first part of this URI is the same as the package name (app.actionmobile.usertracker) to identify the sample app.
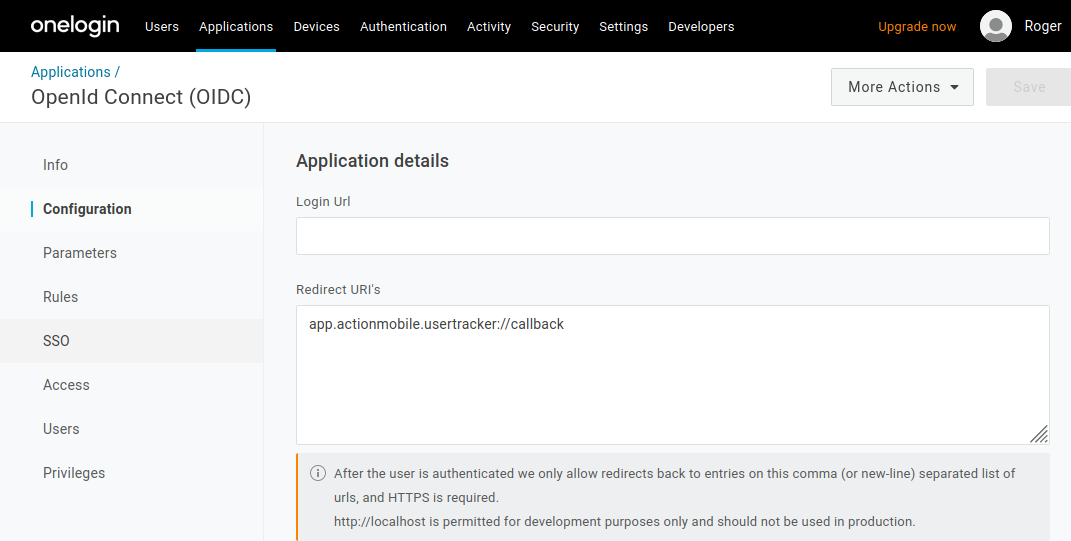
NOTE: The informational note displayed below the field pertains to web apps. For an Android app, we do not want https:// or http:// at the beginning of our Redirect URI. If you add either of those, it will try to redirect to a real web page instead of the built-in dialog.
Click save.
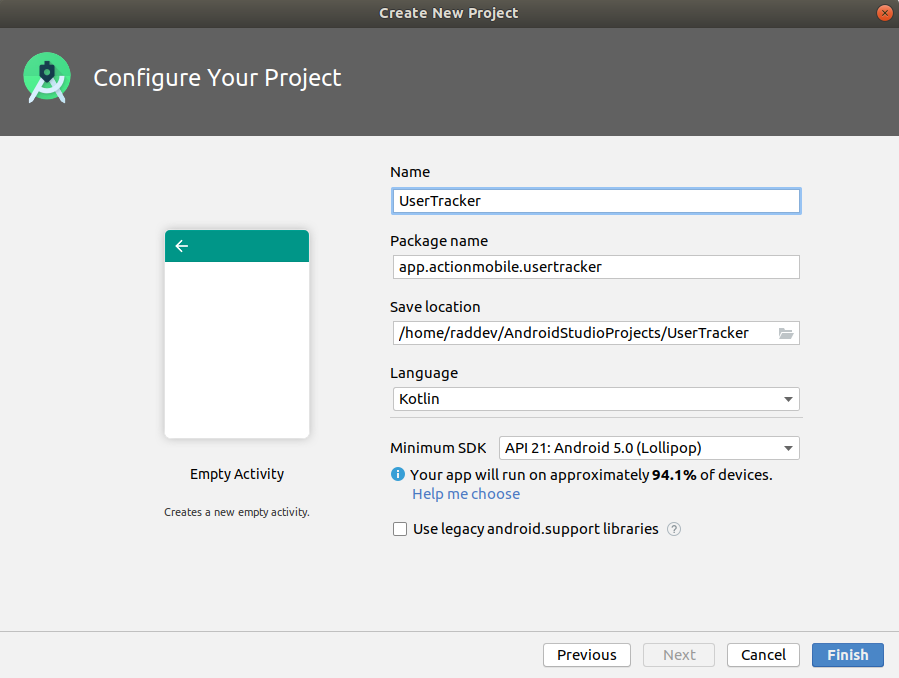
Create the Android app
Go to Android Studio and create a new app based on the Empty Activity template. Set up your project template as shown below.
Install the OneLogin component
The first thing we want to do after the project is created is to add the OneLogin component to the app.
In Android Studio open build.gradle at the module level. (build.gradle (Module: app))
Add the following line to the bottom of the current list of dependencies:
implementation "com.onelogin.oidc:oidc:1.0.0"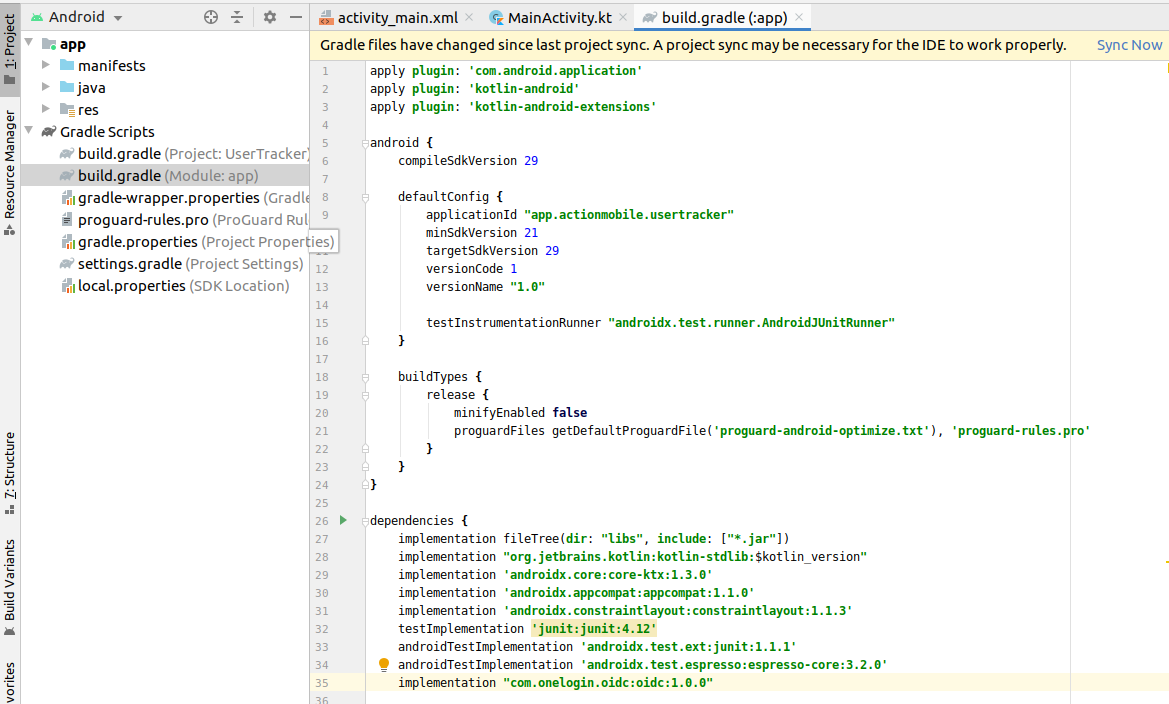
Click Sync Now.
Open MainActivity.kt (Kotlin code file). You can get to it from the project navigator on the left side of Android Studio:
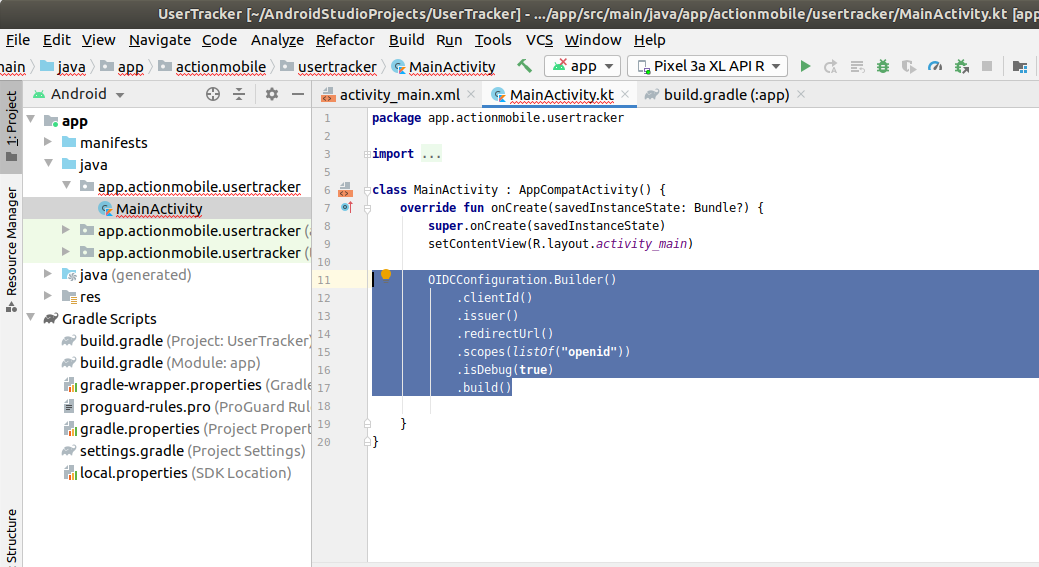
Add the code that is highlighted. This code initializes the OIDCConfiguration in the onCreate() function of the MainActivity. (It is not yet complete. We’ll add three required String values in the next section.)
iOIDCConfiguration.Builder()
 .clientId()
 .issuer()
 .redirectUrl()
 .scopes(listOf("openid"))
 .isDebug(true)
 .build()
Android Studio should find that class in the com.onelogin.oidc package that we added via the implementation line in the build.gradle file. However, be aware that it may not find the class initially since Android Studio sometimes struggles at this. If it continues not to recognize it, go to File > Invalidate Caches / Restart to fix the issue manually.
Once it recognizes the library and method, a popup displays over the package name that allows you to import the package properly.

Add the required String values
Once you’ve imported the package, add the three required String values: clientId, issuer, and redirectUrl.
Copy the value for the first string, clientId, from the SSO tab for the application on the OneLogin Administration UI:.
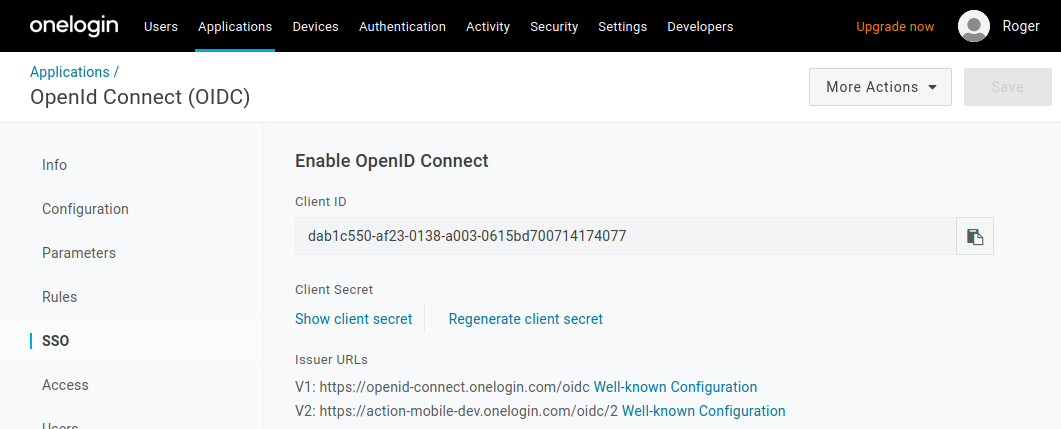
The value for the next string, issuer, is one of the Issuer URLs displayed on the SSO tab.You can copy either one.
Copy the value for the final string, redirectUrl, from the Configuration tab. This is the value you specified earlier.
Store the configuration in a variable named config so that you can use it in a call when you initialize the system.
Here’s what the final OIDCConfiguration call looks like:
val config = OIDCConfiguration.Builder()
 .clientId("")
 .issuer("https://actionmobile-dev.onelogin.com/oidc/2")
 .redirectUrl("app.actionmobile.usertracker://callback")
 .scopes(listOf("openid"))
 .isDebug(true)
 .build()
These are hardcoded Strings right in the code to keep everything visible and a bit easier to explain. You will want to use your own client ID, issuer URL, and redirect URL here.
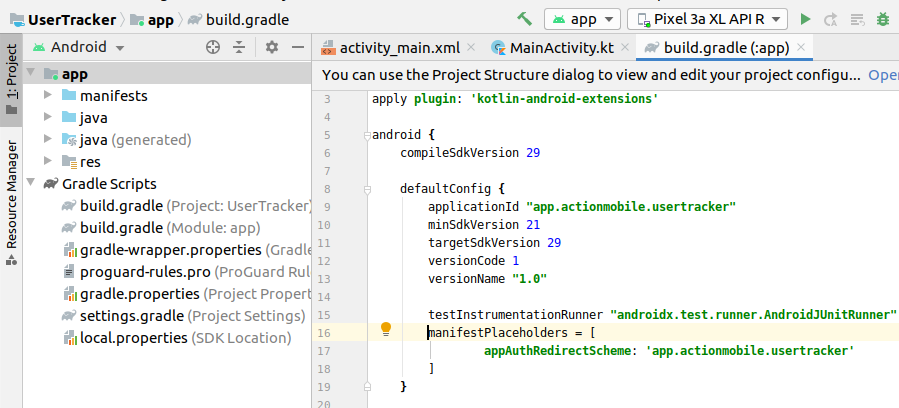
Before building, add the following item to the defaultConfig section of the build.gradle (Module: app) file:
manifestPlaceholders = [
   appAuthRedirectScheme: 'app.actionmobile.usertracker'
]
Click Sync Now. Your project should look like this.
Build and run
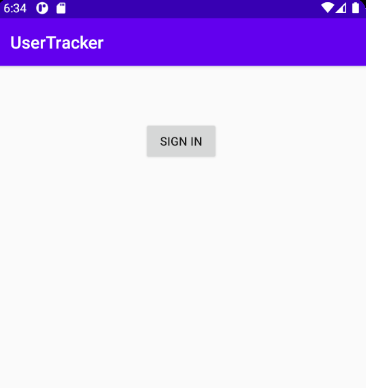
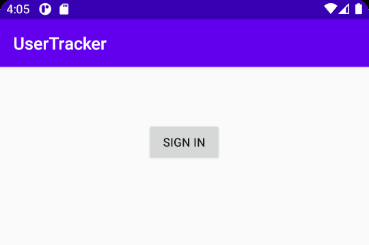
At this point, if everything is configured properly, the UserTracker app will build and run, displaying the simple TextView with “Hello World!” from the template.
Create a Sign In experience with OneLogin
Remove the template textview and added a Sign In button:
You can take a look at the layout XML in the code download from GitHub. To see the layout code up to this point, checkout the branch named step1.
We’ll add some code to it so we can begin to see the OpenLogin API in action.
Wire up the button
Let’s wire up the button so it can run the Sign In functionality for us.
Add a button member variable to the MainActivity class. You can also add a member variable that will allow you to store a reference to the oidcClient object.
var signInButton : Button? = null
var oidcClient : OIDCClient? = null
Inside the onCreate() function add the code to get a reference to the Button control that is in the activity_main.xml (the layout file). Again, it’s basic Kotlin code to do the work.
signInButton = findViewById(R.id.signInButton) as ButtonCreate the onClick handler for the button and add the sign-in code. Notice the comments before each line of code to explain what the code is doing.
You can use the Kotlin null safety operator (?) when calling setOnClickListener on the signInButton. This is a nice feature of Kotlin that will only run the code that follows the null safety operator if the object (signInButton) is not null.
signInButton?.setOnClickListener { Log.d("MainActivity", "sign-in button clicked.") OneLoginOIDC.initialize(this.applicationContext,config) oidcClient = OneLoginOIDC.getClient() Log.d("MainActivity", "got client...") oidcClient?.signIn(this,object : Callback
Let’s walk through this code to understand the details.
We added log output via Log.d() in three places so we can tell whether things are working.
We initialize the OneLogin system by passing in our application context and the config that we created earlier with our app settings (clientId, issuer, and redirectUrl).
OneLoginOIDC.initialize(this.applicationContext,config) - Once the system is initialized, we make the call to get the client object that we’ll use to call the signIn() method. If we had attempted to call this method before calling the initialize() method, the system would throw an exception.
oidcClient = OneLoginOIDC.getClient()We now call the signIn() method. It requires three parameters:
- The Activity that it will report back to (this points to our current Activity).
- A function that will be called if the sign in succeeds (onSuccess).
- A function that will be called if the sign in fails (onError).
oidcClient?.signIn(this,object : Callback - We add the definition of the onSuccess() function, including the body that will run if the user signs in successfully, and we add the definition of the onError() function, including the body that will run if the user sign fails.
To see the code up to this point, checkout the branch named step2 from the git repository.
Ready to run
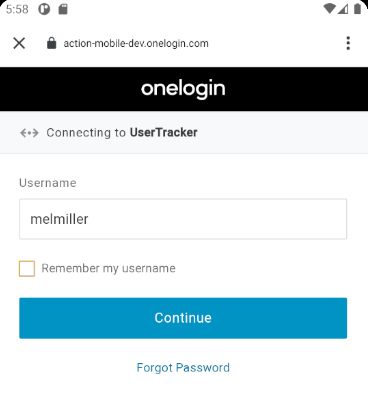
We are now ready to run the app. When you start the app you’ll see the same simple interface with only a button, but now when you click the button you’ll see some output to LogCat and you’ll see a new Activity appear. This is OneLogin presenting the sign in dialog for you.
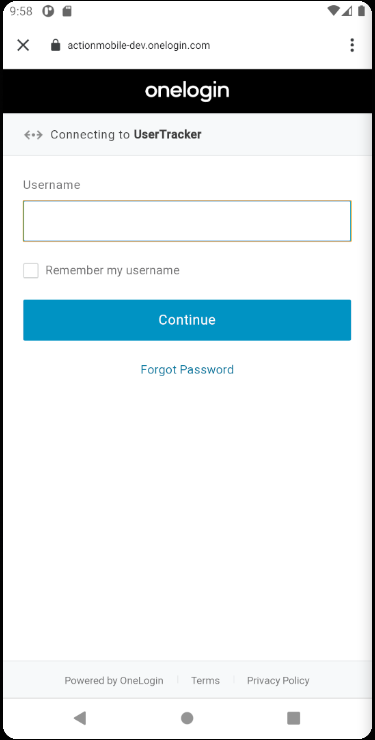
At the top of the Activity you can see that the base issuer URL is shown.
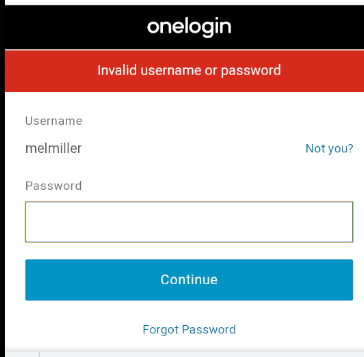
Any attempt to log in will fail, of course, because we haven’t set up a user in our OneLogin app yet.
Managing users with OneLogin
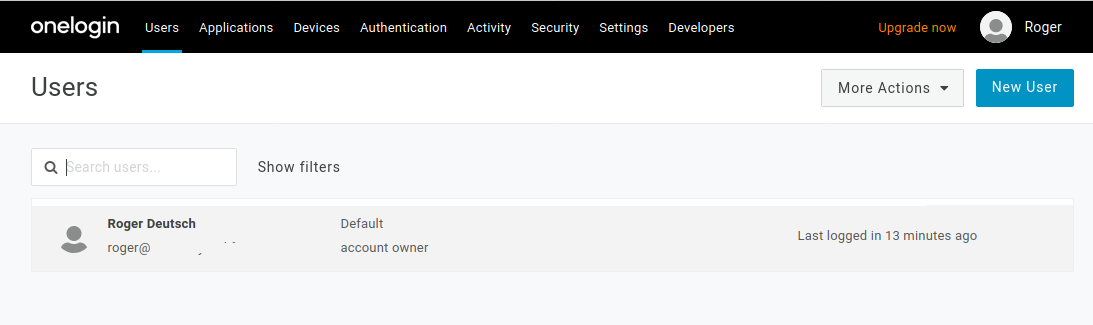
Go to the OneLogin Administration UI and make sure you’re logged in.
Click Users.
Click New User.
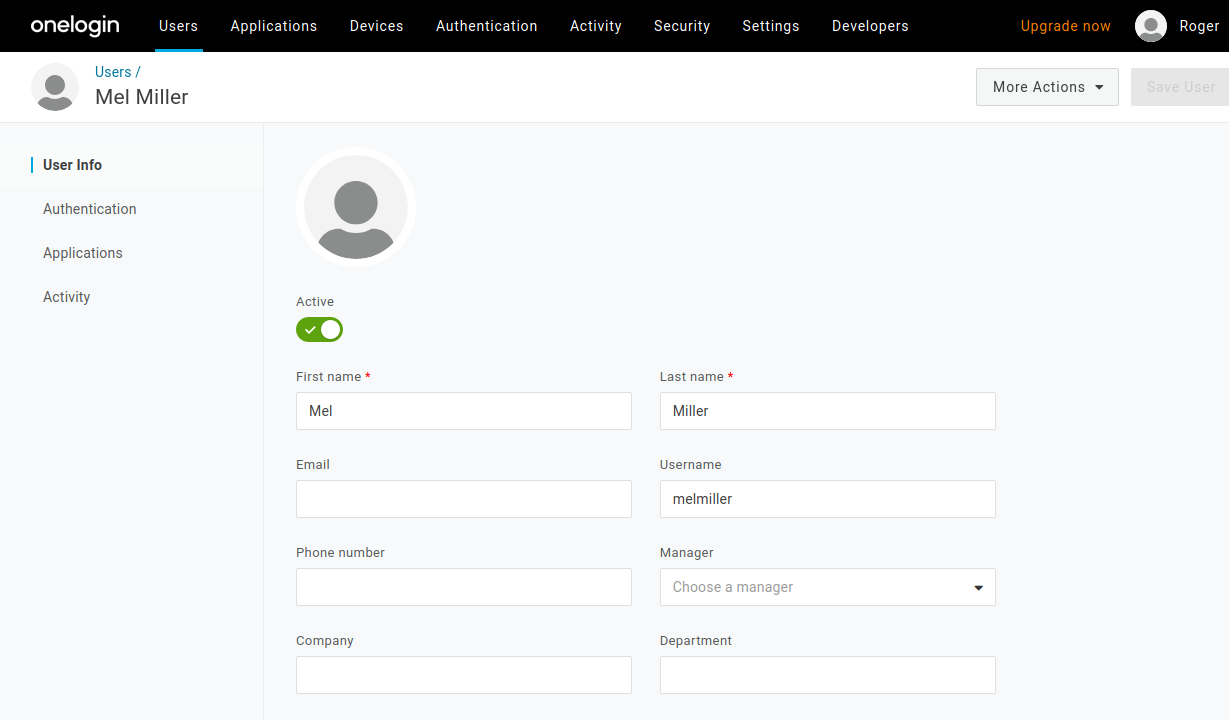
Add the details for the new user, then Save User. Only the First name, Last name, and Username are required.
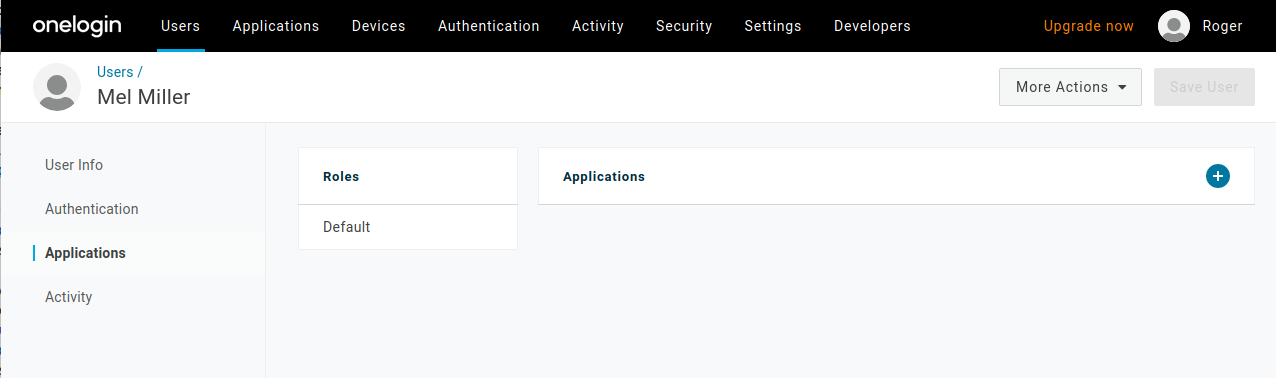
On the Applications tab, click the plus (+) button.
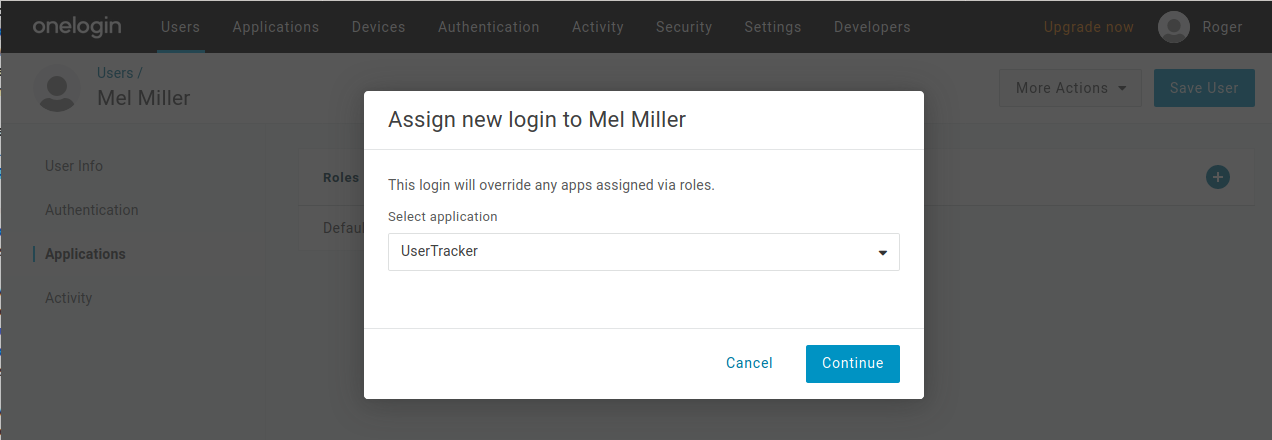
A popup will appear.
Select UserTracker from the Select applications dropdown, then Continue. UserTracker is the name of the OIDC App you added earlier.
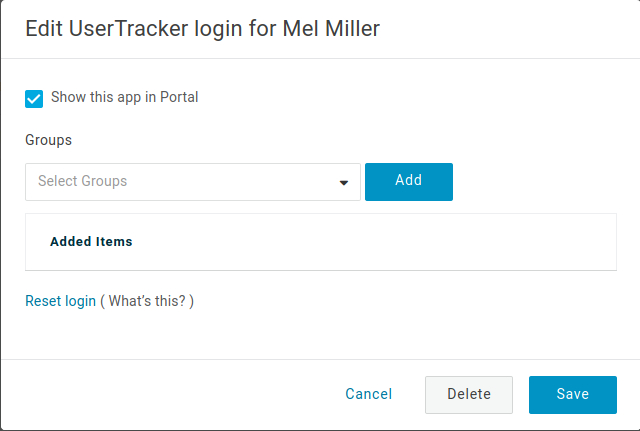
Another popup will appear.
Click save.
Click Users again. Now you’ll see the new user.
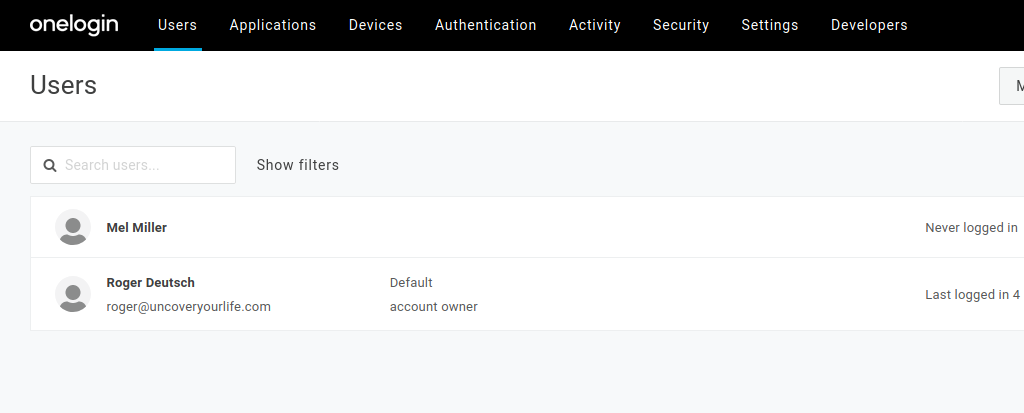
Select the new user (Mel Miller in this example) and the User Info page will load.
Select Change Password from the More Actions dropdown to set a password for your new user.
Add a password that is at least 8 characters long and contains letters and numbers.
The Force Logout option is an important feature to know about when you’re learning how to use the OneLogin API. Once you go through the steps to sign in with an account, you will find that it is always signed in and you cannot get the sign in screens to appear again. If that occurs, simply come here and use the Force Logout option. The user will be logged out and you can retry the sign in.
Type in your password and click Update.
Now we can go back to our Android app and try it out.
The password for melmiller in this example is a1b2c3d4.
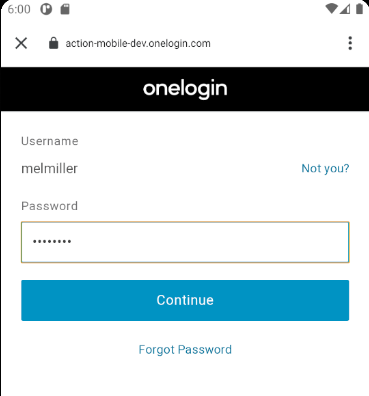
You will see a progress cursor spin and then you will be redirected back to the UserTracker app.
Of course, you can’t really tell that you’ve successfully logged in from our simple user interface, but you can look in the Logcat window and see some output:

Along with other outputs, we got a valid SignIn token.
Adding UserName Display
Now that the user is successfully signed in, a token has been returned that can be used to get further details about the user account, such as username. That makes it possible to display the username in the Activity if the developer desires to do so. This would make a good next step to try to extend the current application after you’re done going through this article.
Revoke the Session token
Let’s take a look at how we remove the Session token that is associated with the user to indicate that the user is logged in.
The work to remove the token would be done when a Sign Out button is clicked. We haven’t discussed that here, but it’s included in the GitHub code repository for your information.
- Add a setOnClickListener to the button. Here’s all of the code that does the work when the button is clicked.
signOutButton?.setOnClickListener {
   Log.d("MainActivity", "sign-out button clicked")
   // insure oidcClient is initialized
   if (oidcClient == null){
       OneLoginOIDC.initialize(this.applicationContext,config)
       oidcClient = OneLoginOIDC.getClient()
   }

   Log.d("MainActivity", "initialized")
   try {
       oidcClient?.revokeToken(object : Callback { // 1
           override fun onSuccess(success: RevokeSuccess) {
               Log.d("MainActivity",
                   "token: $success.sessionInfo.idToken");
               userTextView?.setText(""); // 2
           }

           override fun onError(error: RevokeError) {
               Log.d("MainActivity", "message: $error.message");
           }
       })
   }
   catch (ex : Exception){
       Log.d("MainActivity", "Error : ${ex.message}")
   }
}
This code is very similar to what we saw when the Sign In button is clicked.
We call the OIDC revokeToken() method and again set up the two callback methods (onSuccess, onError) so we can do work when the revokeToken() method is complete.
Inside the onSuccess function, when the token has been successfully revoked, we simply set the userTextView text to be an empty String indicating that no user is signed in — the previous user is signed out. It’s that simple, and you could easily incorporate this logic into a Sign Out button.
A solid starting point
If you’ve followed along, you now have a solid starting point for adding OneLogin OpenId Connect into your next Android app.
As you’ve learned, there are a few configuration steps to get it all set up, but once you do, the actual development work is quite minimal for all that you get: an entire identification and authentication system which includes everything you need to manage your users.
We encourage you to take the sample app even further and explore all the aspects of the OneLogin SDK. If you have any questions feel free to contact OneLogin experts to ask questions specific to your needs or to get a custom demo.
Have a Question?

Found a problem or a bug? Submit a support ticket.

Looking for walkthroughs or how-to guides on OneLogin's user and admin features? Check out the documentation in our Knowledge Base.

Have a product idea or request? Share it with us in our Ideas Portal.