richard.chetwynd | November 14th, 2018
If you’re starting out with OpenId Connect (OIDC), it can be confusing as to which flow you should use and what values you can expect to be returned.
We’ve made life easier for you with a new OpenId Connect Inspector.
The Inspector is quick to configure and enables you to try out the Implicit or Authorization Code flows using your own OneLogin OpenId Connect applications.
All of the request and response details are displayed, making it easier to see how a request should be formatted and help you debug other applications.
You can also change values like the scope, and see how that will affect the claims returned in the id_token. Here’s how to get started.
Step 1. Create an application
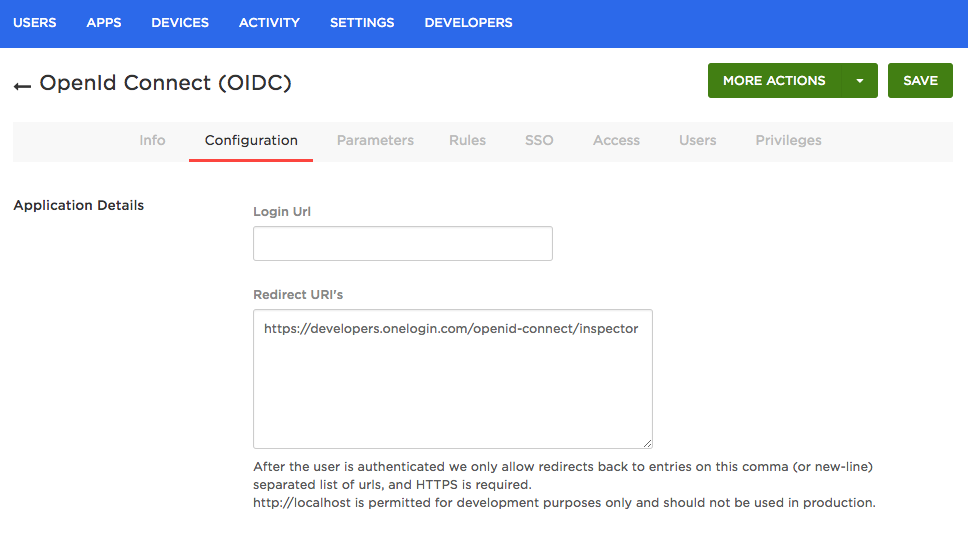
In order to use the Inspector you will need a OneLogin account with an OpenId Connect app setup and assigned to your user. You can find out more information about setting up an OIDC app here.
When you setup your OIDC app be sure to the set the Redirect URI to the following: https://developers.onelogin.com/openid-connect/inspector
Step 2. Setup the Inspector
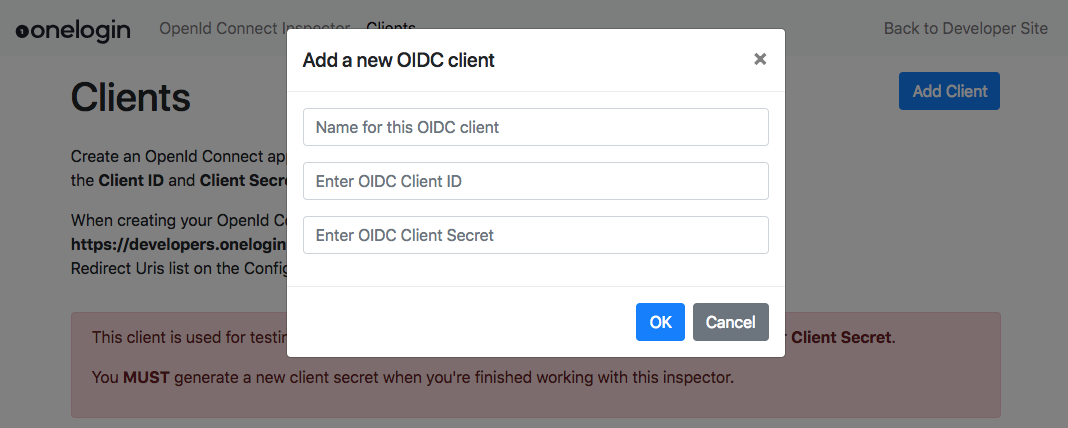
To use the Inspector the first thing you need to do is create a Client.
- To do this, click on the “Clients” menu item and then click “Add a Client”.
- Now enter the Client ID and Client Secret for the app you created in step 1.
You can add multiple client apps so it’s also helpful to give the client a name. This makes it easier to identify which one you are using when building requests.
Step 3. Make an authentication request
With the setup steps now complete you’re all set to build a request and start an authentication flow.
- Click on the “OpenId Connect Inspector” menu item to get started.
- Now select the Issuer region for your OneLogin account.
- You will see the Client that you just created is selected. If you have multiple clients, then select the one that you want to use.
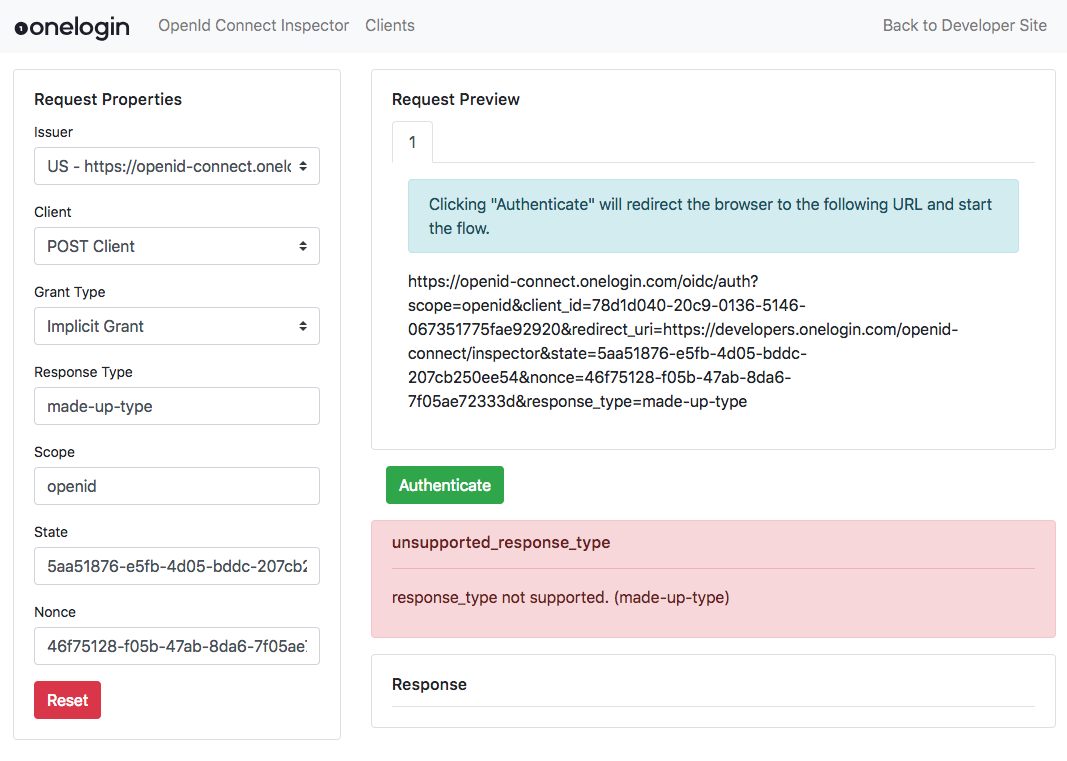
- When you select the Grant Type that you want to test you will notice that the URL in the Request Preview panel changes. This is the URL that will be used to start the flow.
- If testing the Authorization Code Grant, set the Token Authentication Method to match the setting of the same name in your OneLogin OIDC application.
Finally you can alter the Scope value to control the claims that are returned in the id_token. For example if you wanted to include all user profile information you would add the “profile” scope to the Scope field.
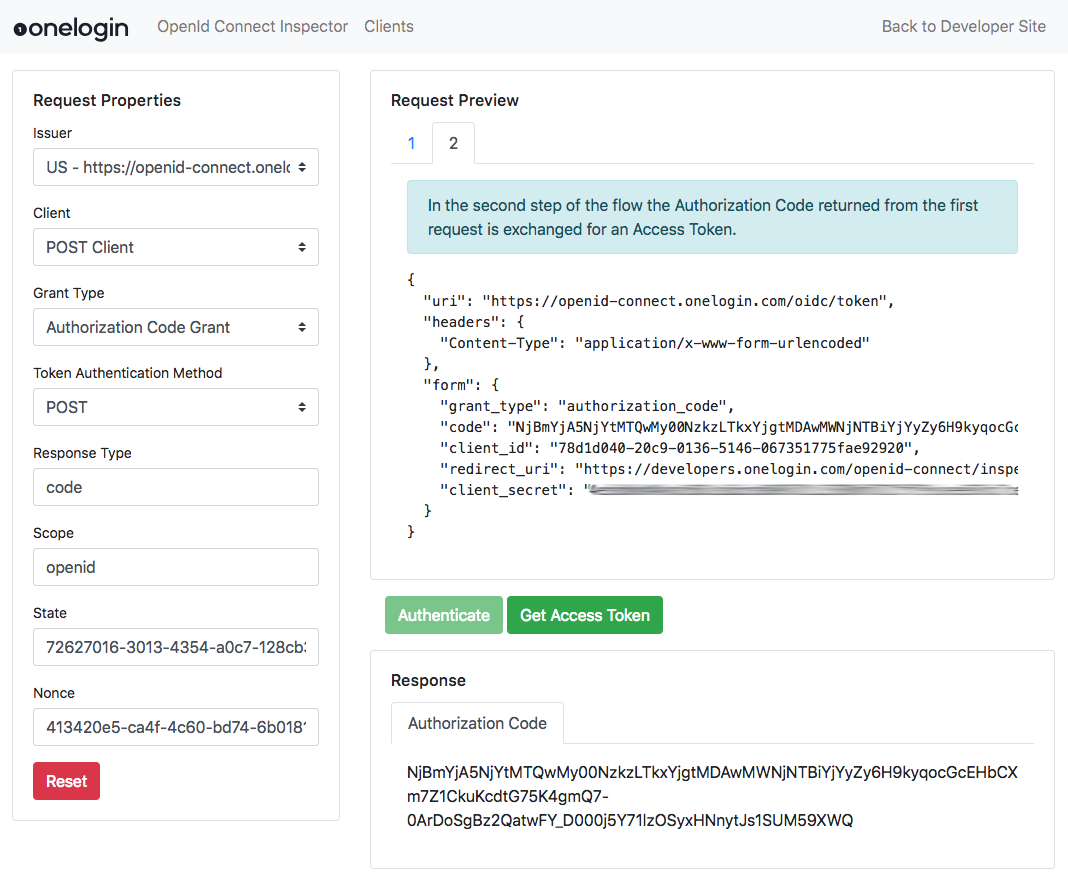
When you’re ready to start the flow, click the “Authenticate” button to redirect your browser to your OneLogin login page.
Once you have successfully authenticated you will be redirected back to the inspector and the id_token will be displayed in the Response section.
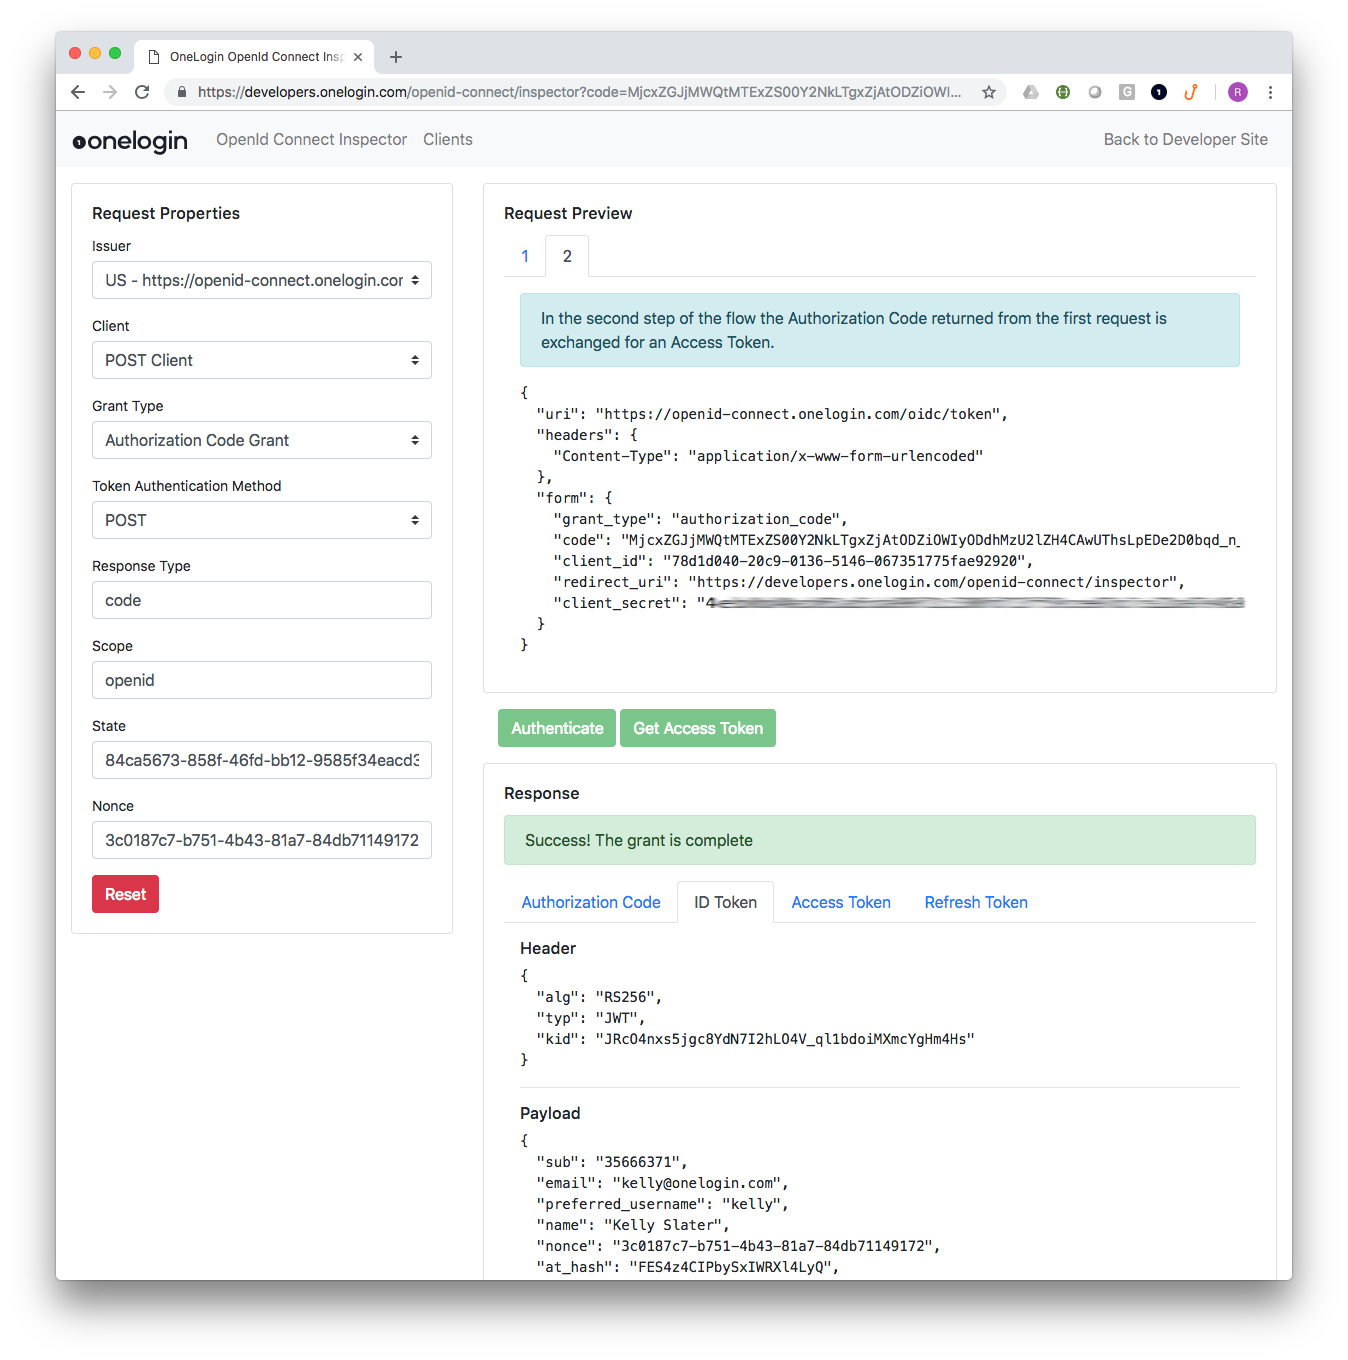
If you are testing the Authorization Code flow, an additional Request Preview tab will be displayed which shows you the content of the POST request that needs to be made to complete the second step in the flow. Clicking the “Get Access Token” button will trigger the request and if successful, the ID Token, Access Token, and Refresh Token will be displayed.
Lastly, if you submit invalid parameters or have other configuration errors they will be displayed too.
So there you have it. A simple tool for testing and inspecting your OpenId Connect flows. Enjoy!
Get started with your OneLogin Developer account.

Rich Chetwynd founded Litmos, the market-leading learning technology company, as well as ThisData, a data security company leading the way in Account Takeover (ATO) attack detection. After ThisData was acquired by OneLogin in Summer 2017, Rich began working with the OneLogin engineering team with a focus on adaptive authentication.