richard.chetwynd | October 18th, 2018
A smart feature of the AWS Application Load Balancer (ALB) is the ability to authenticate a user via OpenId Connect before proxying requests to application servers.
This is really useful if you don’t want to modify an application to add user authentication, but want to quickly restrict access, add multi-factor authentication, or enable single sign-on.
From start to finish, this should only take about 10-–15 minutes - or possibly even faster if you already have an application up and running.
Here’s everything you need to know.
Prerequisites
- AWS account
- OneLogin account
- Registered domain name for your application
Step 1: Create an application in AWS
If you already have an application in AWS, move to Step 2. If not, launch an EC2 instance and enable a web server on it:
- Go to the EC2 section of your AWS admin console.
- Click the Launch Instance button.
- Select an Amazon Linux AMI
- Configure instance details, VPC, security groups for SSH and HTTP, etc.
If you need more help configuring your instance, see Amazon’s documentation to launch an EC2 instance. Launch your instance. Turn SSH on, update the instance, and install Apache using the below code:
> sudo yum update -y
> sudo yum install -y httpd24 php56
> sudo service httpd start
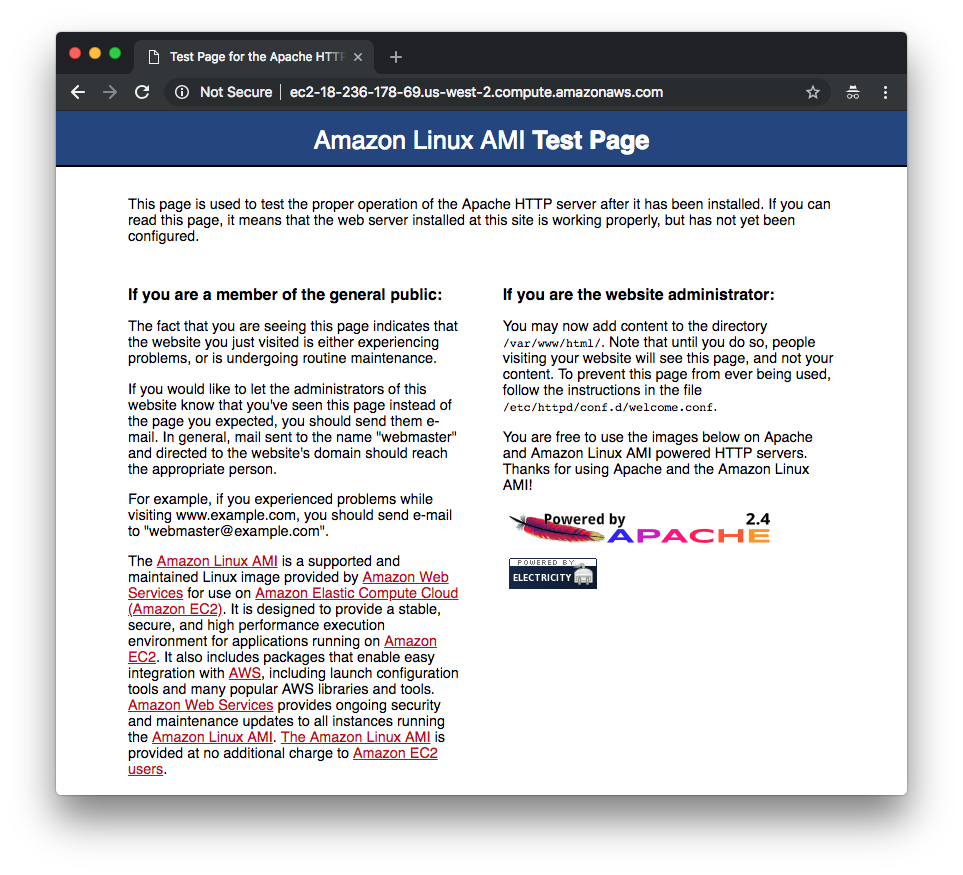
You can now visit the public DNS name for your EC2 instance and see the default Apache web server test page.
Step 2: Create an AWS application load balancer (ALB)
Next, create a load balancer that accepts HTTPS requests and forwards them to the EC2 instance.
Configure load balancer
- Go to Load Balancers
- Click Create Load Balancer
- Select Application Load Balancer
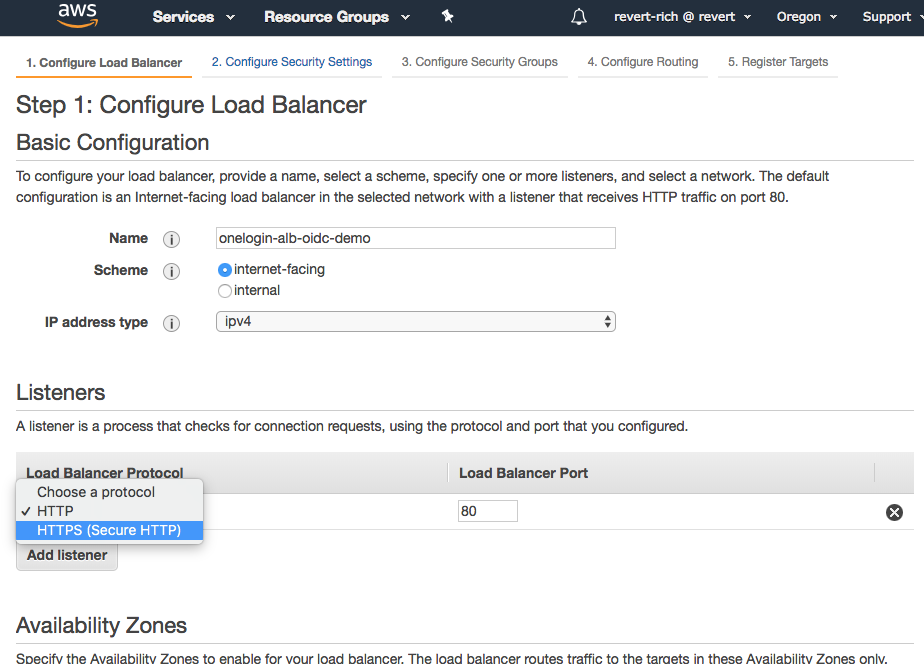
- Name your new load balancer and change the listener to HTTPS. Then, select the availability zones in which the EC2 instance resides.
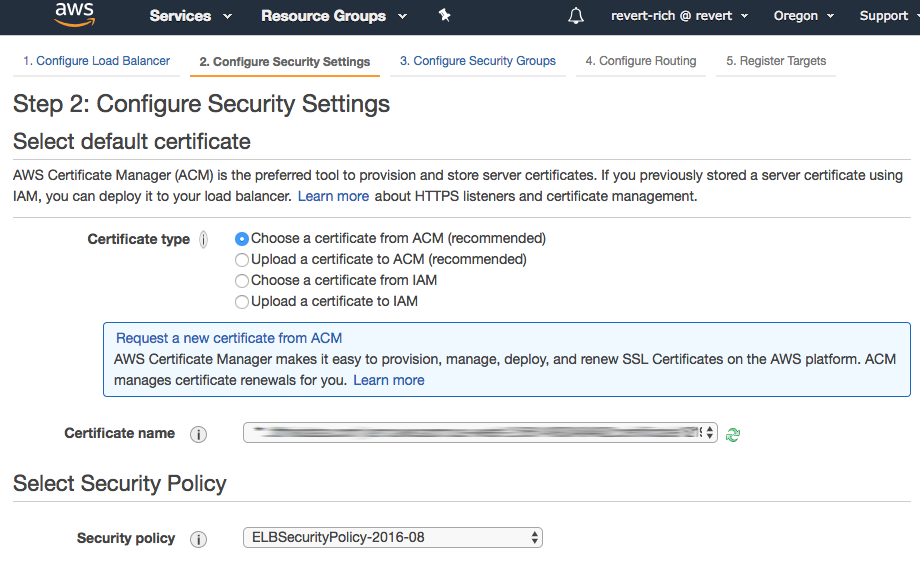
Select a certificate
Since we’re using HTTPS, select a certificate. Use an existing one or request a new one via AWS.
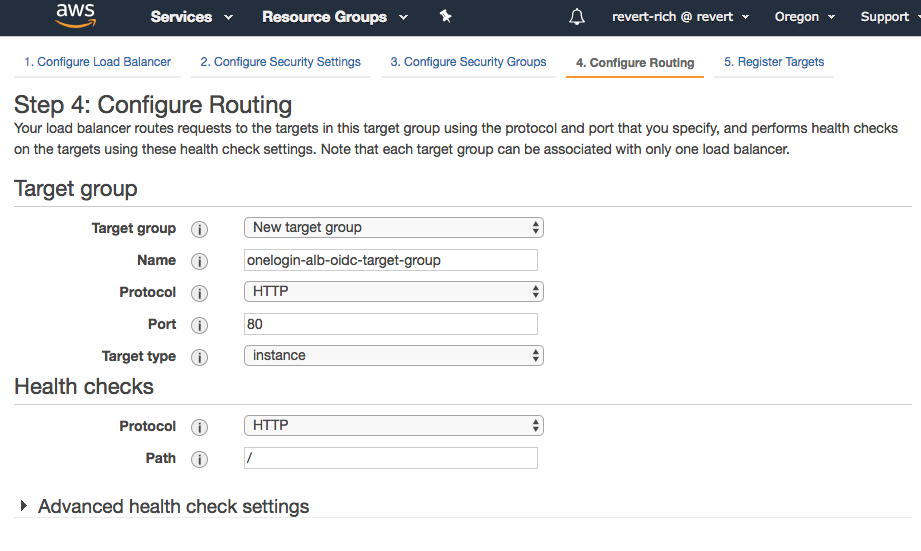
Create a target group
Next, create a target group to contain the EC2 instances that run the application. Name the group and keep the default settings (you may need to change the port number or other details depending on your instance configuration).
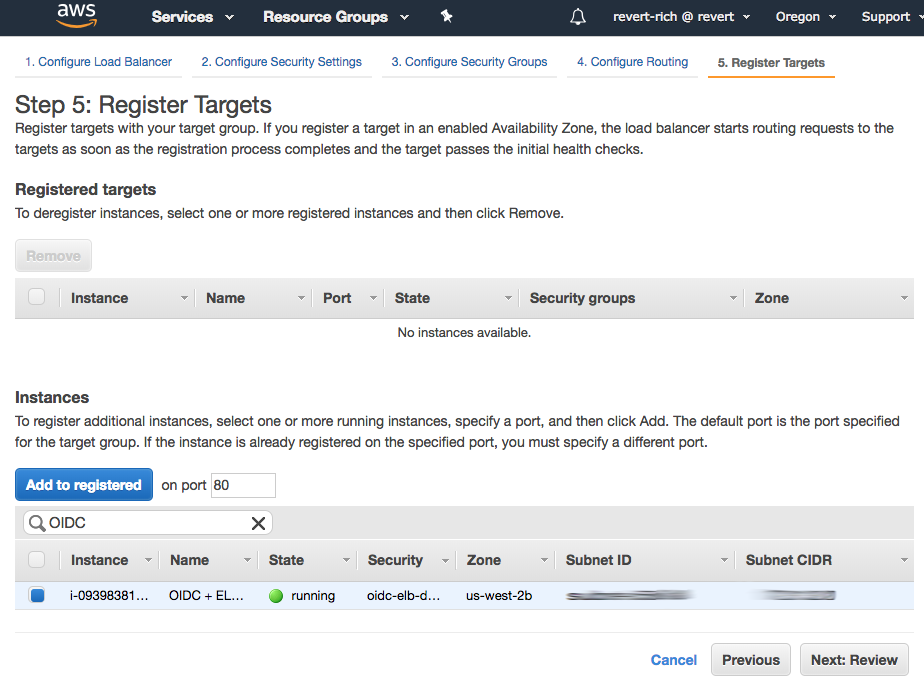
Register instances
Select the EC2 instances to include in the target group and click Add to registered.
Step 3: Setup a CNAME for the ALB
Once you have completed the ALB setup wizard, copy its public DNS record and map it to a CNAME in your DNS provider. The CNAME you choose should be on the same domain as the SSL certificate you specified during the ALB setup.
Step 4: Test
After waiting a few minutes for your DNS changes to propagate, enter your application’s CNAME address into a browser window to test. The browser should return the same Apache test page from Step 1.
Step 5: Create an OpenId Connect application in OneLogin
You now have an application running behind an ALB, so the next step is to add user authentication. To do this, create an application via the OneLogin admin portal.
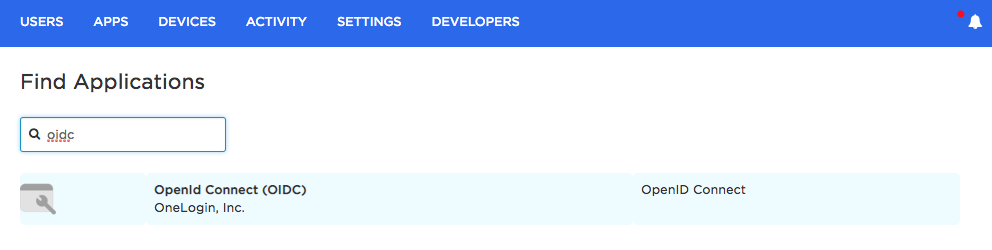
On the Apps tab, click Add App.

Search for OIDC and select the OpenId Connect (OIDC) app.
Give the app a name and click Save.

On the Configuration tab, enter the CNAME address that you created in Step 3. Then set the Redirect URI to the following:
https://

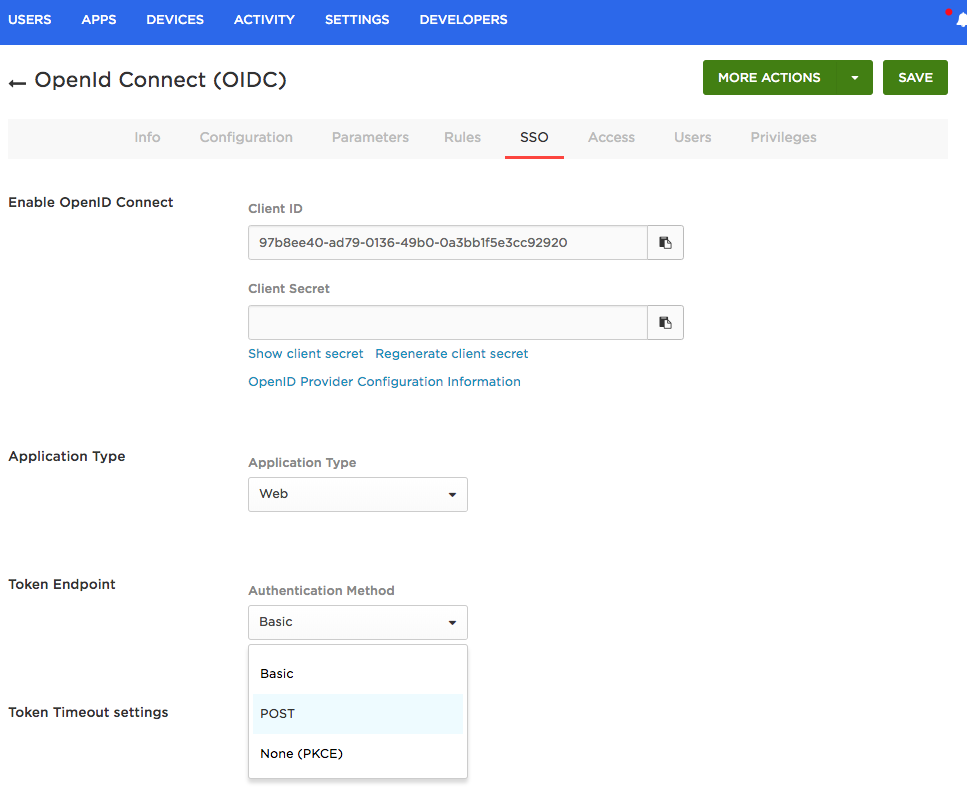
Now click Save and switch to the SSO tab.
Take note of the Client ID and Client Secret, as you will need to enter them into your ALB configuration during the next step.
Set the Token Endpoint Authentication Method to POST.
Click Save and assign the app to a OneLogin user for testing purposes.
Step 6: Configure authentication on AWS ALB
In the final step, add an authentication step to your ALB.
Go to the Listeners tab and select View/edit rules.
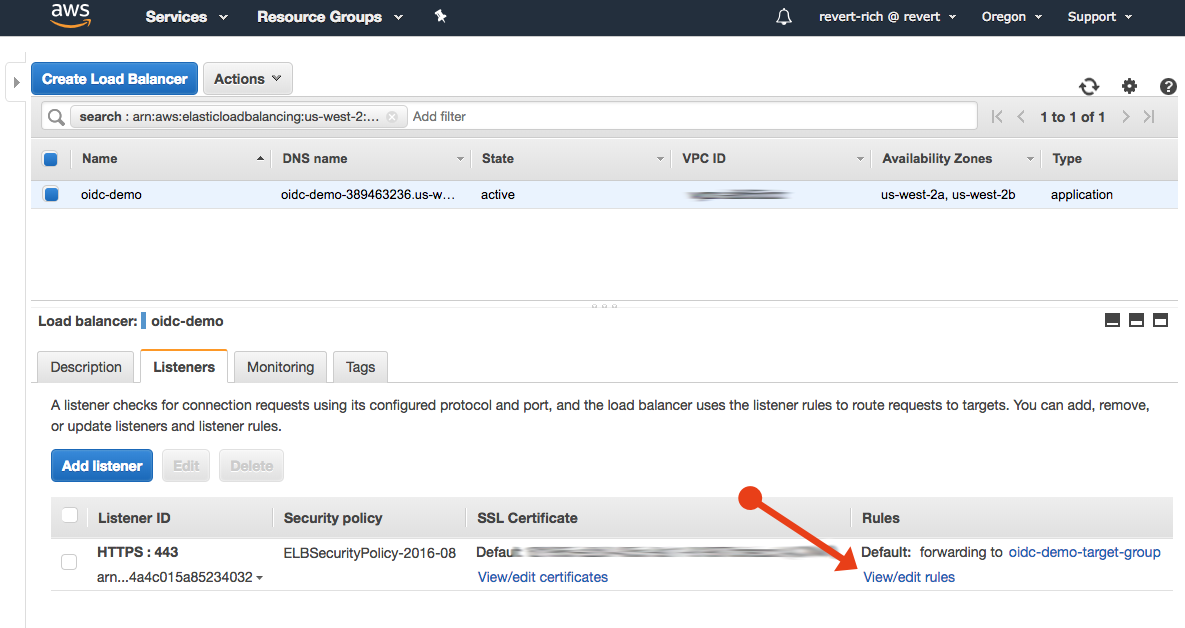
In the tab with the pencil icon, click the secondary pencil to edit the rule.
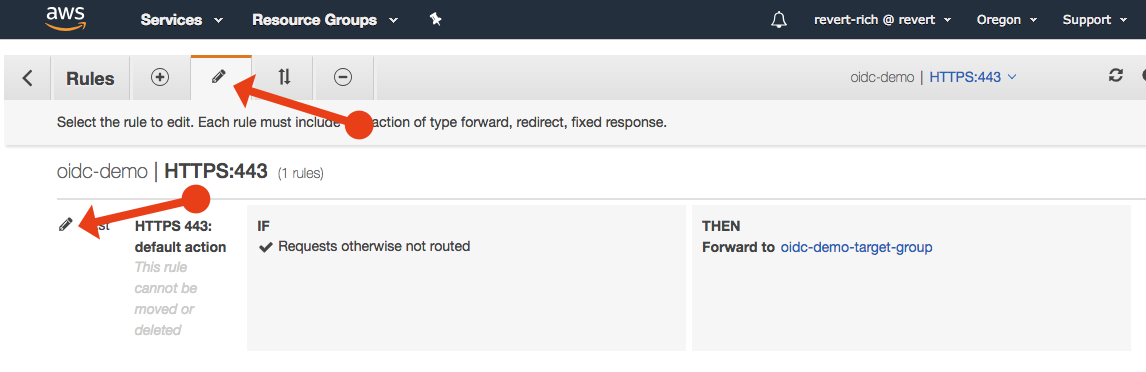
Click Add action and select Authenticate.
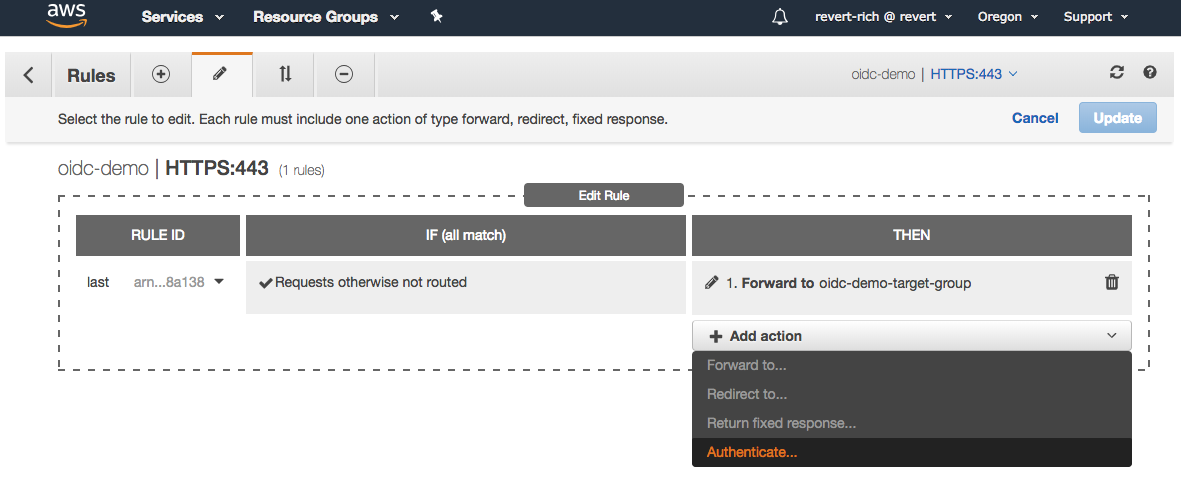
You will be given the choice of Amazon Cognito or OIDC. Select OIDC and enter the following values:
Issuer: https://{subdomain}.onelogin.com/oidc/2
Authorization endpoint: https://{subdomain}.onelogin.com/oidc/2/auth
Token endpoint: https://{subdomain}.onelogin.com/oidc/2/token
User info endpoint: https://{subdomain}.onelogin.com/oidc/2/me
Client ID: The Client ID for your OneLogin app.
Client Secret: The Client Secret for your OneLogin app.
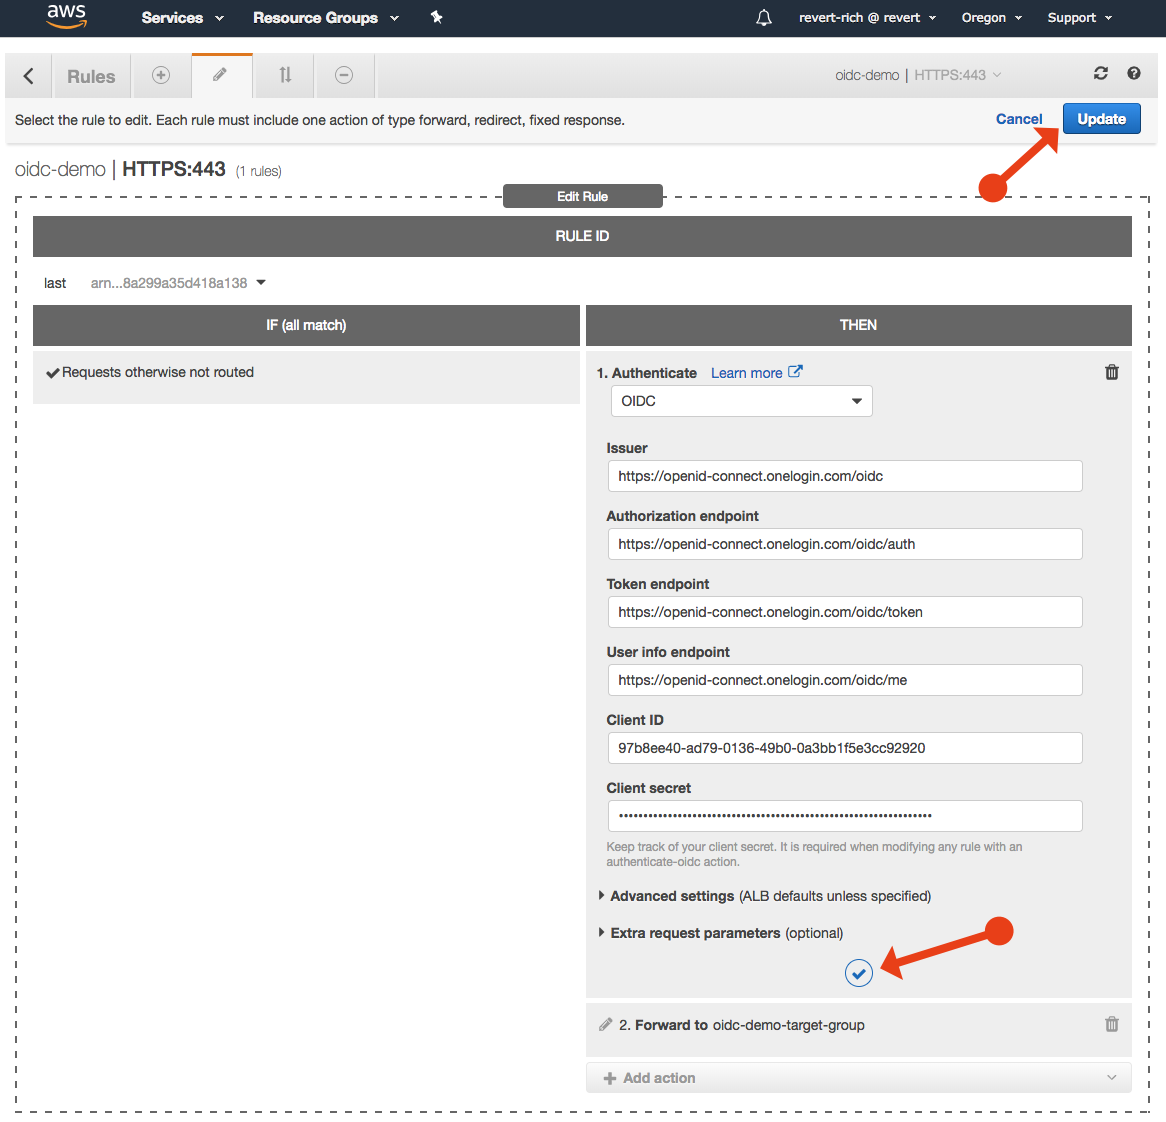
Click Update to save changes.
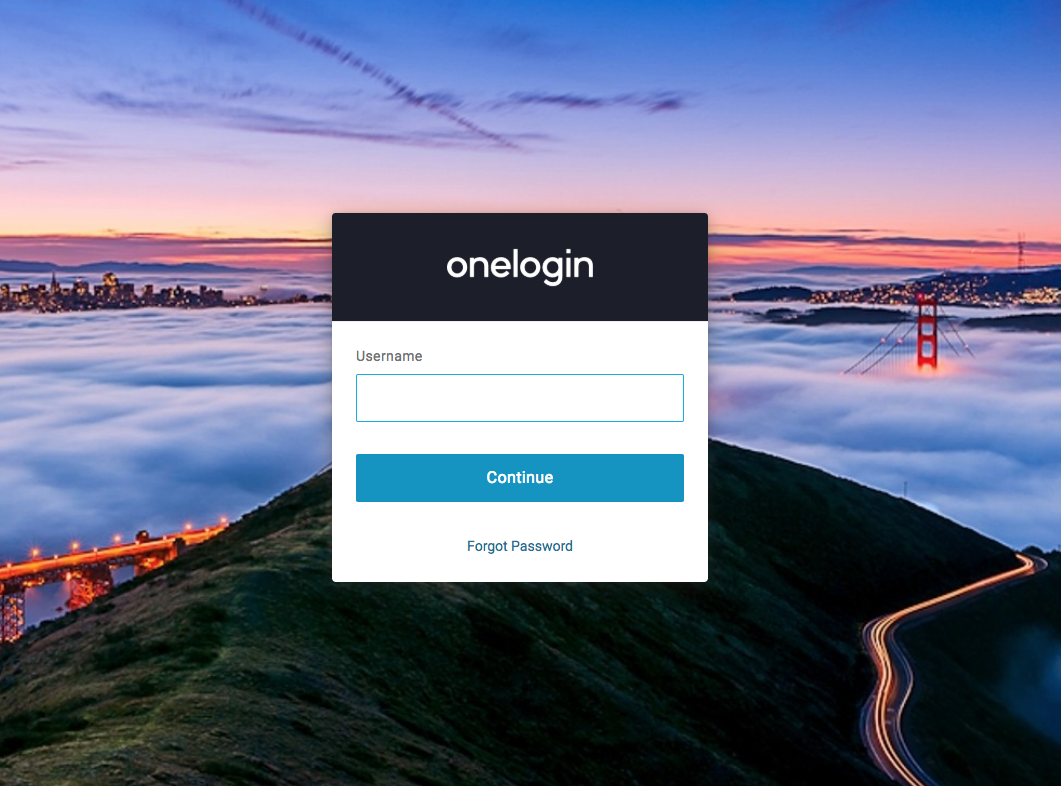
Step 7: Test your configuration
Confirm that your basic configuration is complete by going to the HTTPS address of your application.
Your browser will redirect to your OneLogin page where the user is prompted to authenticate.
After authenticating, the browser redirects back to your application and the Apache test page from Step 1 appears again.
Troubleshooting
- When testing, it’s best to clear browser cache or use incognito mode to ensure no other sessions are active.
- If you aren’t redirected to a login page when you visit your website, check your ALB setting and confirm the authorization endpoint was saved.
- If you see the login page, but then get redirected back to an error page, inspect the address bar of the browser to find out what the error was. For example, 401 Authorization Required usually indicates that the user that you authenticated does not have your OIDC app assigned to them via OneLogin.
Advanced configuration
Once you have the basics up and running, add additional scopes to the OIDC configuration rule in your ALB. By adding the “profile” scope, you will get the full details of the authenticated user forwarded by the ALB and set as “x-amzn-oidc-…” headers that your application can consume.
You can also change the ALB listener rules to only add authentication to certain parts of your site or application. In this example we used the default rule for all routes but you can easily configure it to just authenticate users on the “/admin” section.
Get started
Don’t have a dev account yet? Sign up for a free OneLogin developer account and start protecting your AWS applications today.

Rich Chetwynd founded Litmos, the market-leading learning technology company, as well as ThisData, a data security company leading the way in Account Takeover (ATO) attack detection. After ThisData was acquired by OneLogin in Summer 2017, Rich began working with the OneLogin engineering team with a focus on adaptive authentication.