dominick.caponi | February 11th, 2021
Securely exchange authentication information between your single page app (SPA) and your Identity Provider (IdP)
In 2021, it should come as no surprise that there are way better, more scalable ways to authenticate your users beyond a simple username and password check, especially if your SPA is a front for a sizable number of microservices and APIs. A common go-to for authentication is the OAuth specification which is a tremendous resource for all things Open Authorization.
This explainer aims to simplify the complexities in the Proof Key for Code Exchange (PKCE) scheme as if you were to go out and implement it on your own. I noticed a lot of information on this exists, but I felt that none of it really gave any concrete examples of what to do as a React developer in the trenches, and I hope this serves as a good jumping off point for your own implementation. Of course, the easy thing to do would be to use a battle-tested client library like AppAuth, but this article goes a little more in depth about how a client like that achieves the PKCE flow and is hopefully more satisfying than plugging in your IdP configuration parameters and watching magic.
Which Flow is Right for My App
If you’re someone who doesn’t typically focus on authentication, all the information and drawings and overviews from Identity Provider companies, the IETF and others can seem a bit overwhelming. Here’s what you need to know.
For SPAs, the go-to flow has typically been the Implicit flow since SPAs don’t have a secure spot to stash the client_secret, and Implicit flow does not require you to use a client_secret. If you wanted to use Auth Code, you’d need some intermediary backend server that would hold onto the client_secret and act as a go-between for your SPA and the IdP.
Implicit flow works by having your app build a URL that users click to navigate to your IdP’s login page to authenticate. Once authentication and authorization are complete, the access_token is returned in the query params of the redirect url.
That means it’s possible for your access_tokens, which are equivalent to username & password, are stored in your browser’s history. You can try using a 2-step flow, but you’ll want a way to ensure that the client making requests to the IdP with the response code from the first step is the same client making the second step request. Hence Implicit flow is no longer considered a best practice for OAuth with SPAs, so PKCE is now the recommended method.
Enter PKCE or “Pixy”
PKCE was originally developed for mobile apps to prevent malicious background code from intercepting the returned code in an Auth Code flow.

In order to close the Code Interception Attack loophole, the idea is to make a temporary “client_secret” called a code_challenge so subsequent requests from the SPA can be validated by the AuthZ server to ensure they come from your SPA and not from some other app that intercepted the auth code.
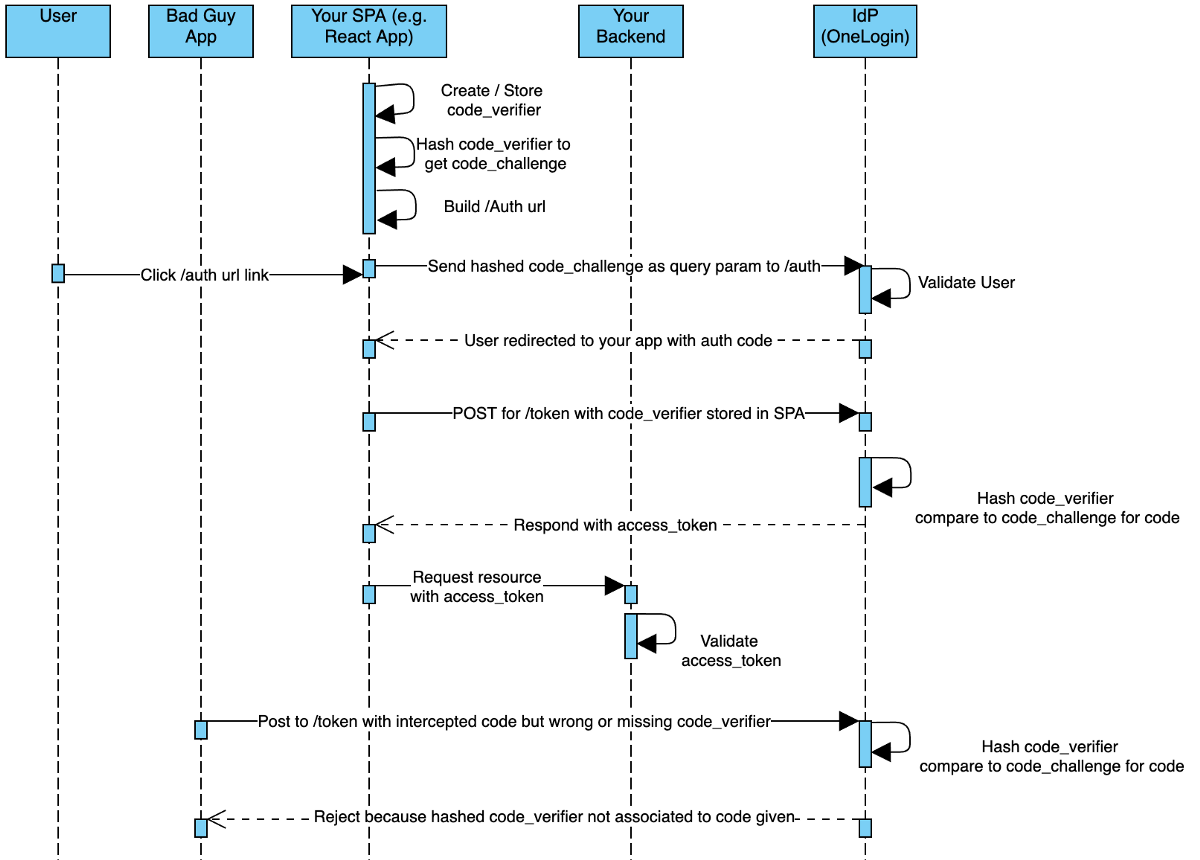
So what exactly happens to make each step work? In Authorization, your app will need to provide users with a link to the IdP’s /authorize endpoint with the information outlined here as part of the query string. For example, your app builds this link and might add it as an href to a button or <a> tag:
https://my_company.onelogin.com/oidc/2/auth?client_id=123&redirect_uri=my_company.com/login&response_type=code&scope=openid&code_verifier=sha-256-hashed&code_challenge_method=S256
For this to work, we have to build out the following parts: the code_verifier, which gets stored in localStorage or somewhere that survives a redirect of the browser, the code_challenge, which is the hashed version of the code_verifier, and the auth URL where we put all that information together.
The code_verifier
const createCodeVerifier = ( size ) => {
  const charset = 'ABCDEFGHIJKLMNOPQRSTUVWXYZabcdefghijklmnopqrstuvwxyz0123456789-_.~';
  const charsetIndexBuffer = new Uint8Array( size );

  for ( let i = 0; i < size; i += 1 ) {
    charsetIndexBuffer[i] = ( Math.random() * charset.length ) | 0;
  }

  let randomChars = [];
  for ( let i = 0; i < charsetIndexBuffer.byteLength; i += 1 ) {
    let index = charsetIndexBuffer[i] % charset.length;
    randomChars.push( charset[index] );
  }

  return randomChars.join( '' );
}
The code verifier according to the spec must be a cryptographically random string using the characters A-Z, a-z, 0–9, and the punctuation characters -._~ (hyphen, period, underscore, and tilde), between 43 and 128 characters long. This should be stored somewhere that will survive the app reloading (like localStorage or a cookie) so we can use it to send along in step 2 after we’re redirected back here.
The code_challenge
const createCodeChallenge = ( codeVerifier ) => {
  if ( typeof window !== 'undefined' && !!( window.crypto ) && !!( window.crypto.subtle ) ) {
    return new Promise( ( resolve, reject ) => {
      let codeVerifierCharCodes = textEncodeLite( codeVerifier );
      crypto.subtle
        .digest( 'SHA-256', codeVerifierCharCodes )
        .then(
          hashedCharCodes => resolve( urlSafe( new Uint8Array(hashedCharCodes) ) ),
          error => reject( error )
        );
    });
  }
}

const textEncodeLite = ( str ) => {
  const charCodeBuffer = new Uint8Array( str.length );
  for ( let i = 0; i < str.length; i++ ) {
   charCodeBuffer[i] = str.charCodeAt( i );
  }
  return charCodeBuffer;
}

const urlSafe = ( buffer ) => {
  const encoded = base64.fromByteArray( new Uint8Array( buffer ) );

  return encoded.replace( /\+/g, '-' ).replace( /\//g, '_' ).replace( /=/g, '' );
}
Next we’ll SHA-256 digest and encode our code_verifier. This code has some helper functions to convert our code_verifier into an array of char codes that the crypto library can work with. Then we base64 encode it so it’s something we can send over as a query string. Note, the crypto library may be supported by the browser. It worked for me on Chrome, but your mileage may vary there. The code_challenge is the thing that gets stored with the AuthZ server (in our case, OneLogin) and is used to ensure that any subsequent requests regarding this authorization code are coming from the same application. We’ll see in the /token request, that we send the code_verifier un-hashed back to the IdP and since the IdP knows to try SHA-256 hashing it, the IdP does just that and checks it against the code_challenge sent. This is the magic PKCE dust that defines this flow. All this becomes our authorization step. That is, you make a link that a user clicks to get taken to the IdP’s /auth page with all this information in the query string.
The auth URL
const PKCEAuthCodeFirstStep = () => {
  let oidcURL = `${process.env.OIDC_IDP_URL}/auth`;
  let queryParams = [`client_id=${process.env.OIDC_CLIENT_ID}`];
  let codeVerifier = createCodeVerifier( 50 );
  localStorage.setItem( 'code_verifier', codeVerifier );

  return createCodeChallenge( codeVerifier ).then( codeChallenge => {
    queryParams.push(`code_challenge=${codeChallenge}`);
    queryParams.push(`redirect_uri=http://localhost/login_oidc`);
    queryParams.push(`code_challenge_method=S256`);
    queryParams.push(`response_type=code`);
    queryParams.push(`scope=openid`);

    return `${oidcURL}?${queryParams.join("&")}`;
  } );
}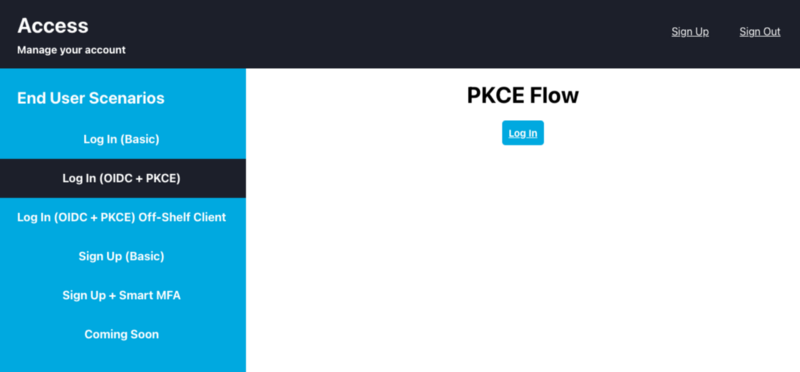
This step creates something I used as the href in an <a> tag that is that Log In button you see there. This is what the user clicks to get directed to their IdP for login. Also, notice I stash the code_verifier (the UN-HASHED string) in localStorage. Once they successfully authenticate there, they will get redirected back to your redirect_uri of choice (usually back here) with a query parameter ?code=123 .
The /token Request
const PKCEAuthCodeSecondStep = ( code ) => {
  let oidcURL = `${process.env.OIDC_IDP_URL}/token`;

  let params = qs.stringify( {
    grant_type: "authorization_code",
    redirect_uri: "http://localhost/login_oidc",
    client_id: process.env.OIDC_CLIENT_ID,
    code_verifier: localStorage.getItem( 'code_verifier' ),
    code
  } );

  localStorage.removeItem( 'code_verifier' );
  return axios.post( oidcURL, params,
    { headers: { 'Content-Type': 'application/x-www-form-urlencoded' } }
  ).then( res => {
    localStorage.setItem( 'access_token', res.data.access_token );
    return res.data
  } );
}
This last step takes the code we received from the IdP, combines it with the client_id and code_verifier (retrieved from localStorage), and sends a POST request to the IdP. Remember to send this data as x-www-form-urlencoded and use the qs library to stringify these parameters first to avoid any weird behavior. Once I get an access_token, I store that in localStorage to use for other requests that need authentication.
The Full Picture
One-Liner Setup
If you don’t feel like going through a UI-driven setup process, we’ve included this Terraform plan file for your convenience. If you’re a Terraform user, you can simply run terraform apply and you’ll have the user, app, and role configured.
The code below constitutes a full React module that can be dropped into a project (minus the custom components you see there) where you can start authenticating users through a React project. To get started, I recommend hitting up OneLogin for their easy-to-use OIDC integration.
You should get a developer account with all the features for this unlocked, including multi-factor auth, which is now possible if you authenticate your users with this flow.
OneLogin Account Setup
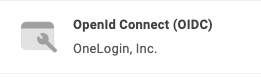
Create a new OIDC App
Then tell your IdP about your SPA redirect URIs in the App configuration screen. Doing this tells your IdP to allow cross origin traffic and redirect to only these URLs so you don’t run into any CORS issues.
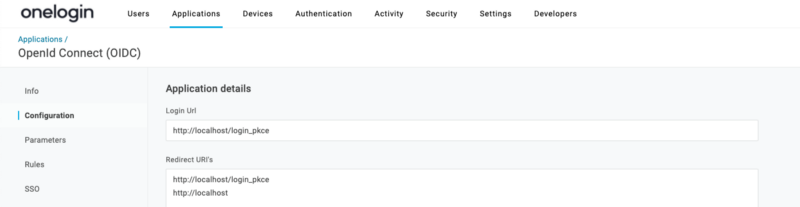
Enter http://localhost
Next, under the SSO tab, grab your client_id and save it to a .env file in your SPA project. If you’re following these code samples, you should save it like OIDC_CLIENT_ID=123 . While you’re in your .env file, you should also drop in your OIDC_IDP_URL like so OIDC_IDP_URL=
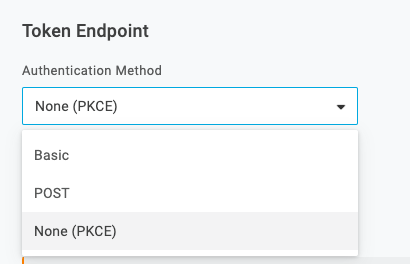
Once you added your redirect urls you’ll need to configure the app for the PKCE login flow by going to the SSO tab and selecting None (PKCE) from the Token Endpoint dropdown. This tells the IdP to expect a code_verifier instead of a client_secret when you POST to the /token endpoint.
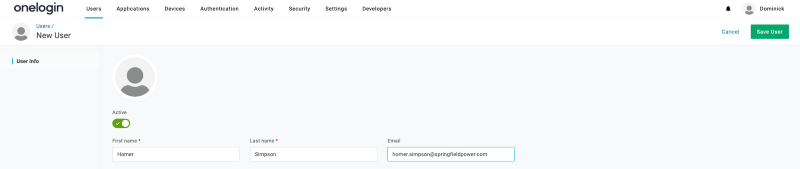
Then create a user and assign a username and password in OneLogin
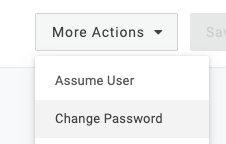
This option is available to you after you save the user
Then, create a role and add the user to that role.
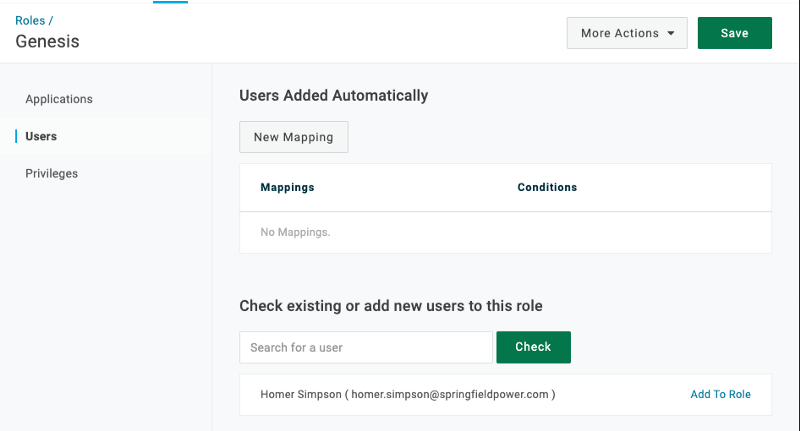
Click Add To Role and Save the role
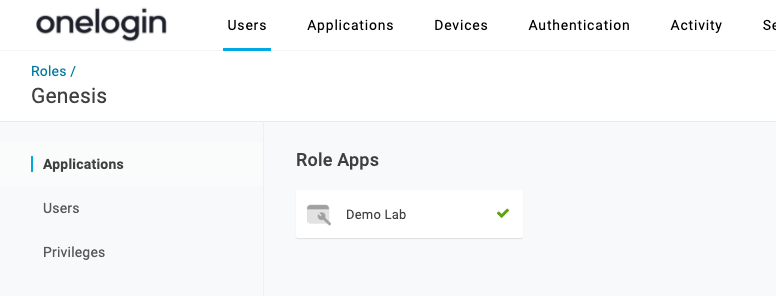
Finally, add your OIDC app to the role (I named mine Demo Lab and added it already).
Once you set up your React App and environment, you should be presented with a link to /auth. Click it, and you should see the OneLogin login page. Enter your credentials and you should be redirected back to your app, and a peek at the network tab should reveal a 200 for the /token request.
You can go a step further as well and ask for some basic user information (like a profile page) by hitting the /me endpoint of your IdP with the access_token you just got.
React Component Implementation
This gist represents a single react component for the white part of the screenshot here

where the full working code can be found at https://github.com/onelogin/onelogin-demo-lab. Feel free to use this component as inspiration for your login components or you can start the demo app and follow the instructions for recreating the example from this post.

Dominick is a Senior Software Engineer building a community around OneLogin’s open-source projects, heading up API development, and building cutting-edge developer tools that empower developers to make authentication and access managment easy.